28

 EN
EN


 MANUAL
 SHOOTING


 (cont.)


Manual Focusing
In contrast to auto focusing, where the camera automatically focuses on the subject, manual focusing can be used when you want to intentionally change the point of focus in an image.
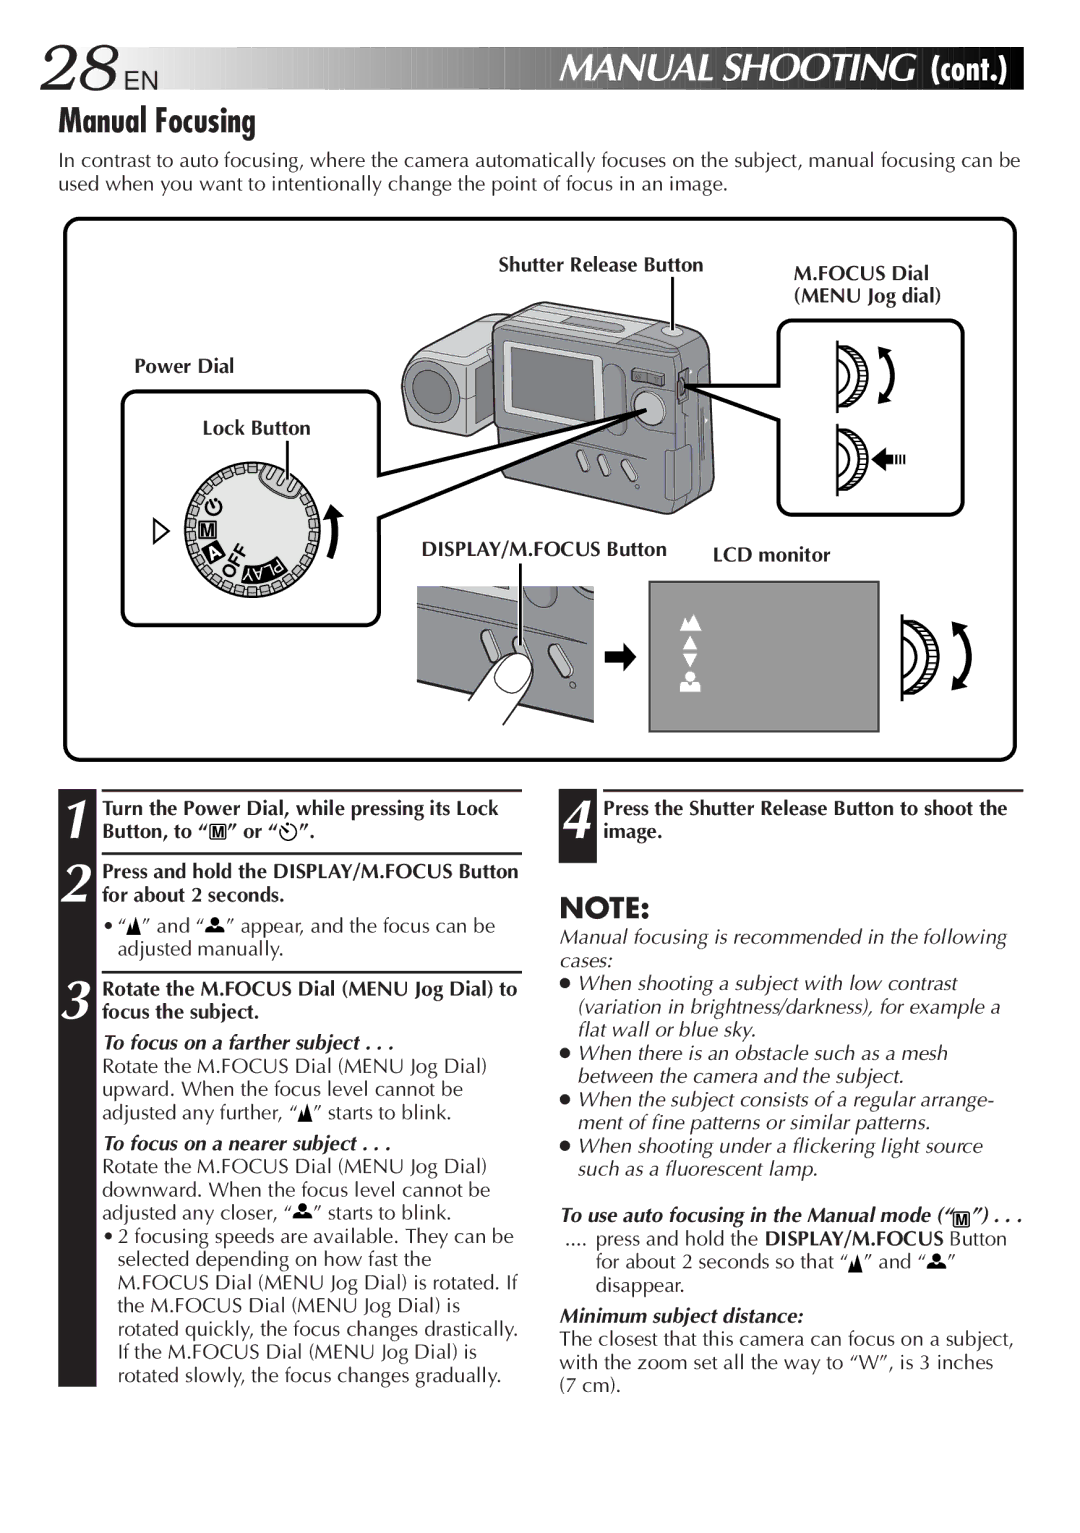
Shutter Release Button | M.FOCUS Dial | |||||
|
| (MENU Jog dial) | ||||
|
|
|
|
|
|
|
|
|
|
|
|
|
|
Power Dial
Lock Button
![]()
![]() OFF
OFF
| P |
L | |
YA |
|
DISPLAY/M.FOCUS Button | LCD monitor |
Turn the Power Dial, while pressing its Lock | ||
1 Button, to “ | M | ” or “ ”. |
|
| |
2 Press and hold the DISPLAY/M.FOCUS Button for about 2 seconds.
•“![]() ” and “
” and “![]() ” appear, and the focus can be adjusted manually.
” appear, and the focus can be adjusted manually.
3 Rotate the M.FOCUS Dial (MENU Jog Dial) to focus the subject.
To focus on a farther subject . . .
Rotate the M.FOCUS Dial (MENU Jog Dial) upward. When the focus level cannot be adjusted any further, “![]() ” starts to blink.
” starts to blink.
To focus on a nearer subject . . .
Rotate the M.FOCUS Dial (MENU Jog Dial) downward. When the focus level cannot be adjusted any closer, “![]() ” starts to blink.
” starts to blink.
•2 focusing speeds are available. They can be selected depending on how fast the M.FOCUS Dial (MENU Jog Dial) is rotated. If the M.FOCUS Dial (MENU Jog Dial) is rotated quickly, the focus changes drastically. If the M.FOCUS Dial (MENU Jog Dial) is
rotated slowly, the focus changes gradually.
4 Press the Shutter Release Button to shoot the image.
NOTE:
Manual focusing is recommended in the following cases:
●When shooting a subject with low contrast (variation in brightness/darkness), for example a flat wall or blue sky.
●When there is an obstacle such as a mesh between the camera and the subject.
●When the subject consists of a regular arrange- ment of fine patterns or similar patterns.
●When shooting under a flickering light source such as a fluorescent lamp.
To use auto focusing in the Manual mode (“M ”) . . .
.... press and hold the DISPLAY/M.FOCUS Button
for about 2 seconds so that “![]() ” and “
” and “![]() ” disappear.
” disappear.
Minimum subject distance:
The closest that this camera can focus on a subject, with the zoom set all the way to “W”, is 3 inches (7 cm).