22![]()
![]()
![]() EN
EN![]()
![]()
![]()
![]()
![]()
![]()
![]()
![]()
![]()
![]()
![]()
![]()
![]()
![]()
![]()
![]()
![]()
![]()
![]()
![]()
![]()
![]()
![]()
![]()
![]()
![]()
![]()
![]()
![]()
![]()
![]()
![]()
![]()
![]()
![]()
![]()
![]()
![]()
![]()
![]()
![]()
![]()
![]()
![]()
![]()
![]()
![]()
![]()
![]()
![]()
![]()
![]()
![]()
![]()
![]()
![]()
![]()
BASIC OPERATION


 (cont.)


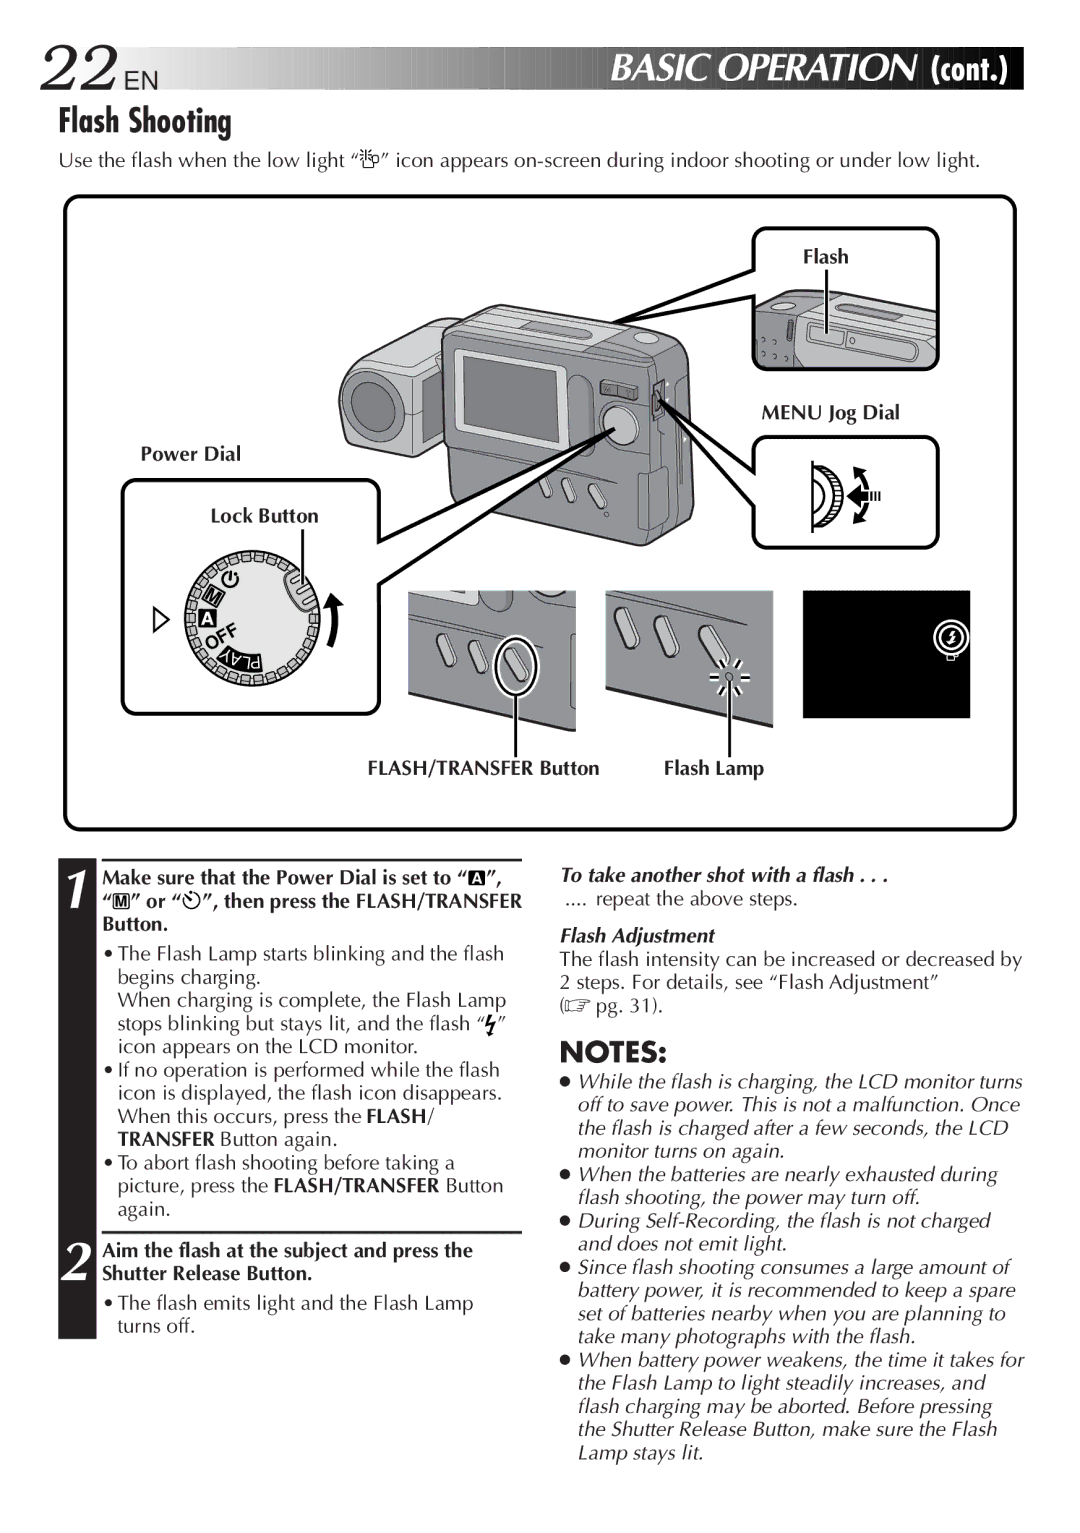
Flash Shooting
Use the flash when the low light “![]()
![]() ” icon appears
” icon appears
Flash
Power Dial
MENU Jog Dial
Lock Button
![]() OFF
OFF ![]() YA
YA
LP
FLASH/TRANSFER Button | Flash Lamp |
1
2
Make sure that the Power Dial is set to “ | A | ”, |
|
|
“M ” or “ ”, then press the FLASH/TRANSFER Button.
•The Flash Lamp starts blinking and the flash begins charging.
When charging is complete, the Flash Lamp
stops blinking but stays lit, and the flash “![]() ” icon appears on the LCD monitor.
” icon appears on the LCD monitor.
•If no operation is performed while the flash icon is displayed, the flash icon disappears. When this occurs, press the FLASH/ TRANSFER Button again.
•To abort flash shooting before taking a picture, press the FLASH/TRANSFER Button again.
Aim the flash at the subject and press the Shutter Release Button.
•The flash emits light and the Flash Lamp turns off.
To take another shot with a flash . . .
.... repeat the above steps.
Flash Adjustment
The flash intensity can be increased or decreased by 2 steps. For details, see “Flash Adjustment”
(☞ pg. 31).
NOTES:
●While the flash is charging, the LCD monitor turns off to save power. This is not a malfunction. Once the flash is charged after a few seconds, the LCD monitor turns on again.
●When the batteries are nearly exhausted during flash shooting, the power may turn off.
●During
●Since flash shooting consumes a large amount of battery power, it is recommended to keep a spare set of batteries nearby when you are planning to take many photographs with the flash.
●When battery power weakens, the time it takes for the Flash Lamp to light steadily increases, and flash charging may be aborted. Before pressing the Shutter Release Button, make sure the Flash Lamp stays lit.