CAMCORDER ATTACHMENT 


 EN 11
EN 11
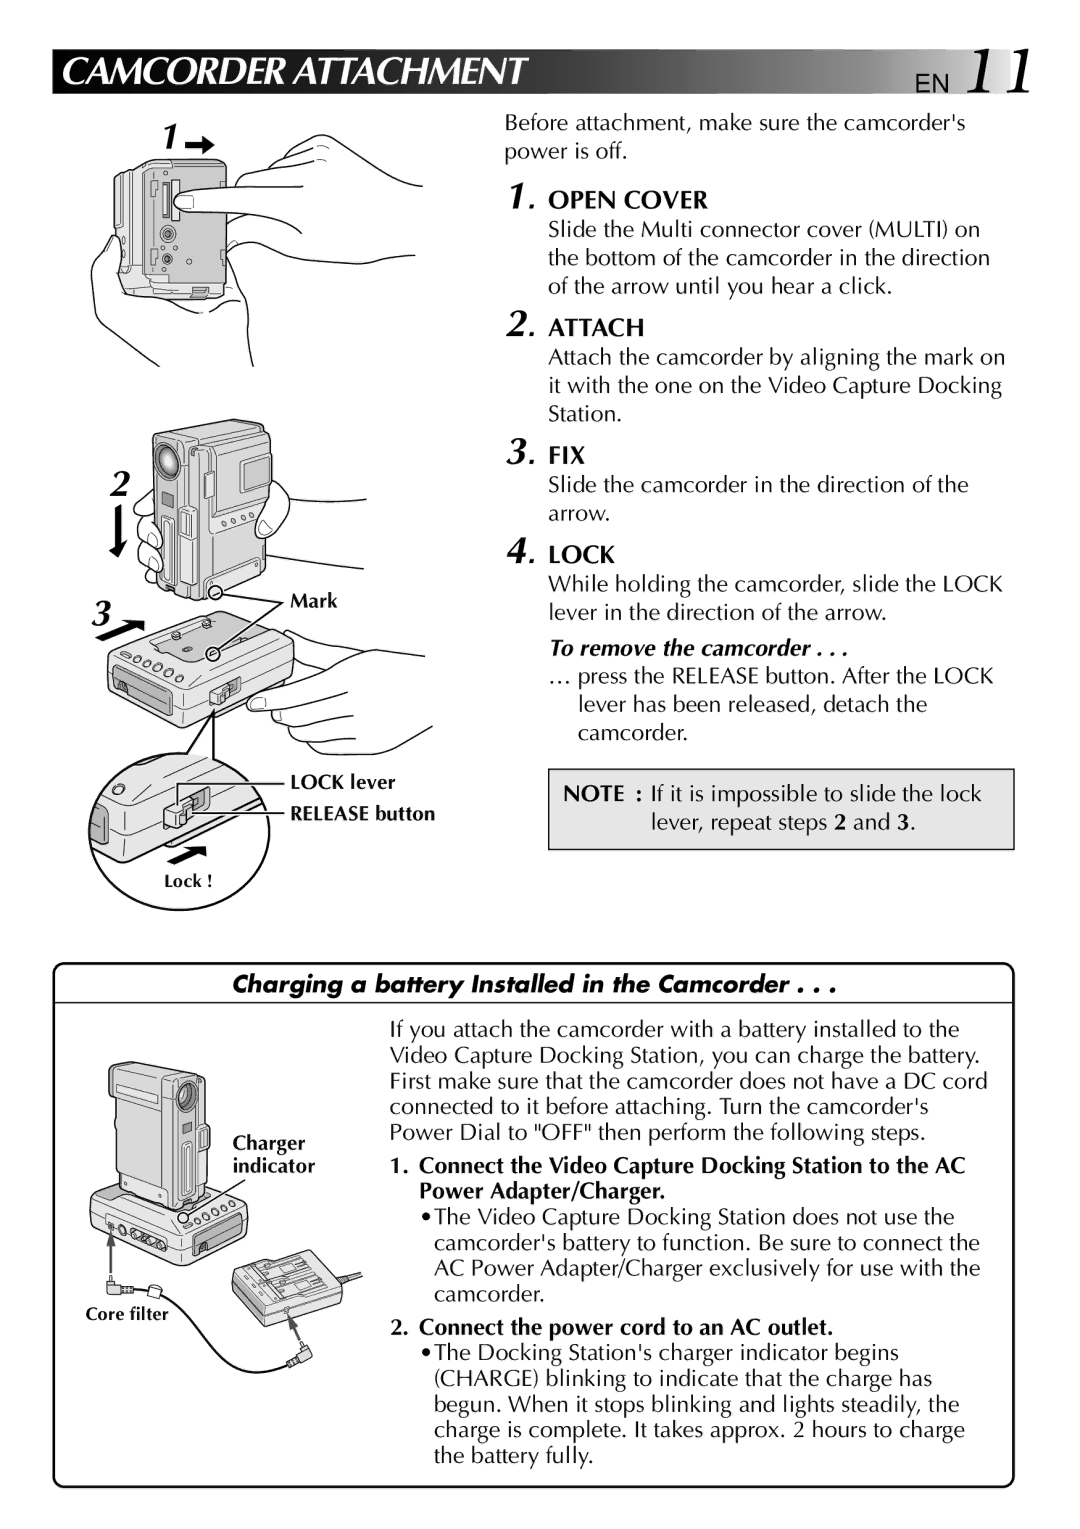
1 ![]()
2
3
Mark
LOCK lever RELEASE button
Before attachment, make sure the camcorder's power is off.
1. OPEN COVER
Slide the Multi connector cover (MULTI) on the bottom of the camcorder in the direction of the arrow until you hear a click.
2. ATTACH
Attach the camcorder by aligning the mark on it with the one on the Video Capture Docking Station.
3. FIX
Slide the camcorder in the direction of the arrow.
4. LOCK
While holding the camcorder, slide the LOCK lever in the direction of the arrow.
To remove the camcorder . . .
…press the RELEASE button. After the LOCK lever has been released, detach the camcorder.
NOTE : If it is impossible to slide the lock lever, repeat steps 2 and 3.
Lock !
Charging a battery Installed in the Camcorder . . .
Charger indicator
Core filter
If you attach the camcorder with a battery installed to the Video Capture Docking Station, you can charge the battery. First make sure that the camcorder does not have a DC cord connected to it before attaching. Turn the camcorder's Power Dial to "OFF" then perform the following steps.
1.Connect the Video Capture Docking Station to the AC Power Adapter/Charger.
•The Video Capture Docking Station does not use the camcorder's battery to function. Be sure to connect the AC Power Adapter/Charger exclusively for use with the camcorder.
2.Connect the power cord to an AC outlet.
•The Docking Station's charger indicator begins (CHARGE) blinking to indicate that the charge has begun. When it stops blinking and lights steadily, the charge is complete. It takes approx. 2 hours to charge the battery fully.