Chapter 5: Subsystem Maintenance and Upgrading
5.3.3 DIMM Module Installation
![]() WARNING!
WARNING!
The
![]() Step 1. Prepare an
Step 1. Prepare an
![]() Step 2. Remove the BBU module, if installed. Carefully place the module for it contains
Step 2. Remove the BBU module, if installed. Carefully place the module for it contains
![]() Step 3. Remove the controller module. See Section 0.
Step 3. Remove the controller module. See Section 0.
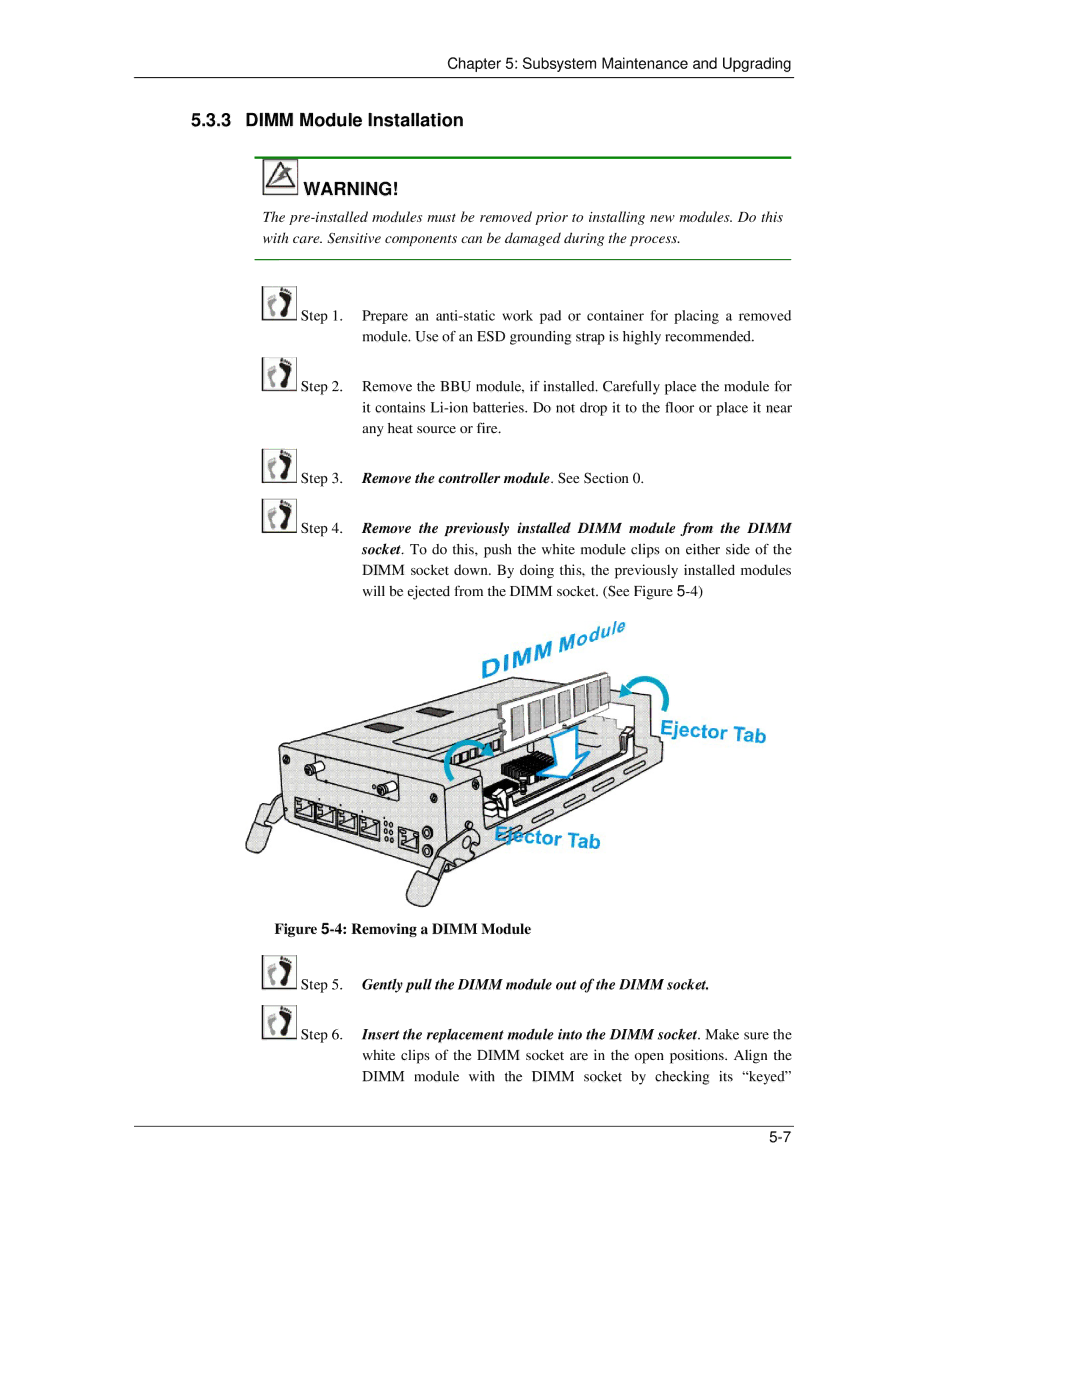
![]() Step 4. Remove the previously installed DIMM module from the DIMM socket. To do this, push the white module clips on either side of the DIMM socket down. By doing this, the previously installed modules will be ejected from the DIMM socket. (See Figure
Step 4. Remove the previously installed DIMM module from the DIMM socket. To do this, push the white module clips on either side of the DIMM socket down. By doing this, the previously installed modules will be ejected from the DIMM socket. (See Figure
Figure 5-4: Removing a DIMM Module
![]() Step 5. Gently pull the DIMM module out of the DIMM socket.
Step 5. Gently pull the DIMM module out of the DIMM socket.
![]() Step 6. Insert the replacement module into the DIMM socket. Make sure the white clips of the DIMM socket are in the open positions. Align the DIMM module with the DIMM socket by checking its “keyed”
Step 6. Insert the replacement module into the DIMM socket. Make sure the white clips of the DIMM socket are in the open positions. Align the DIMM module with the DIMM socket by checking its “keyed”