Chapter 5: Subsystem Maintenance and Upgrading
![]() Step 3. Keep a replacement on hand: If a hard drive has failed, make sure you have a replacement drive readily available before removing the failed drive from the subsystem. Do not leave the drive tray slot open for an extended period of time or the normalized airflow will be disrupted and subsystem components will overheat and may become permanently damaged.
Step 3. Keep a replacement on hand: If a hard drive has failed, make sure you have a replacement drive readily available before removing the failed drive from the subsystem. Do not leave the drive tray slot open for an extended period of time or the normalized airflow will be disrupted and subsystem components will overheat and may become permanently damaged.
5.7.2 Replacing a Hard Drive
To replace a hard drive, please follow these steps:
![]() WARNING!
WARNING!
Hard drives are fragile; therefore, always handle them with extreme care.
Do not drop the hard drive.
Always be slow, gentle, and careful when handling a hard drive.
Handle a hard drive only by the edges of its metal cover, and avoid touching its circuits part and interface connectors.
![]() Step 1. Identify the location of the drive tray that contains a hard drive indicated as faulty. You may use firmware utility or RAIDWatch software to locate a faulty drive. The drive tray LED should also light red.
Step 1. Identify the location of the drive tray that contains a hard drive indicated as faulty. You may use firmware utility or RAIDWatch software to locate a faulty drive. The drive tray LED should also light red.
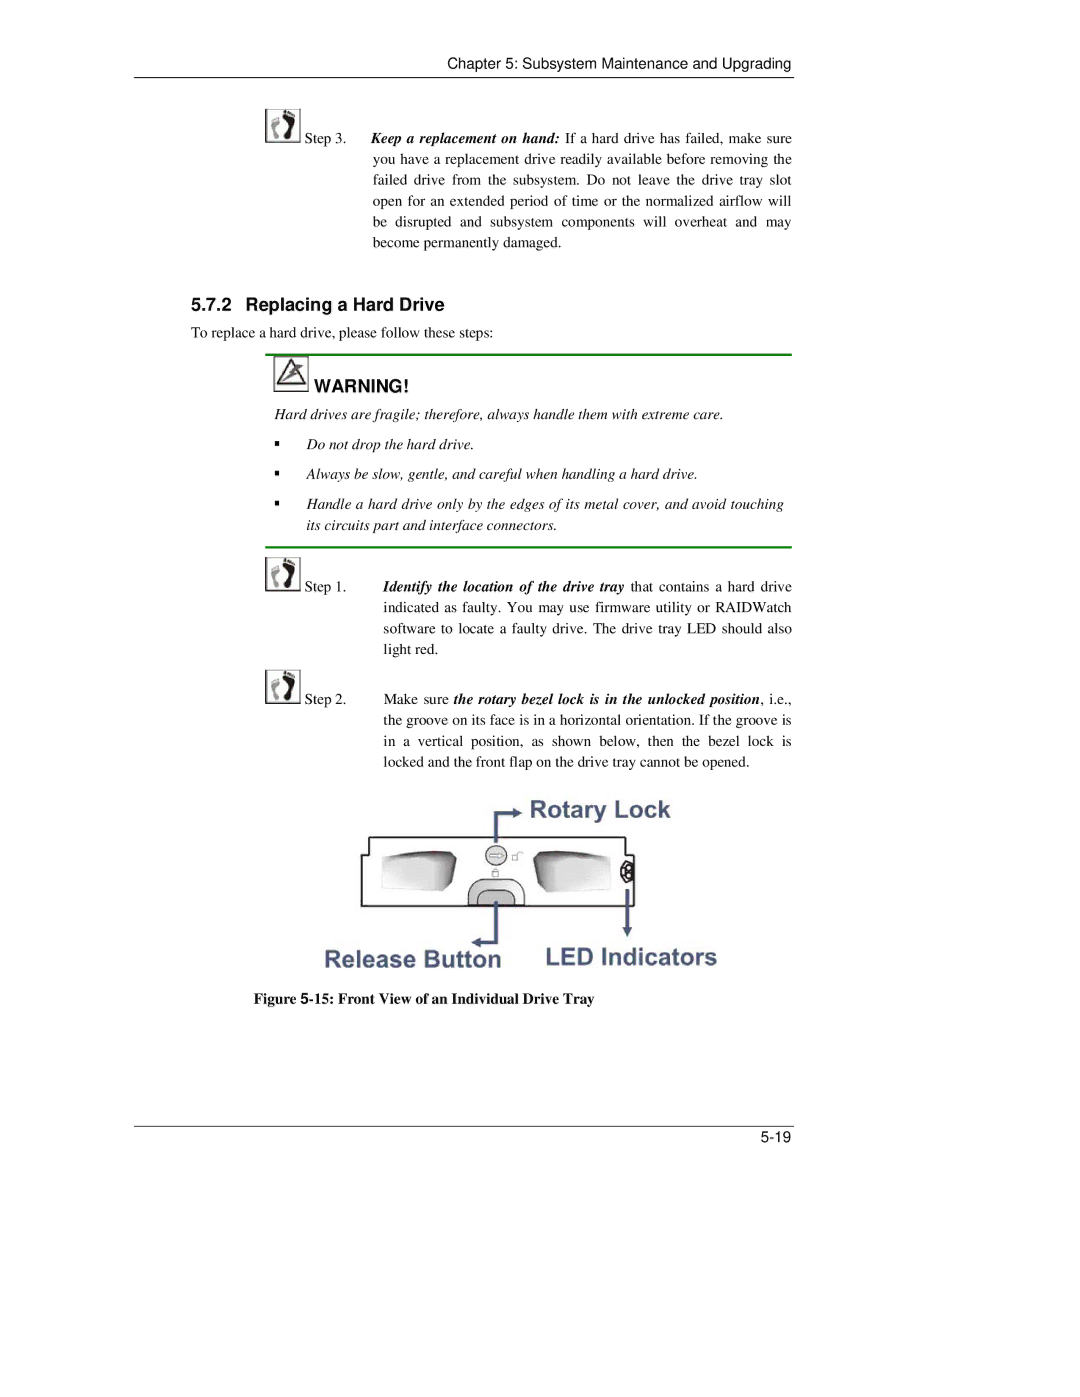
![]() Step 2. Make sure the rotary bezel lock is in the unlocked position, i.e., the groove on its face is in a horizontal orientation. If the groove is in a vertical position, as shown below, then the bezel lock is locked and the front flap on the drive tray cannot be opened.
Step 2. Make sure the rotary bezel lock is in the unlocked position, i.e., the groove on its face is in a horizontal orientation. If the groove is in a vertical position, as shown below, then the bezel lock is locked and the front flap on the drive tray cannot be opened.