3-Administering the MaxNAS
2.3.4 Access Control Lists |
|
| ||||||||||
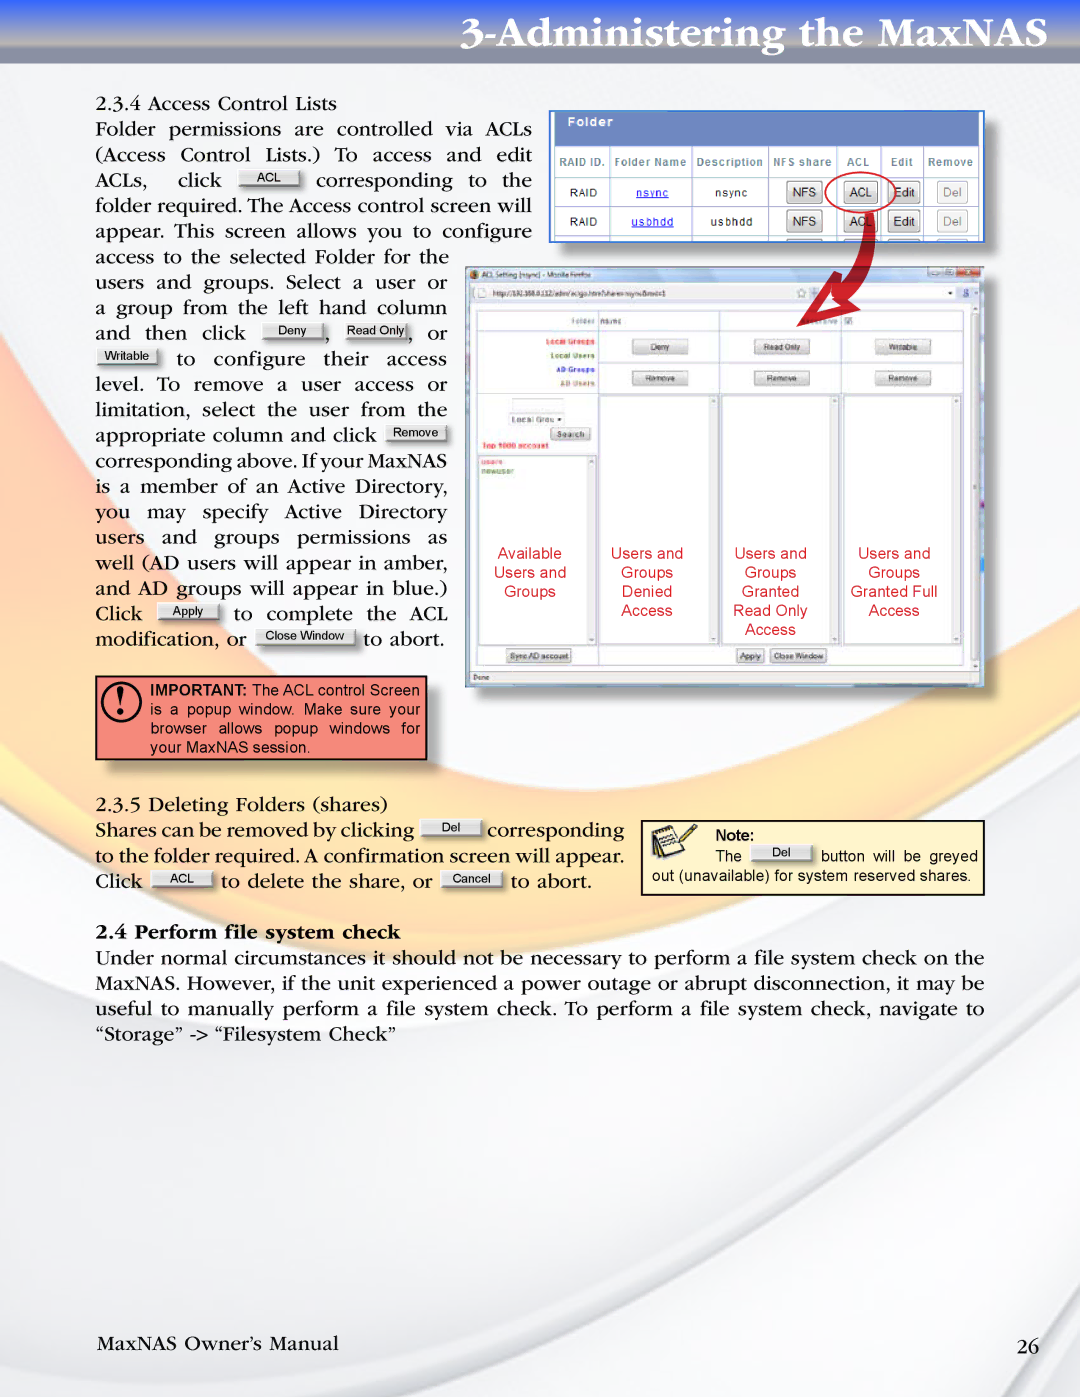
Folder permissions are controlled via ACLs |
| |||||||||||
(Access Control Lists.) To access and edit |
| |||||||||||
ACLs, | click |
| ACL | corresponding to | the |
| ||||||
folder required. | The Access control screen will |
| ||||||||||
appear. This screen allows you to configure |
| |||||||||||
access to the selected Folder for the |
|
| ||||||||||
users and groups. Select a user or |
|
| ||||||||||
a group from the left hand column |
|
| ||||||||||
and then click | Deny | , |
| Read Only , | or |
|
| |||||
Writable |
|
|
|
|
|
|
|
|
|
|
| |
to configure | their access |
|
| |||||||||
level. To remove a user access or |
|
| ||||||||||
limitation, select the user from the |
|
| ||||||||||
appropriate column and click | Remove |
|
|
| ||||||||
corresponding above. If your | MaxNAS |
|
|
| ||||||||
is a member of an Active Directory, |
|
| ||||||||||
you may specify Active Directory |
|
| ||||||||||
users and groups permissions as | Available | |||||||||||
well (AD users will appear in amber, | ||||||||||||
Users and | ||||||||||||
and AD groups will appear in blue.) | ||||||||||||
Groups | ||||||||||||
Click Apply to complete the ACL modification, or Close Window to abort.
Users and | Users and | Users and |
Groups | Groups | Groups |
Denied | Granted | Granted Full |
Access | Read Only | Access |
| Access |
|
!IMPORTANT: The ACL control Screen is a popup window. Make sure your browser allows popup windows for your MaxNAS session.
2.3.5 Deleting Folders (shares)
Shares can be removed by clicking Del corresponding to the folder required. A confirmation screen will appear. Click ACL to delete the share, or Cancel to abort.
Note:
The Del button will be greyed out (unavailable) for system reserved shares.
2.4 Perform file system check
Under normal circumstances it should not be necessary to perform a file system check on the MaxNAS. However, if the unit experienced a power outage or abrupt disconnection, it may be useful to manually perform a file system check. To perform a file system check, navigate to “Storage”
MaxNAS Owner’s Manual | 26 |