3-Administering the MaxNAS
2.7 nSync Backup Service
nSync is an FTP compatible synchronization method that allows backup and restoration of a share folder to another MaxNAS Target or any FTP server. When using nSync between two MaxNAS units, the synchronization also supports secure encryption. nSync can scheduled to run once, daily, weekly, or monthly. The available bandwidth for nSync tasks can be limited to reduce impact on network availability. The nSync configuration screen is accessible by selecting “nSync” from the Storage menu.
2.7.1 Create new nSync backup task
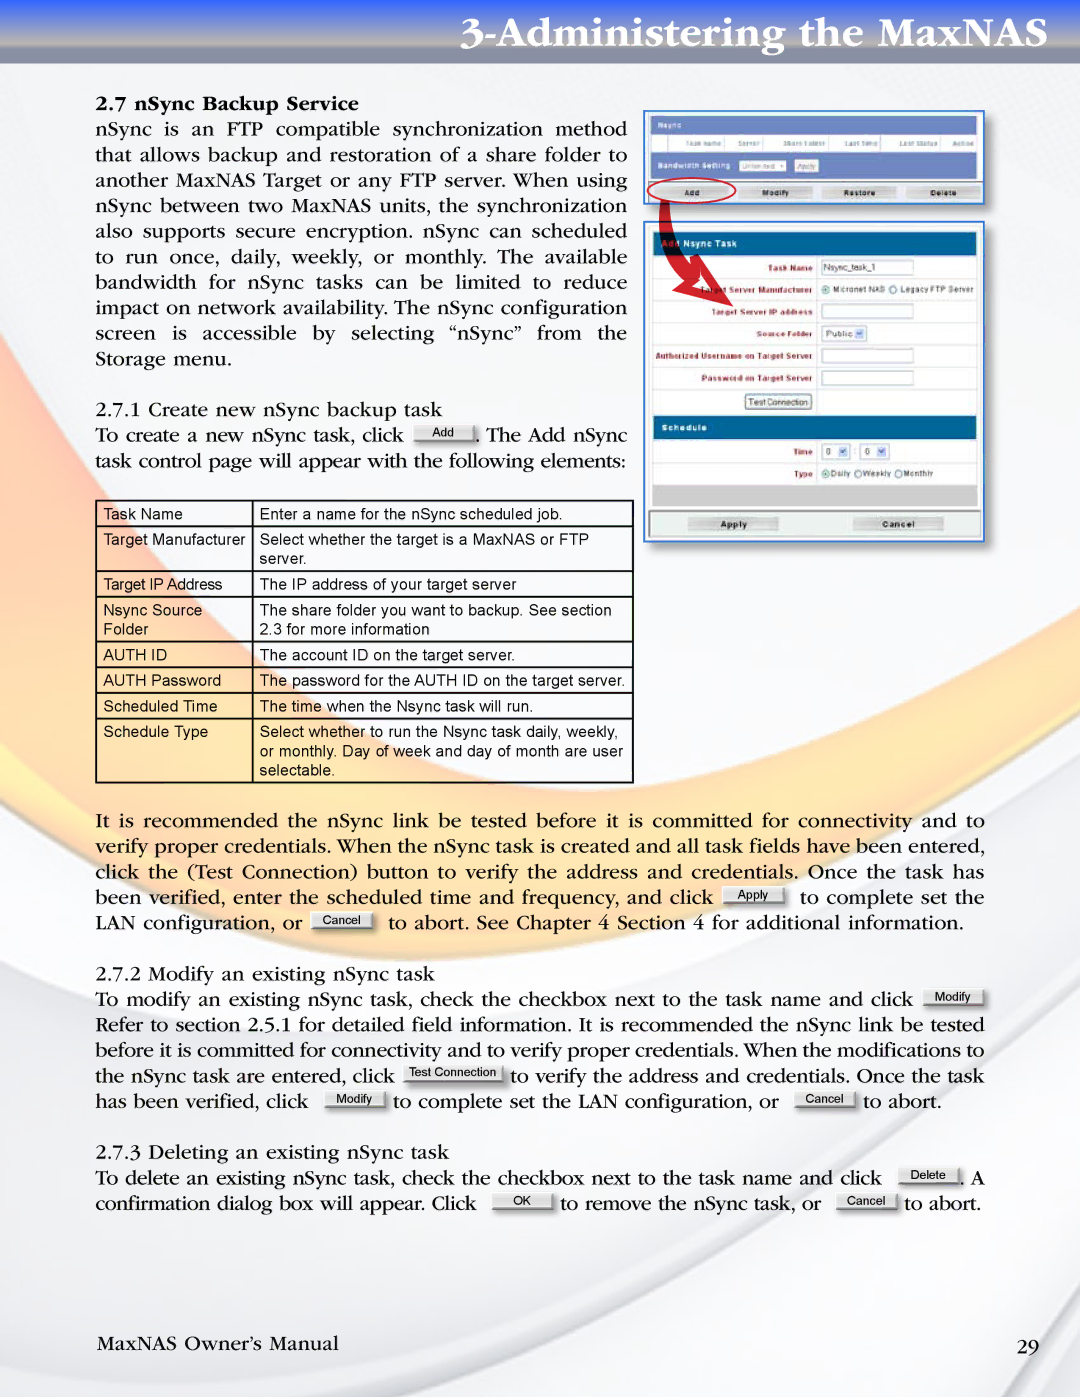
To create a new nSync task, click Add . The Add nSync task control page will appear with the following elements:
Task Name | Enter a name for the nSync scheduled job. |
Target Manufacturer | Select whether the target is a MaxNAS or FTP |
| server. |
Target IP Address | The IP address of your target server |
Nsync Source | The share folder you want to backup. See section |
Folder | 2.3 for more information |
AUTH ID | The account ID on the target server. |
AUTH Password | The password for the AUTH ID on the target server. |
Scheduled Time | The time when the Nsync task will run. |
Schedule Type | Select whether to run the Nsync task daily, weekly, |
| or monthly. Day of week and day of month are user |
| selectable. |
It is recommended the nSync link be tested before it is committed for connectivity and to verify proper credentials. When the nSync task is created and all task fields have been entered, click the (Test Connection) button to verify the address and credentials. Once the task has
been verified, enter the scheduled time and frequency, and click Apply to complete set the LAN configuration, or Cancel to abort. See Chapter 4 Section 4 for additional information.
2.7.2 Modify an existing nSync task
To modify an existing nSync task, check the checkbox next to the task name and click Modify Refer to section 2.5.1 for detailed field information. It is recommended the nSync link be tested before it is committed for connectivity and to verify proper credentials. When the modifications to
the nSync task are entered, click | Test Connection | to verify the address and credentials. Once the task | |||||||||||
has been verified, click | Modify | to complete set the LAN configuration, or | Cancel |
| to abort. | ||||||||
2.7.3 Deleting an existing nSync task |
|
|
|
|
|
|
|
|
| ||||
To delete an existing nSync task, check the checkbox next to the task name and click |
| Delete . | A | ||||||||||
confirmation dialog box will appear. Click |
| OK | to remove the nSync task, or |
| Cancel |
| to abort. |
| |||||
|
|
|
|
|
|
|
|
|
|
|
|
|
|
MaxNAS Owner’s Manual | 29 |