4-Connecting Users
Chapter 4- Connecting Users
Once the MaxNAS has been configured with storage, shares, users, groups, and permissions it is ready to accept user connections. The MaxNAS supports SMB/CIFS network services as well as Webdisk/Secure Webdisk user connections. This chapter includes discussion on both of those services and connection methods.
1. SMB/CIFS User Access Configuration
SMB shares are accessible from Windows 95 and newer,
1.1 Mapping a Network Drive (Windows)
To access the MaxNAS from a Windows based host, open “My Network Places” (Windows XP) or “Network Neighborhood” on Windows 98/2000. The MaxNAS is called “MaxNAS” in workgroup “Workgroup” by default. Double click to see the available shares. Alternatively, you may use Window’s search function to look for computers named “MaxNAS.”
You can map share folders on the MaxNAS so you can access them through the My Computer folder in Windows. Connect to the shared network folders on the MaxNAS as follows:
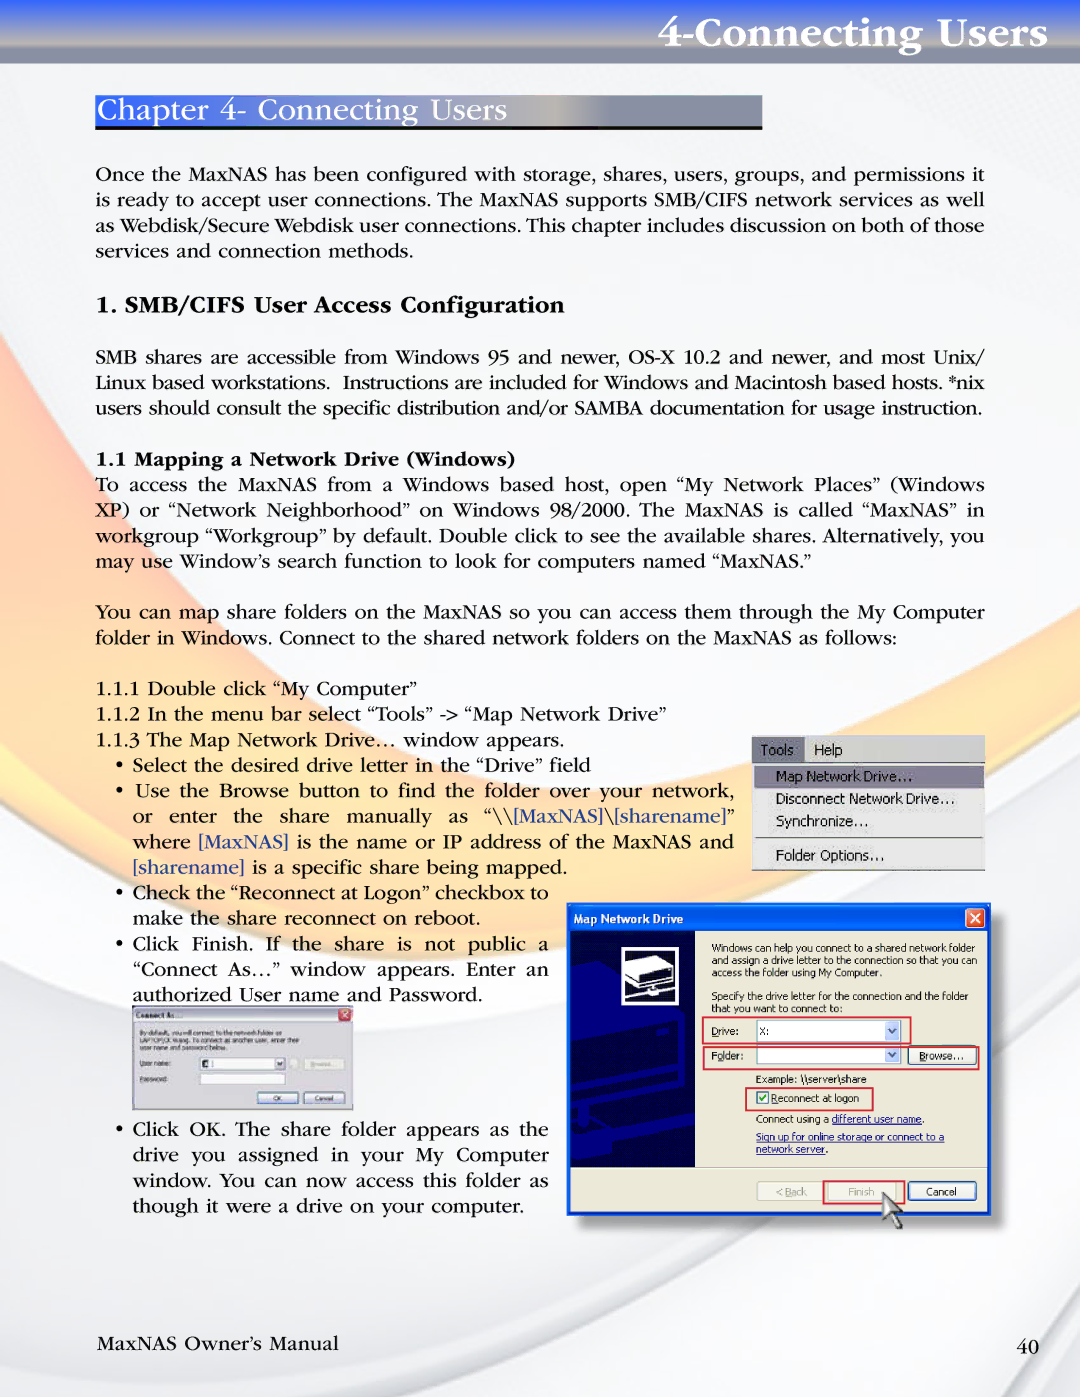
1.1.1Double click “My Computer”
1.1.2In the menu bar select “Tools”
1.1.3The Map Network Drive… window appears.
•Select the desired drive letter in the “Drive” field
•Use the Browse button to find the folder over your network, or enter the share manually as “\\[MaxNAS]\[sharename]” where [MaxNAS] is the name or IP address of the MaxNAS and [sharename] is a specific share being mapped.
•Check the “Reconnect at Logon” checkbox to make the share reconnect on reboot.
•Click Finish. If the share is not public a
“Connect As…” window appears. Enter an authorized User name and Password.
•Click OK. The share folder appears as the drive you assigned in your My Computer window. You can now access this folder as though it were a drive on your computer.
MaxNAS Owner’s Manual | 40 |