EXPOSURE BRACKETING
Exposure bracketing automatically exposes a series of frames with exposures above and below the metered exposure value. Bracket your exposures when shooting slides and other films with a low tol- erance for exposure error. A larger bracketing increment is recom- mended when shooting negative film.
• This camera can expose a 3, 5, or 7 frame brackets in increments of
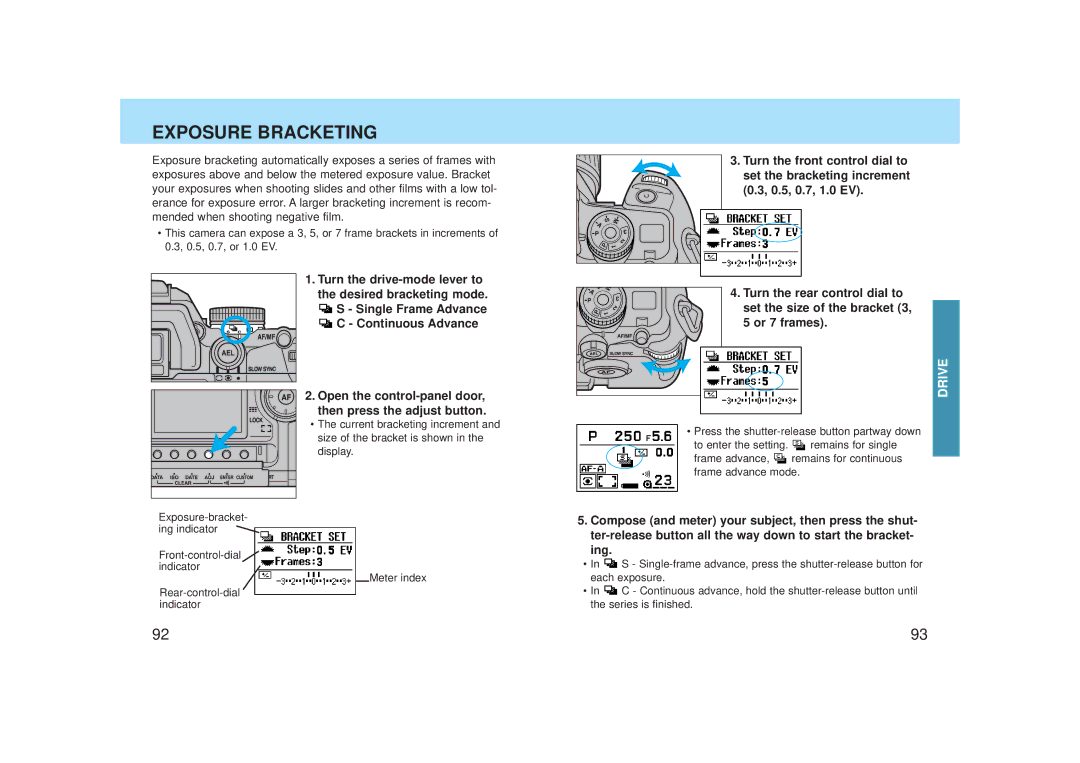
3.Turn the front control dial to set the bracketing increment
(0.3, 0.5, 0.7, 1.0 EV).
0.3, 0.5, 0.7, or 1.0 EV. |
1.Turn the
![]() S - Single Frame Advance C - Continuous Advance
S - Single Frame Advance C - Continuous Advance
4. Turn the rear control dial to set the size of the bracket (3, 5 or 7 frames).
DRIVE
2. Open the
• The current bracketing increment and size of the bracket is shown in the display.
![]()
![]()
Meter index
•Press the
to enter the setting. ![]() remains for single
remains for single
frame advance, ![]() remains for continuous frame advance mode.
remains for continuous frame advance mode.
5.Compose (and meter) your subject, then press the shut-
•In![]() S -
S -
•In![]() C - Continuous advance, hold the
C - Continuous advance, hold the
92 | 93 |