FLASH BRACKETING
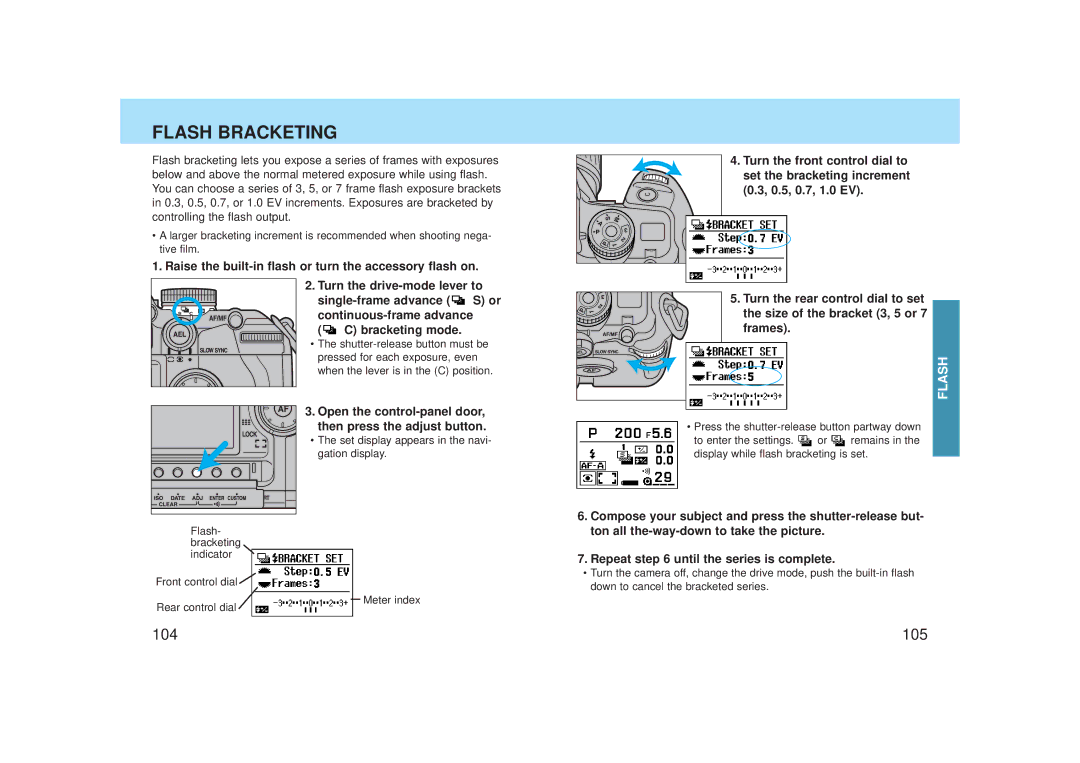
Flash bracketing lets you expose a series of frames with exposures below and above the normal metered exposure while using flash. You can choose a series of 3, 5, or 7 frame flash exposure brackets in 0.3, 0.5, 0.7, or 1.0 EV increments. Exposures are bracketed by controlling the flash output.
•A larger bracketing increment is recommended when shooting nega- tive film.
1. Raise the
2. Turn the
S) or | ||
( | C) bracketing mode. |
|
• The
3. Open the control-panel door, then press the adjust button.
• The set display appears in the navi- gation display.
Flash- bracketing indicator
Front control dial ![]()
4.Turn the front control dial to set the bracketing increment
(0.3, 0.5, 0.7, 1.0 EV).
5. Turn the rear control dial to set the size of the bracket (3, 5 or 7 frames).
FLASH
•Press the
to enter the settings. ![]() or
or ![]() remains in the display while flash bracketing is set.
remains in the display while flash bracketing is set.
6.Compose your subject and press the
7.Repeat step 6 until the series is complete.
•Turn the camera off, change the drive mode, push the
Rear control dial
Meter index
104 | 105 |
