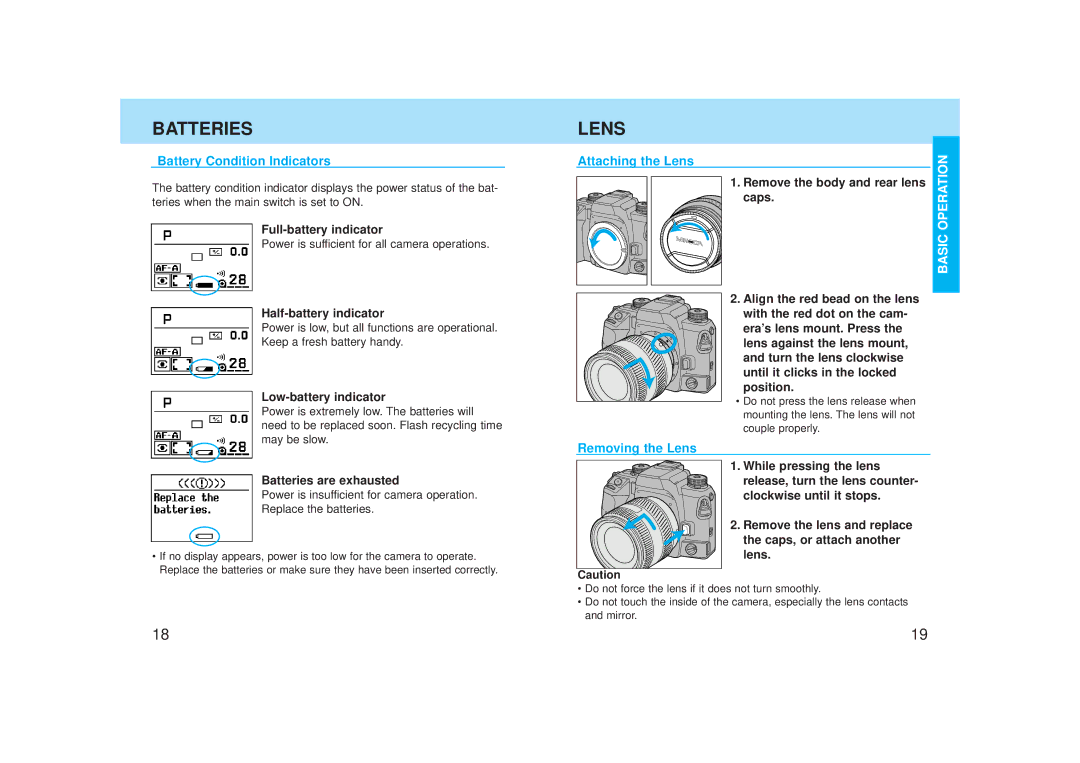
BATTERIES
Battery Condition Indicators
The battery condition indicator displays the power status of the bat- teries when the main switch is set to ON.
Power is sufficient for all camera operations.
Power is low, but all functions are operational.
Keep a fresh battery handy.
Low-battery indicator
Power is extremely low. The batteries will need to be replaced soon. Flash recycling time may be slow.
Batteries are exhausted
Power is insufficient for camera operation.
Replace the batteries.
•If no display appears, power is too low for the camera to operate. Replace the batteries or make sure they have been inserted correctly.
LENS
Attaching the Lens
1. Remove the body and rear lens caps.
2. Align the red bead on the lens with the red dot on the cam- era’s lens mount. Press the lens against the lens mount, and turn the lens clockwise until it clicks in the locked position.
• Do not press the lens release when mounting the lens. The lens will not couple properly.
Removing the Lens
1. While pressing the lens release, turn the lens counter- clockwise until it stops.
2. Remove the lens and replace
the caps, or attach another lens.
Caution
•Do not force the lens if it does not turn smoothly.
•Do not touch the inside of the camera, especially the lens contacts and mirror.
BASIC OPERATION
18 | 19 |