NE-4100 Series User’s Manual | Getting Started |
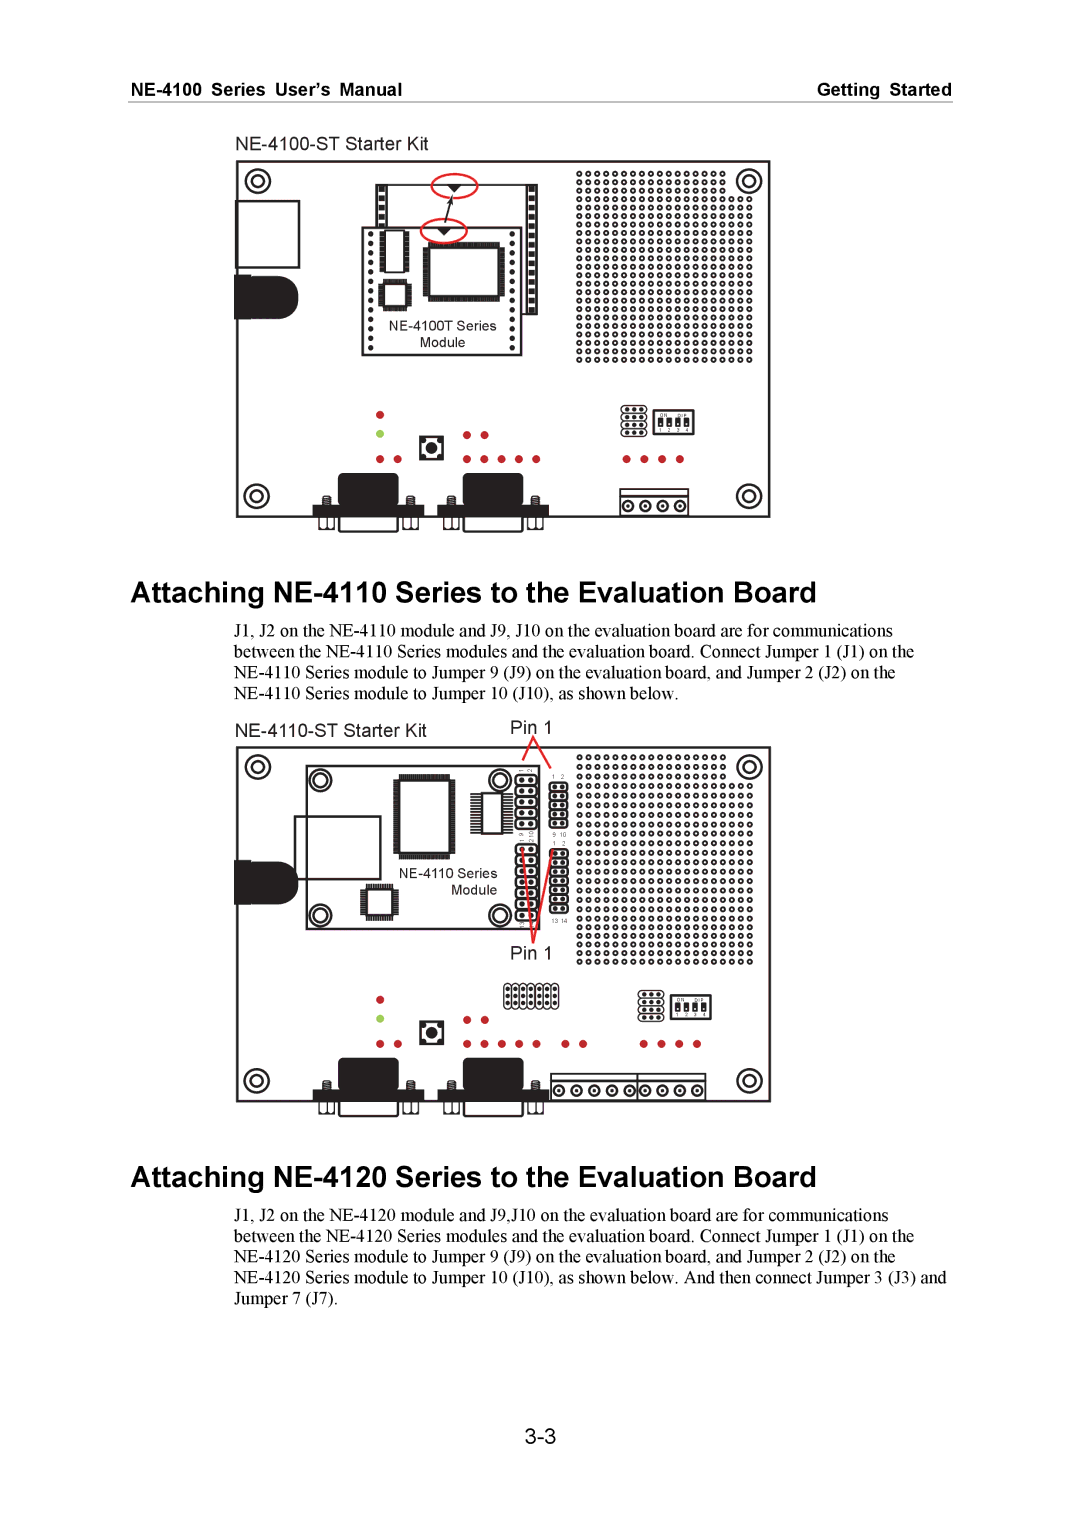
NE-4100-ST Starter Kit
NE-4100T Series
Module
Attaching NE-4110 Series to the Evaluation Board
J1, J2 on the NE-4110 module and J9, J10 on the evaluation board are for communications between the NE-4110 Series modules and the evaluation board. Connect Jumper 1 (J1) on the NE-4110 Series module to Jumper 9 (J9) on the evaluation board, and Jumper 2 (J2) on the NE-4110 Series module to Jumper 10 (J10), as shown below.
NE-4110-ST Starter Kit | Pin 1 |
Pin 1
ON D I P
Attaching NE-4120 Series to the Evaluation Board
J1, J2 on the NE-4120 module and J9,J10 on the evaluation board are for communications between the NE-4120 Series modules and the evaluation board. Connect Jumper 1 (J1) on the NE-4120 Series module to Jumper 9 (J9) on the evaluation board, and Jumper 2 (J2) on the NE-4120 Series module to Jumper 10 (J10), as shown below. And then connect Jumper 3 (J3) and Jumper 7 (J7).