Moxa Technologies user manual Telnet Console, NE-4100 Series User’s Manual

Models: NE-4100

1 90
Download 90 pages 17.34 Kb
Page 33
Image 33
Telnet Console

NE-4100 Series User’s Manual

Initial IP Address Configuration

arp –s 192.168.200.100 00-90-E8-xx-xx-xx

This is where 192.168.200.100 is the new IP address and 00-90-E8-xx-xx-xx is the MAC address for your NE-4100 Series. You will need to use both numbers, as described above in points 1 and 2.

4.Next, execute a special Telnet command by typing: telnet 192.168.200.100 6000

After issuing this command, a Connect failed message will appear, as shown here. After the NE-4100 module reboots, its IP address should be updated to the new address, and you can reconnect using Telnet, Web, or Administrator to check that the update was successful.

Telnet Console

Depending on how your computer and network are configured, you may find it convenient to use network access to set up your NE-4100 module’s IP address. This can be done using the Telnet program.

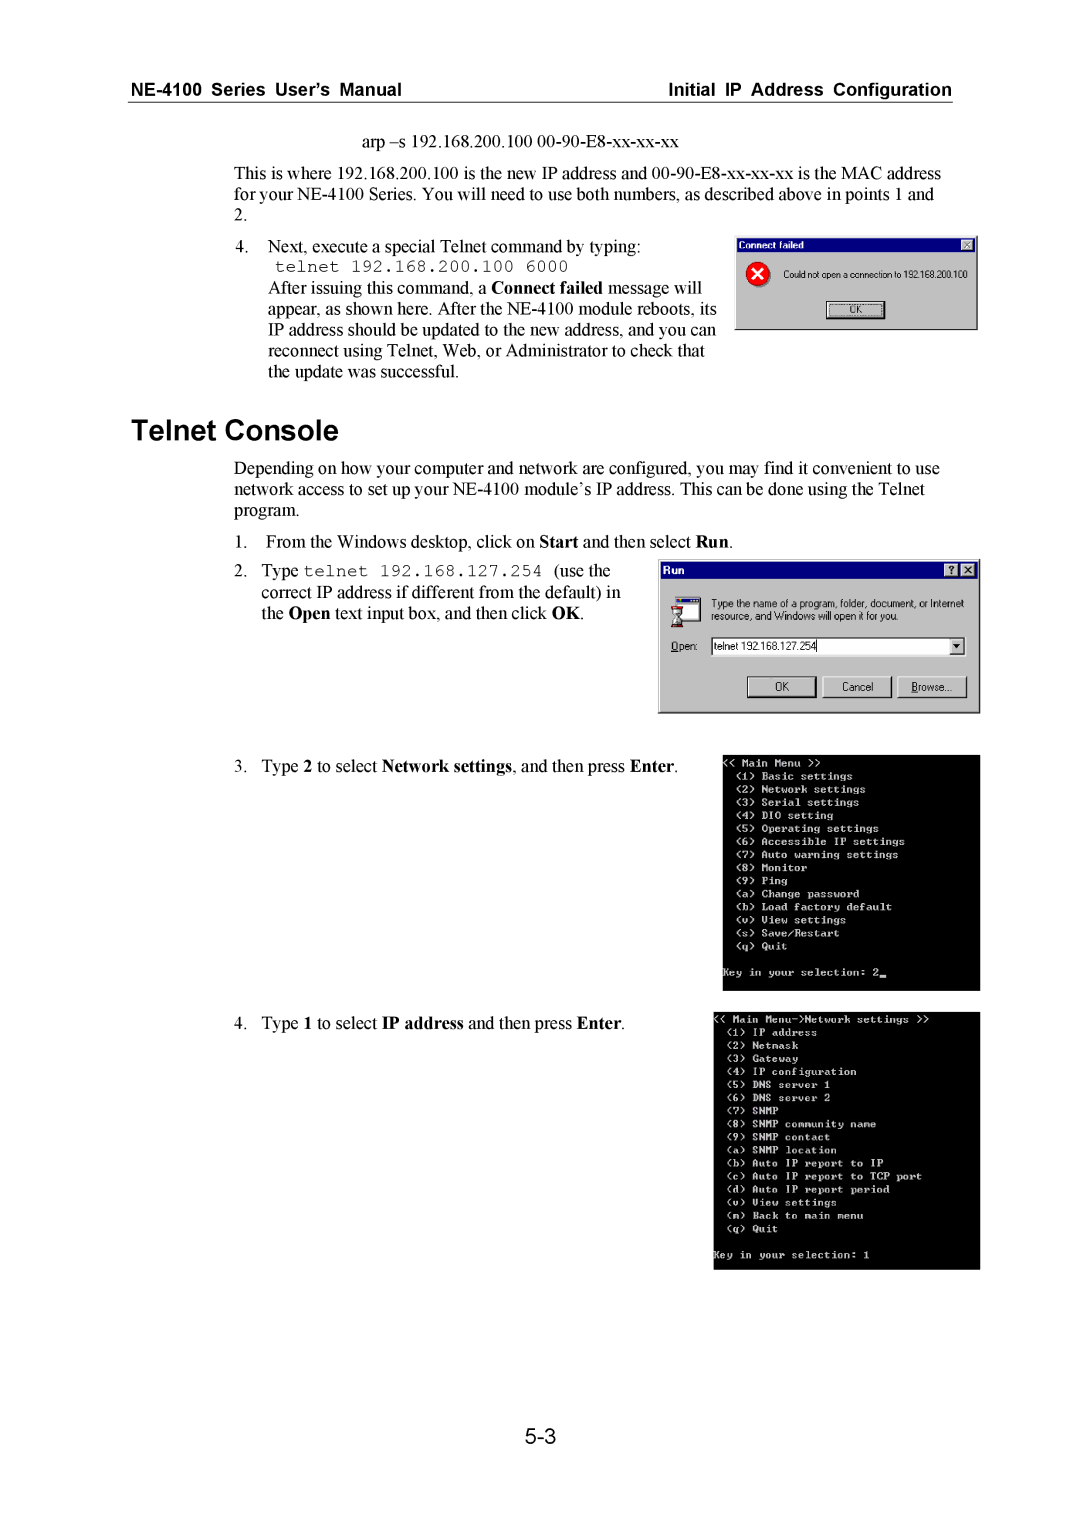
1.From the Windows desktop, click on Start and then select Run.

2.Type telnet 192.168.127.254 (use the correct IP address if different from the default) in the Open text input box, and then click OK.

3.Type 2 to select Network settings, and then press Enter.

4. Type 1 to select IP address and then press Enter.

5-3

Page 33
Image 33
Moxa Technologies user manual Telnet Console, NE-4100 Series User’s Manual, Initial IP Address Configuration