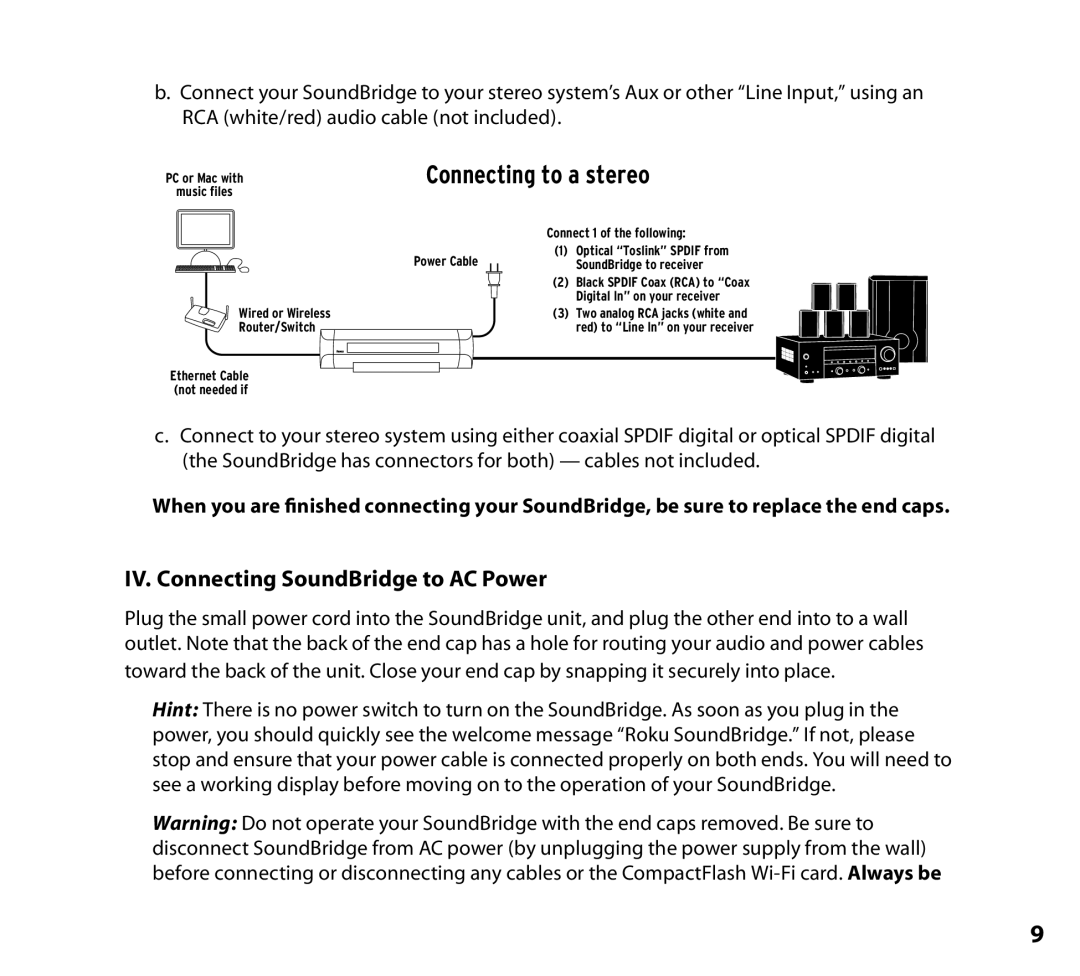
b.Connect your SoundBridge to your stereo system’s Aux or other “Line Input,” using an RCA (white/red) audio cable (not included).
PC or Mac with
music files
Connecting to a stereo
Power Cable
Wired or Wireless
Router/Switch
Ethernet Cable (not needed if
Connect 1 of the following:
(1)Optical “Toslink” SPDIF from SoundBridge to receiver
(2)Black SPDIF Coax (RCA) to “Coax Digital In” on your receiver
(3)Two analog RCA jacks (white and red) to “Line In” on your receiver
c.Connect to your stereo system using either coaxial SPDIF digital or optical SPDIF digital (the SoundBridge has connectors for both) — cables not included.
When you are finished connecting your SoundBridge, be sure to replace the end caps.
IV. Connecting SoundBridge to AC Power
Plug the small power cord into the SoundBridge unit, and plug the other end into to a wall outlet. Note that the back of the end cap has a hole for routing your audio and power cables toward the back of the unit. Close your end cap by snapping it securely into place.
Hint: There is no power switch to turn on the SoundBridge. As soon as you plug in the power, you should quickly see the welcome message “Roku SoundBridge.” If not, please stop and ensure that your power cable is connected properly on both ends. You will need to see a working display before moving on to the operation of your SoundBridge.
Warning: Do not operate your SoundBridge with the end caps removed. Be sure to disconnect SoundBridge from AC power (by unplugging the power supply from the wall) before connecting or disconnecting any cables or the CompactFlash
9