Operating Instructions
2 Various Camera Features
2.1Using Camera Features
1.Access the camera (see page 11).
• The Top page is displayed.
Note
•When [Permit access from guest users] is set on the Security: Administrator page, click [login] button and log in as an administrator.
•When users other than an administrator are accessing the camera, the [Setup] and [Maintenance] tabs are not displayed.
•If [View
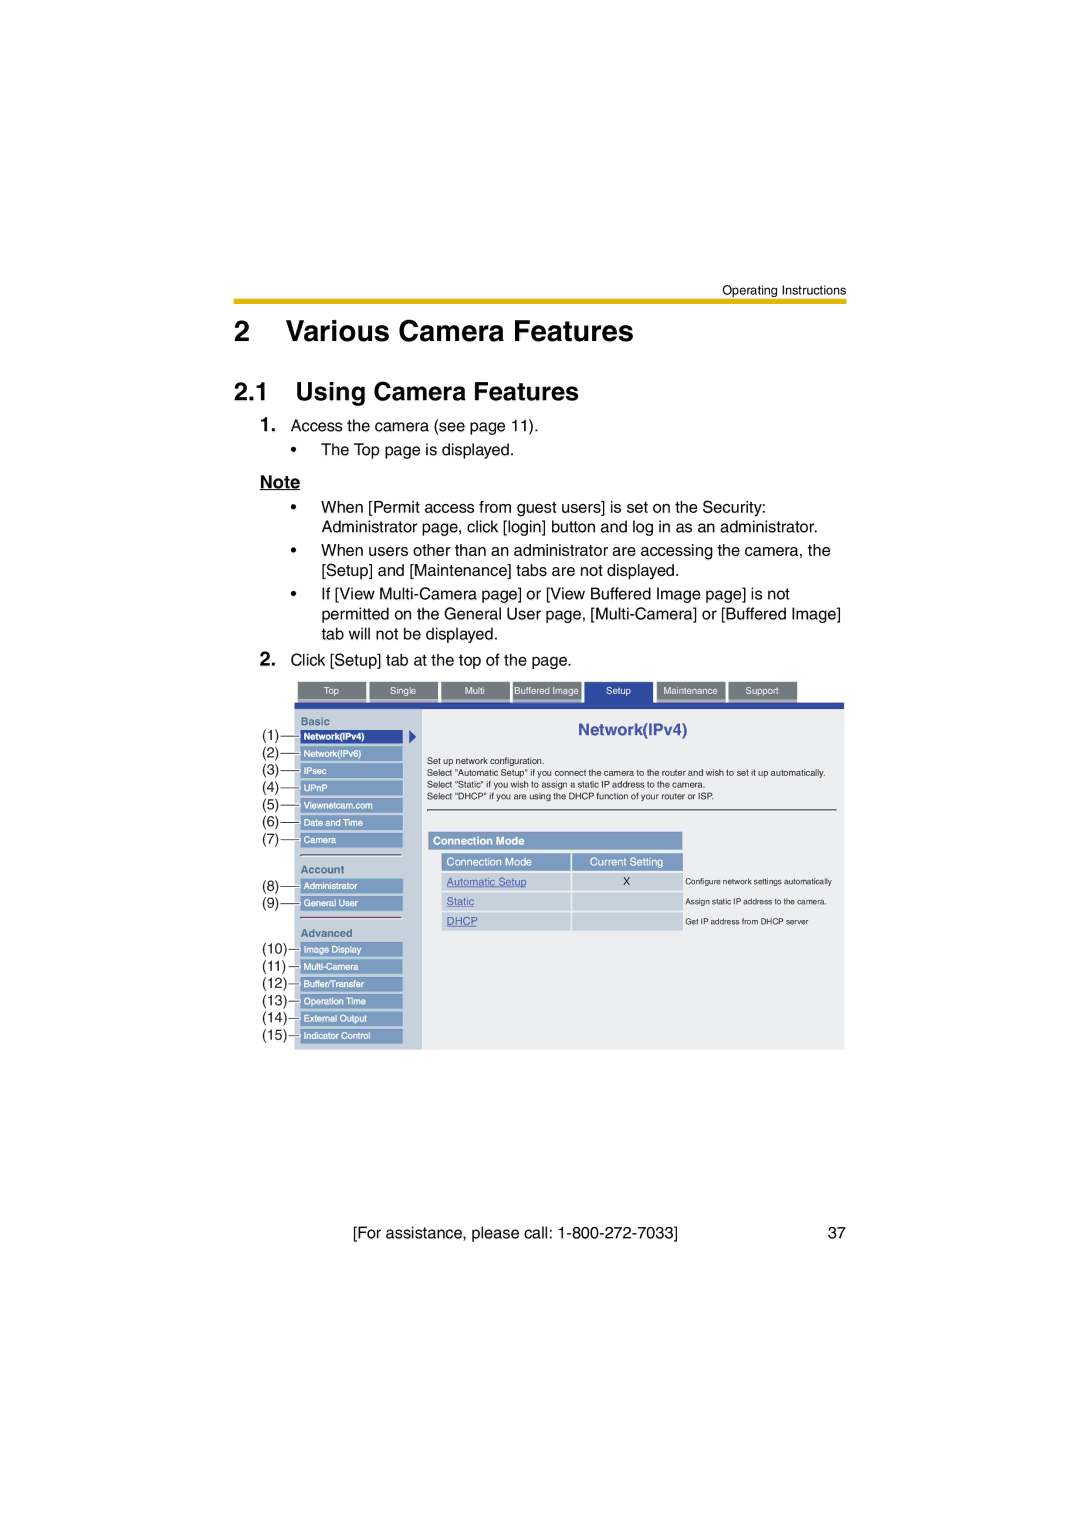
2.Click [Setup] tab at the top of the page.
| Top |
| Single |
| Multi |
| Buffered Image |
| Setup |
| Maintenance |
| Support |
|
|
|
|
|
|
|
|
|
|
|
|
|
|
|
|
Basic
(1)![]()
![]() Network(IPv4)
Network(IPv4)
(2)![]()
![]() Network(IPv6)
Network(IPv6)
(3)![]()
![]() IPsec
IPsec
(4)
 UPnP
UPnP
(5)![]()
![]() Viewnetcam.com
Viewnetcam.com
(6)![]()
![]() Date and Time
Date and Time
(7)![]()
![]() Camera
Camera
Account
(8)![]()
![]() Administrator
Administrator
(9)![]()
![]() General User
General User
Advanced
(10)![]()
![]() Image Display
Image Display
(11)![]()
![]()
(12)![]()
![]() Buffer/Transfer
Buffer/Transfer
(13)![]()
![]() Operation Time
Operation Time
(14)![]()
![]() External Output
External Output
(15)![]()
![]() Indicator Control
Indicator Control
Network(IPv4)
Set up network configuration.
Select "Automatic Setup" if you connect the camera to the router and wish to set it up automatically. Select "Static" if you wish to assign a static IP address to the camera.
Select "DHCP" if you are using the DHCP function of your router or ISP.
Connection Mode |
|
| |
|
|
|
|
| Connection Mode | Current Setting |
|
|
|
|
|
| Automatic Setup | X | Configure network settings automatically |
|
|
|
|
| Static |
| Assign static IP address to the camera. |
|
|
|
|
| DHCP |
| Get IP address from DHCP server |
|
|
|
|
[For assistance, please call: | 37 |