“Telephone
“Telephone Plug-in” settings
System requirements
Item | Specifications | ||
CPU |
| 1.0 GHz Intel® Pentium®/Celeron® |
|
|
| processor or comparable CPU or | |
|
| higher processor | |
|
|
|
|
RAM | 512 MB or more | ||
|
|
|
|
OS | R Microsoft Windows® XP | ||
|
| Service Pack 3 or later | |
|
| only) | |
|
| R Microsoft Windows Vista® | |
|
| Service Pack 2 or later | |
|
| R Microsoft Windows 7 | |
|
| Service Pack 1 or later | |
|
|
|
|
Microsoft | R Microsoft Office Outlook 2003 | ||
Office | Service Pack 3 or later | ||
Outlook | R Microsoft Office Outlook 2007 | ||
|
| Service Pack 2 or later | |
|
| R Microsoft Office Outlook 2010 | |
|
| or later (Service Pack) | |
|
|
|
|
Hard disk | 20 MB or more | ||
|
|
|
|
Video | 1,024 x 768 or higher | ||
resolution |
|
| |
|
|
|
|
Others | R | ||
|
| R USB 2.0 | |
|
|
|
|
Trademarks:
R Microsoft, Windows, Windows Vista, and Outlook are either registered trademarks or trademarks of Microsoft Corporation in the United States and/or other countries.
R Intel, Celeron and Pentium are trademarks of Intel Corporation in the U.S. and other countries.
R All other trademarks identified herein are the property of their respective owners.
R Microsoft product screen shots reprinted with permission from Microsoft Corporation.
Note:
R The screen shot shown is for Microsoft Office Outlook 2010.
R The screen shots shown in these instructions may differ slightly from those of the actual product.
R Software features and appearance are subject to change without notice.
Installing the “Telephone Plug-in”
Before installing “Telephone
–Microsoft Office Outlook is installed on your computer.
–The base unit is not connected to your computer with the mini USB cable (until instructed to do so).
1Start Windows and exit all other applications. R You must be logged in as an administrator
in order to install “Telephone
2Insert the included
R Installation starts automatically. If the installation does not start, see page 49.
R For Microsoft Windows Vista and
Microsoft Windows 7 users:
Click [Run Setup.exe] when prompted.
3When the language selection window is displayed, select the desired language and click [Next].
4When the “Telephone
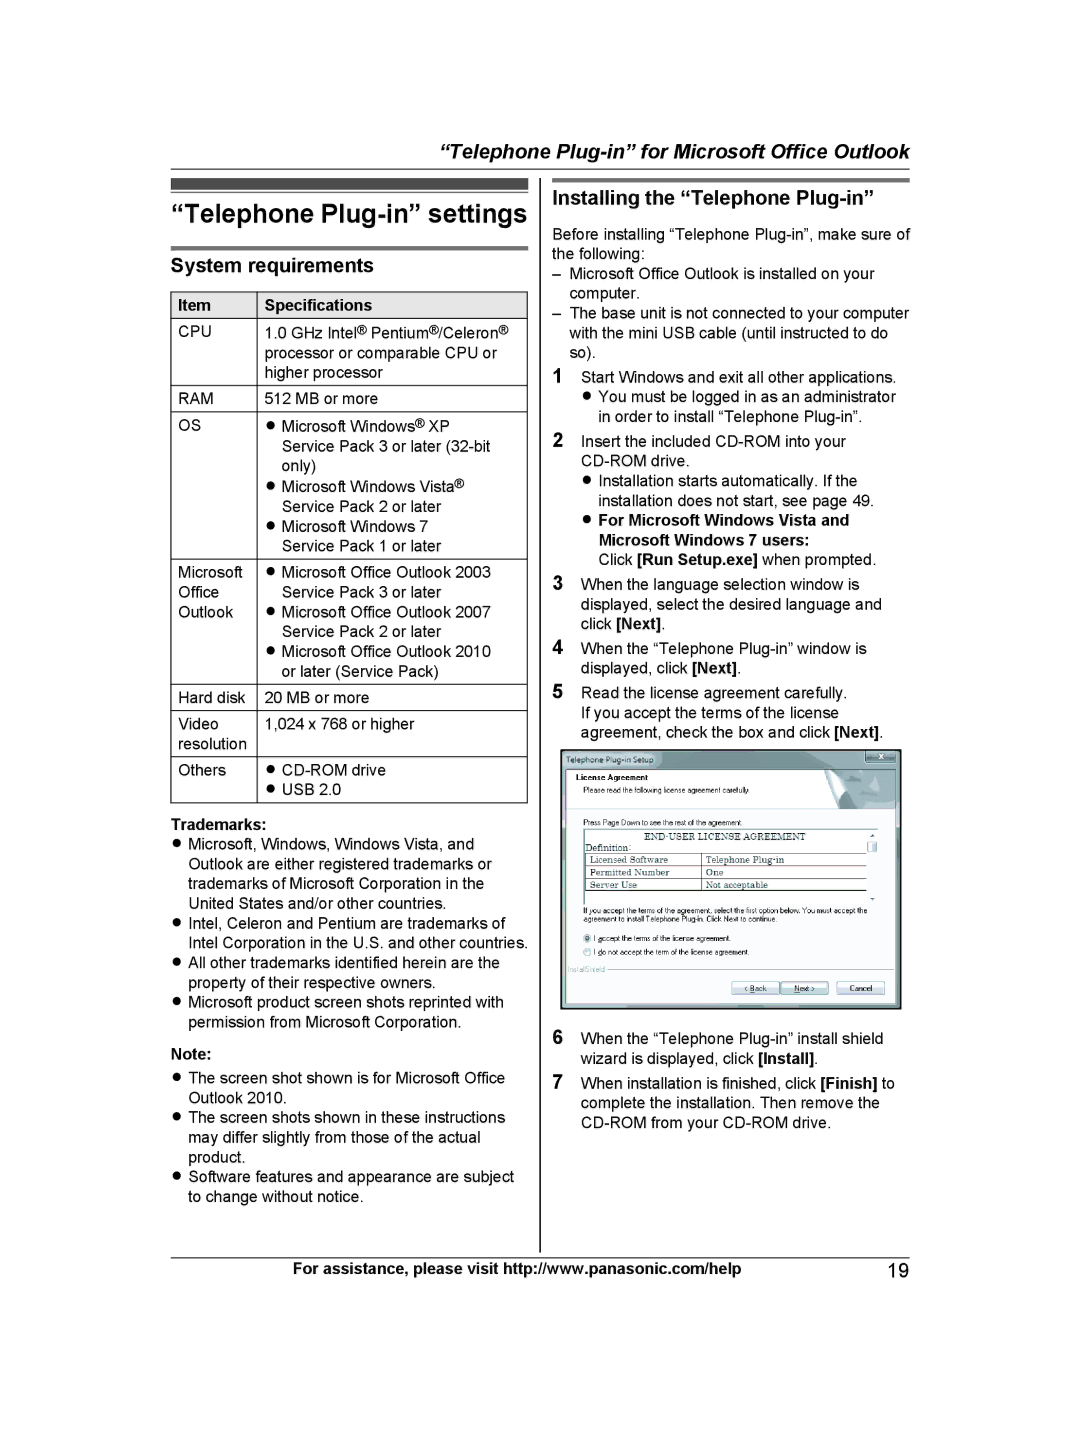
5Read the license agreement carefully. If you accept the terms of the license agreement, check the box and click [Next].
6When the “Telephone
7When installation is finished, click [Finish] to complete the installation. Then remove the
For assistance, please visit http://www.panasonic.com/help | 19 |