Location and function of each part
Projector < Top · Rear and Side > | < Rear control panel > | |||||||||||||||
|
|
|
|
|
|
|
|
|
|
|
|
|
|
|
|
|
|
|
|
|
|
|
|
|
|
|
|
|
|
|
|
|
|
|
|
|
|
|
|
|
|
|
|
|
|
|
|
|
|
|
|
|
|
|
|
|
|
|
|
|
|
|
|
|
|
|
|
|
|
|
|
|
|
|
|
|
|
|
|
|
|
|
|
|
|
|
|
|
|
|
|
|
|
|
|
|
|
|
|
|
|
|
|
|
|
|
|
|
|
|
|
|
|
|
|
|
|
|
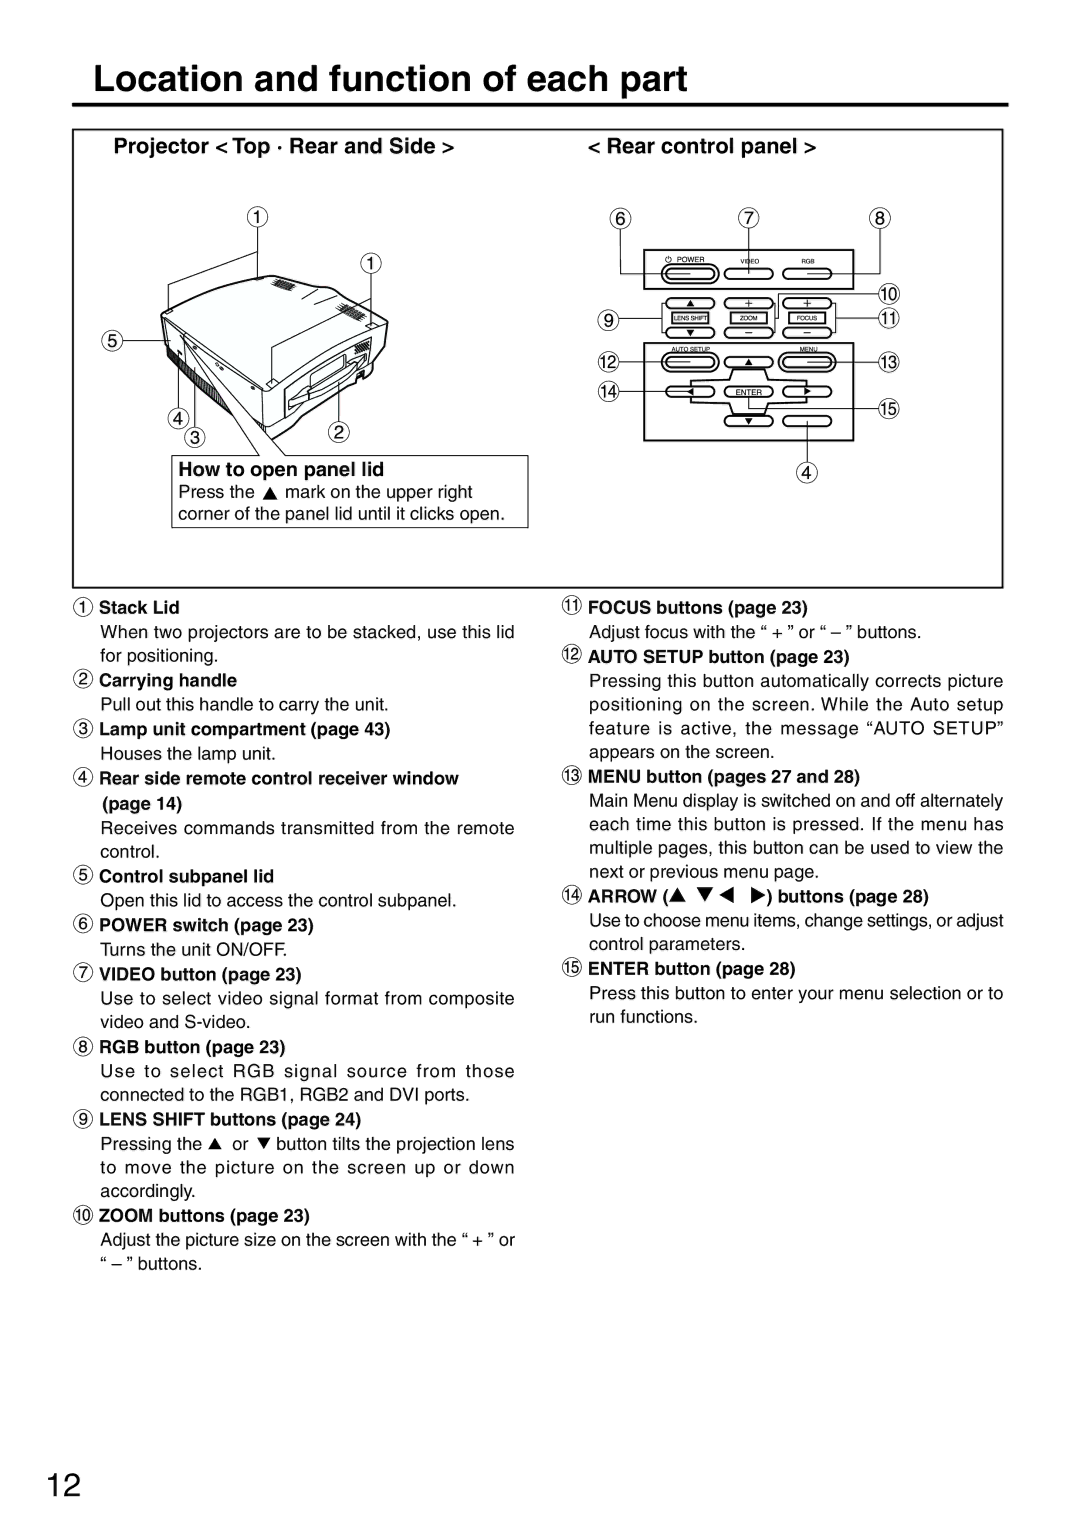
How to open panel lid
Press the ![]() mark on the upper right corner of the panel lid until it clicks open.
mark on the upper right corner of the panel lid until it clicks open.
![]() Stack Lid
Stack Lid
When two projectors are to be stacked, use this lid for positioning.
![]() Carrying handle
Carrying handle
Pull out this handle to carry the unit.
![]() Lamp unit compartment (page 43)
Lamp unit compartment (page 43)
Houses the lamp unit.
![]() Rear side remote control receiver window (page 14)
Rear side remote control receiver window (page 14)
Receives commands transmitted from the remote control.
![]() Control subpanel lid
Control subpanel lid
Open this lid to access the control subpanel.
![]() POWER switch (page 23)
POWER switch (page 23)
Turns the unit ON/OFF.
![]() VIDEO button (page 23)
VIDEO button (page 23)
Use to select video signal format from composite video and
![]() RGB button (page 23)
RGB button (page 23)
Use to select RGB signal source from those connected to the RGB1, RGB2 and DVI ports.
 LENS SHIFT buttons (page 24)
Pressing the ![]() or
or ![]() button tilts the projection lens to move the picture on the screen up or down accordingly.
button tilts the projection lens to move the picture on the screen up or down accordingly.
![]() ZOOM buttons (page 23)
ZOOM buttons (page 23)
Adjust the picture size on the screen with the “ + ” or
“– ” buttons.
![]() FOCUS buttons (page 23)
FOCUS buttons (page 23)
Adjust focus with the “ + ” or “ – ” buttons.
 AUTO SETUP button (page 23)
Pressing this button automatically corrects picture positioning on the screen. While the Auto setup feature is active, the message “AUTO SETUP” appears on the screen.
 MENU button (pages 27 and 28)
Main Menu display is switched on and off alternately each time this button is pressed. If the menu has multiple pages, this button can be used to view the next or previous menu page.
![]() ARROW (
ARROW (![]()
![]()
![]()
![]() ) buttons (page 28)
) buttons (page 28)
Use to choose menu items, change settings, or adjust control parameters.
![]() ENTER button (page 28)
ENTER button (page 28)
Press this button to enter your menu selection or to run functions.
12