8–CONNECT AC POWER
At this point in your installation procedure, you should have mounted your drive and motor, coupled the motor to the load, and connected the controller and motor cables to the drive.
The
•Motor should be properly secured
•Motor cable should be connected to drive
•Drive should be properly mounted
•Controller cable should be connected to drive
•Controller cable should not be in close physical proximity to motor cable
APPLY POWER
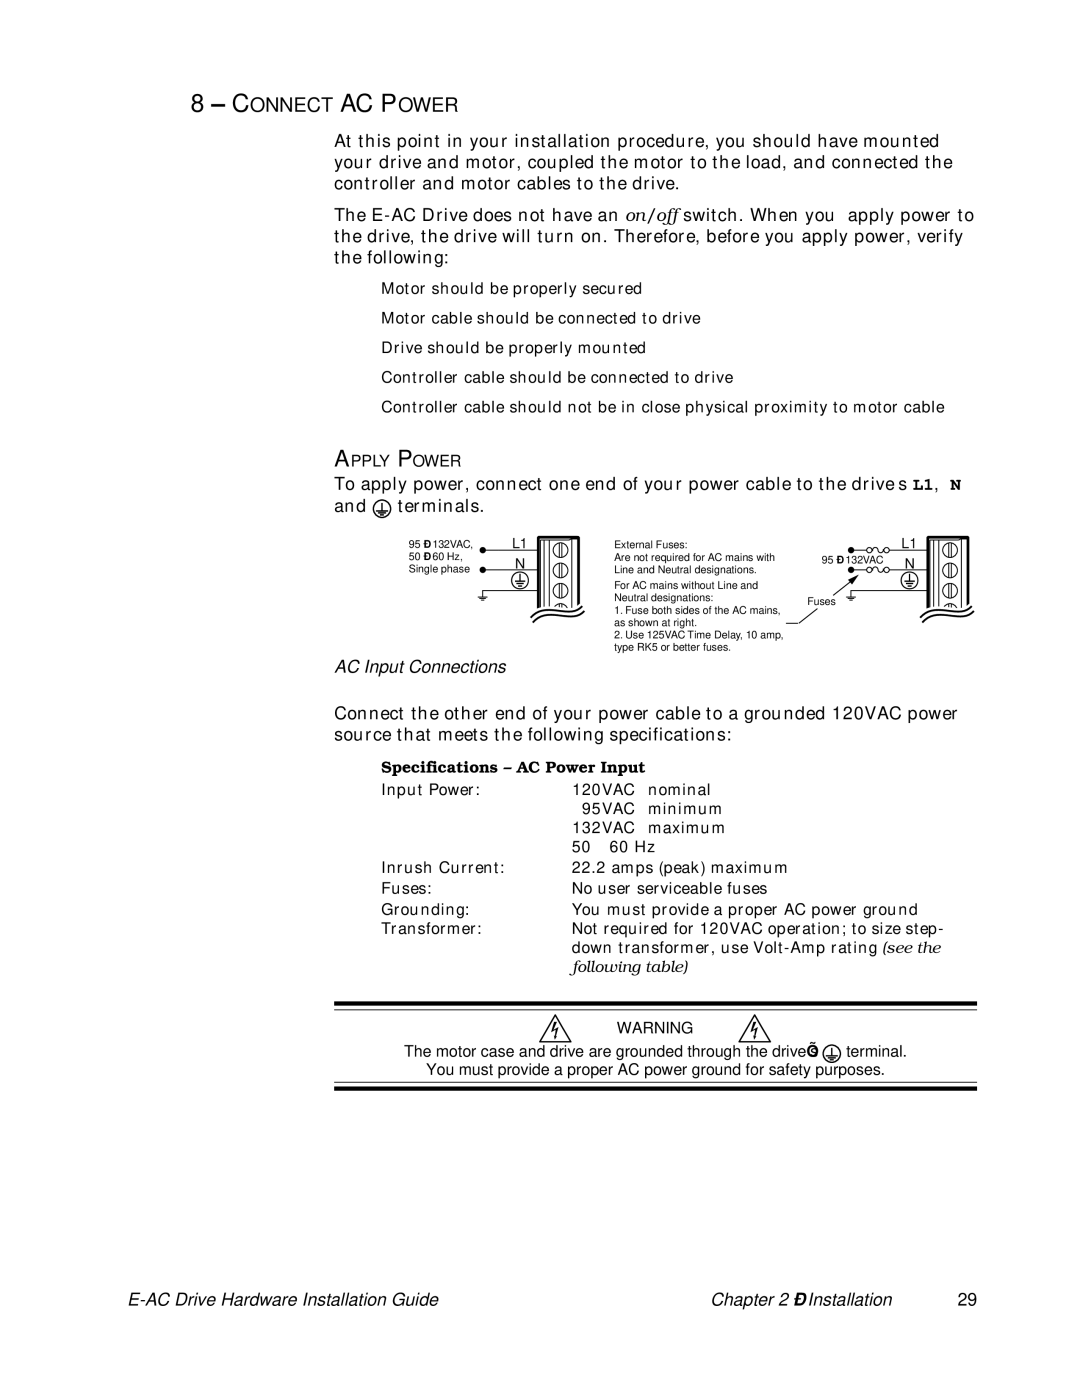
To apply power, connect one end of your power cable to the drive’s L1, N and ![]() terminals.
terminals.
95 | – 132VAC, |
|
|
| L1 |
|
|
|
|
|
|
|
|
|
|
| |||
50 | – 60 Hz, |
|
|
| N |
|
|
|
|
|
|
|
|
|
|
| |||
Single phase |
|
|
|
|
|
|
| ||
|
|
|
|
|
|
|
| ||
|
|
|
|
|
|
|
|
|
|
|
|
|
|
|
|
|
|
|
|
|
|
|
|
|
|
|
|
|
|
|
|
|
|
|
|
|
|
|
|
|
|
|
|
|
|
|
|
|
|
External Fuses:
Are not required for AC mains with Line and Neutral designations.
For AC mains without Line and Neutral designations:
1.Fuse both sides of the AC mains, as shown at right.
2.Use 125VAC Time Delay, 10 amp, type RK5 or better fuses.
L1
95 – 132VAC N
Fuses
AC Input Connections
Connect the other end of your power cable to a grounded 120VAC power source that meets the following specifications:
Specifications – AC Power Input |
| |
Input Power: | 120VAC | nominal |
| 95VAC | minimum |
| 132VAC | maximum |
| 50 – 60 Hz | |
Inrush Current: | 22.2 amps (peak) maximum | |
Fuses: | No user serviceable fuses | |
Grounding: | You must provide a proper AC power ground | |
Transformer: | Not required for 120VAC operation; to size step- | |
| down transformer, use | |
| following table) | |
WARNING
The motor case and drive are grounded through the drive’s ![]() terminal.
terminal.
You must provide a proper AC power ground for safety purposes.
| Chapter 2 – Installation | 29 |