05/08 Rev. AB | OPERATOR’S HANDBOOK | Care & Maintenance |
| ||||||
|
|
|
| 9844/9854 |
| ||||
|
|
|
|
|
|
| |||
Replacing the Printhead |
|
|
|
|
| ||||
|
| 1 |
|
|
| ||||
|
|
|
|
|
|
| |||
|
|
|
|
|
| ||||
|
|
|
| |
|
|
|
|
|
|
|
|
|
|
|
|
| ||
|
|
|
|
|
|
|
|
| |
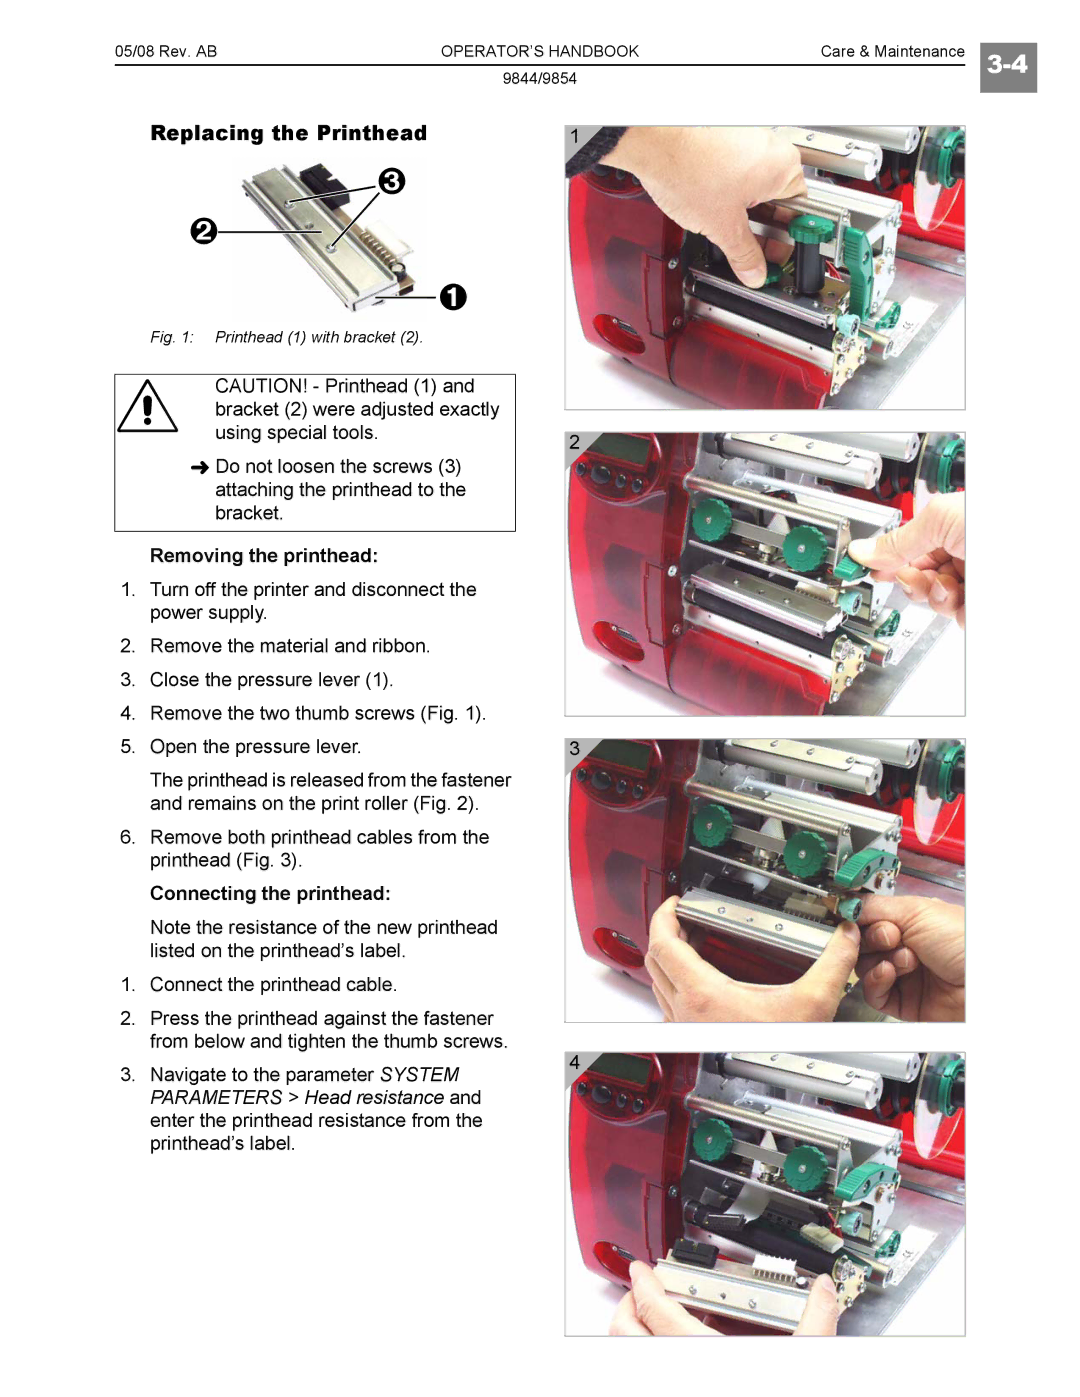
Fig. 1: Printhead (1) with bracket (2). |
|
|
|
|
| ||||
|
|
|
|
|
| ||||
|
|
|
|
|
|
|
|
| |
CAUTION! - Printhead (1) and |
|
|
| ||||||
bracket (2) were adjusted exactly |
|
|
|
| |||||
|
|
|
| ||||||
using special tools. |
|
|
|
|
|
| |||
2 |
|
|
| ||||||
|
|
|
|
|
|
| |||
Do not loosen the screws (3) attaching the printhead to the bracket.
Removing the printhead:
1.Turn off the printer and disconnect the power supply.
2.Remove the material and ribbon.
3.Close the pressure lever (1).
4.Remove the two thumb screws (Fig. 1).
5. | Open the pressure lever. |
|
|
| 3 | ||
| The printhead is released from the fastener |
| |
|
| ||
| and remains on the print roller (Fig. 2). |
| |
6. | Remove both printhead cables from the |
| |
| printhead (Fig. 3). |
| |
| Connecting the printhead: |
| |
| Note the resistance of the new printhead |
| |
| listed on the printhead’s label. |
| |
1.Connect the printhead cable.
2.Press the printhead against the fastener from below and tighten the thumb screws.
3. Navigate to the parameter SYSTEM | 4 |
| |
PARAMETERS > Head resistance and |
|
| |
enter the printhead resistance from the |
|
printhead’s label. |
|
|
|