ì
îEthernet Activity LED: Flashes green to indicate that data is being transmitted or received by the camera.
ïEthernet Link LED: Glows solid amber to indicate that a live network connection is established.
ñAccessory Port: For use with compatible Pelco accessories.
ó24 VAC Power, Relay, and Alarm Connections: Supports 24 VAC as the power source, one relay that can be used to control an external circuit, and one alarm for physical input into the system.
rReset Button: Reboots the camera or restores the camera’s factory default settings. This button is recessed. Using a small tool, such as a paper clip, press and release the reset button once to reboot the camera. Press and hold the reset button for 10 seconds to restore the camera to the factory default settings.
sMini SD Card Slot: Saves a snapshot image to a mini SD card based on alarm activity.
NOTE: The mini SD card must be formatted as FAT32. Other formats are not compatible with the camera.
tService Port: Outputs analog video. Use this port at the installation site to set up the field of view and to focus the camera. When a service cable is connected to the camera, video to the IP stream is disabled (refer to Service Cable on page 12).
uPower LED: Glows solid amber and then flashes green during the configuration sequence; glows solid green after the sequence is complete. The LED can be disabled. If this LED glows red (solid or flashing), contact Pelco Product Support at
~í
~â
~ä
Auto Iris Lens Connector: Controls the amount of light allowed through the lens. Insert the
Auto Back Focus Button: Sets the auto back focus mechanism. Press the button once to center the auto back focus mechanism and to fully open the iris. Press and hold the button for three seconds to start the auto back focus mechanism and to focus the camera.
NTSC/PAL Button: Toggles the service connector between NTSC and PAL formats. The default setting is NTSC.
PRODUCT LABEL
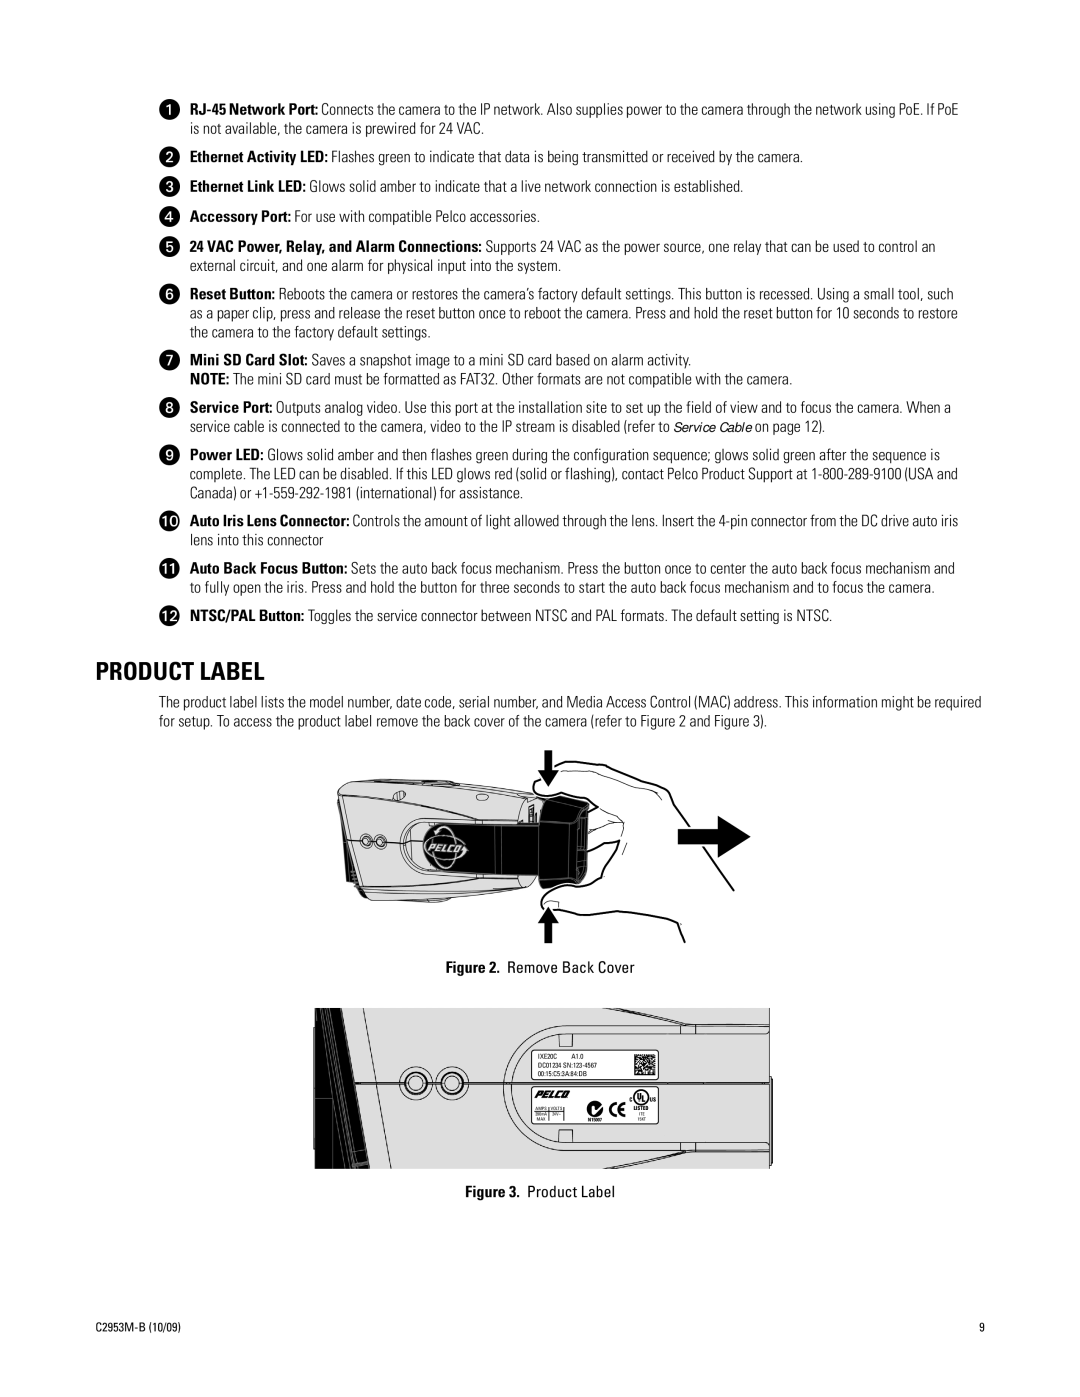
The product label lists the model number, date code, serial number, and Media Access Control (MAC) address. This information might be required for setup. To access the product label remove the back cover of the camera (refer to Figure 2 and Figure 3).
Figure 2. Remove Back Cover
IXE20C A1.0
DC01234
AMPS VOLTS
390mA 24V~
MAX
C ![]() US
US
LISTED
ITE
N1500715KT
Figure 3. Product Label
9 |