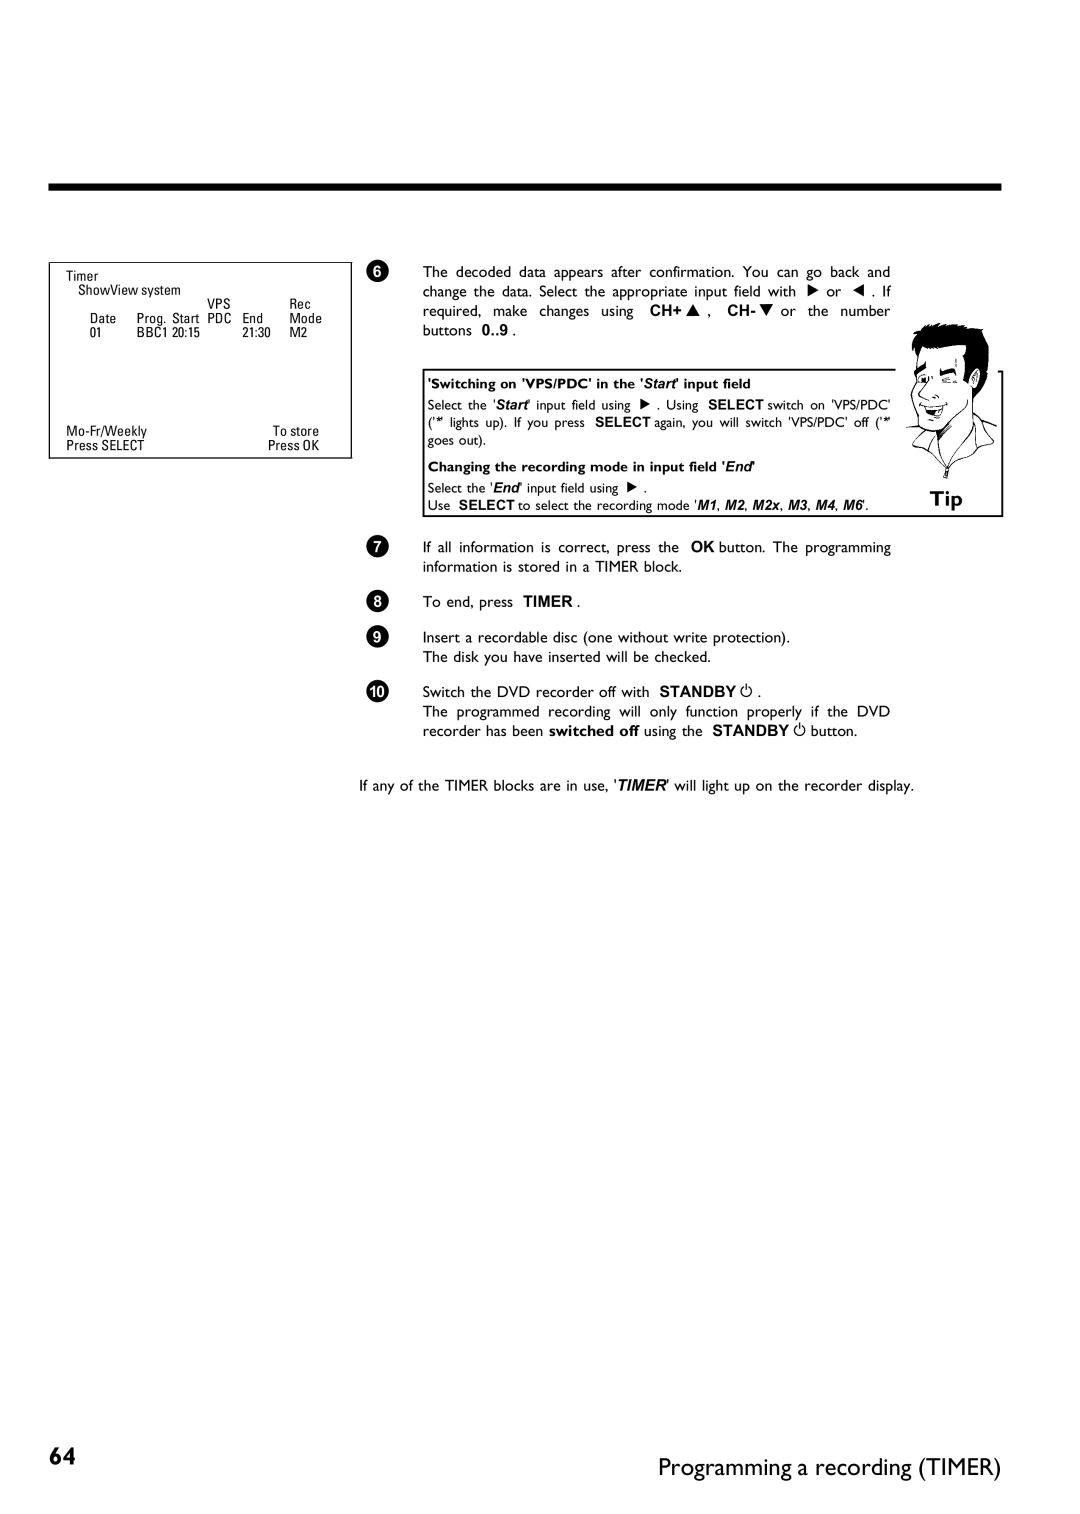
Timer |
|
|
|
ShowView system |
|
| |
| VPS |
| Rec |
Date | Prog. Start PDC | End | Mode |
01 | BBC1 20:15 | 21:30 | M2 |
To store | |
Press SELECT | Press OK |
6The decoded data appears after confirmation. You can go back and change the data. Select the appropriate input field with C or D . If required, make changes using CH+ A , CH- B or the number buttons 0..9 .
'Switching on 'VPS/PDC' in the 'Start' input field
Select the 'Start' input field using C . Using SELECT switch on 'VPS/PDC' ('*' lights up). If you press SELECT again, you will switch 'VPS/PDC' off ('*' goes out).
Changing the recording mode in input field 'End' |
|
Select the 'End' input field using C . | Tip |
Use SELECT to select the recording mode 'M1, M2, M2x, M3, M4, M6'. |
7If all information is correct, press the OK button. The programming information is stored in a TIMER block.
8To end, press TIMER .
9Insert a recordable disc (one without write protection). The disk you have inserted will be checked.
0Switch the DVD recorder off with STANDBY m .
The programmed recording will only function properly if the DVD recorder has been switched off using the STANDBY m button.
If any of the TIMER blocks are in use, 'TIMER' will light up on the recorder display.
64 | Programming a recording (TIMER) |
|