Installation
3.If you are mounting the projector on a ceiling: Line up the holes on the Ceiling Mount Plate (included with the projector ceiling mount kit) with those on the bottom of the projector and attachment plate.
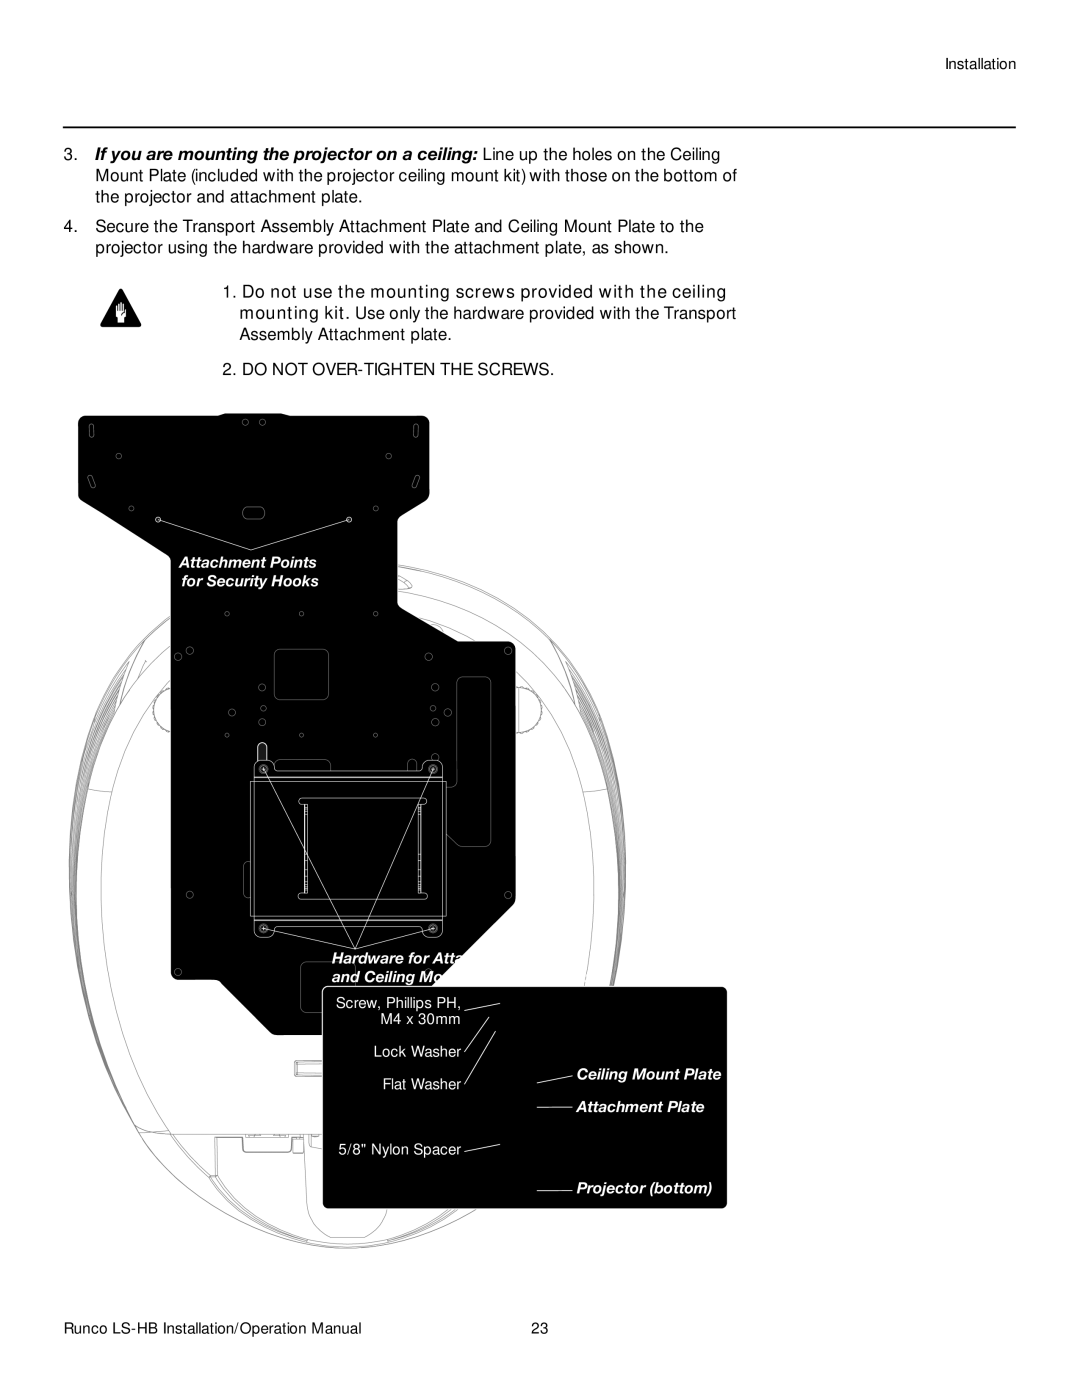
4.Secure the Transport Assembly Attachment Plate and Ceiling Mount Plate to the projector using the hardware provided with the attachment plate, as shown.
1. Do not use the mounting screws provided with the ceiling Caution mounting kit. Use only the hardware provided with the Transport
Assembly Attachment plate.
2. DO NOT OVER-TIGHTEN THE SCREWS.
Attachment Points for Security Hooks
Hardware for Attachment Plate and Ceiling Mount Plate (4 Places):
Screw, Phillips PH, M4 x 30mm
Lock Washer
Flat Washer
5/8" Nylon Spacer
Ceiling Mount Plate
Attachment Plate
Projector (bottom)
Runco | 23 |