Installation
1.Use the Height/Pitch Adjustment Screws (3) and Washers (2) to attach the Lens Mounting Bracket (5) to the Anamorphic Lens (1).
2.Remove the nut and rubber collar from each Swell Latch Assembly (4).
3.Secure the lens (with the mounting bracket attached) to the Lens Base Plate (6) using the swell latches.
Tip | To avoid clipping the corners of the image, position the anamorphic |
lens as close as possible to the primary lens. |
Adjusting the Lens Height and Angle:
1.Project a white field on the screen.
2.Loosen the four Height/Pitch Adjustment Screws just enough to allow vertical movement of the lens assembly.
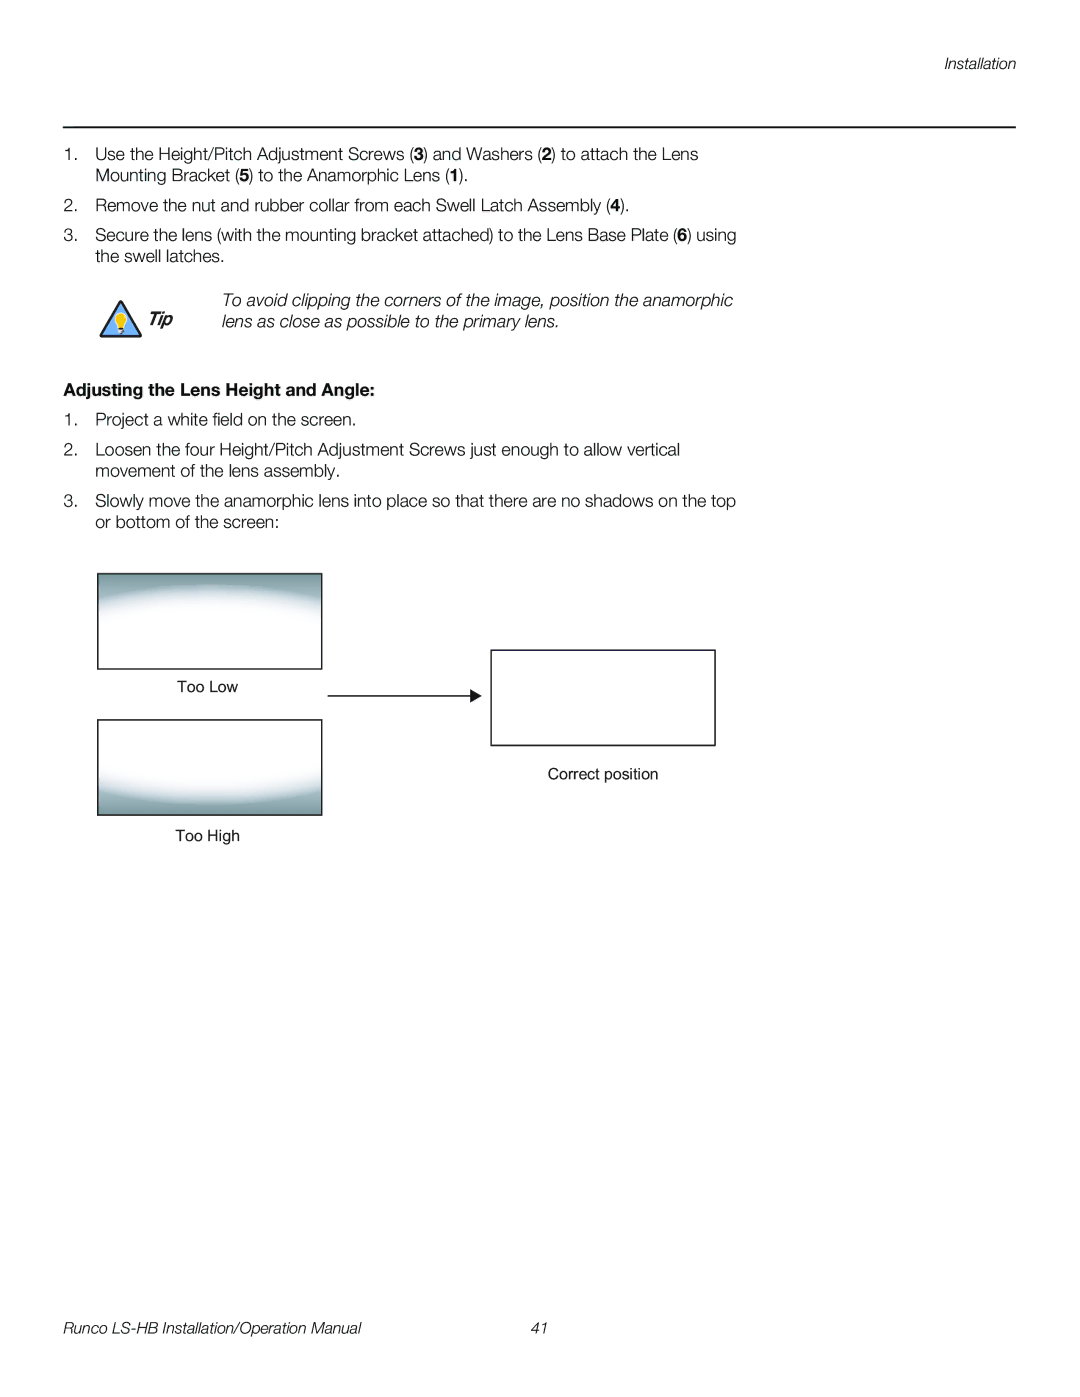
3.Slowly move the anamorphic lens into place so that there are no shadows on the top or bottom of the screen:
Too Low
Correct position
Too High
Runco | 41 |