3.7
Turning on the Power
3.8
Primary Lens Adjustments
1. Turn on your source components.
ON
2. Press the ON l button on the remote control to turn on the
3. When the projector is ready for use, the LED turns off.
The
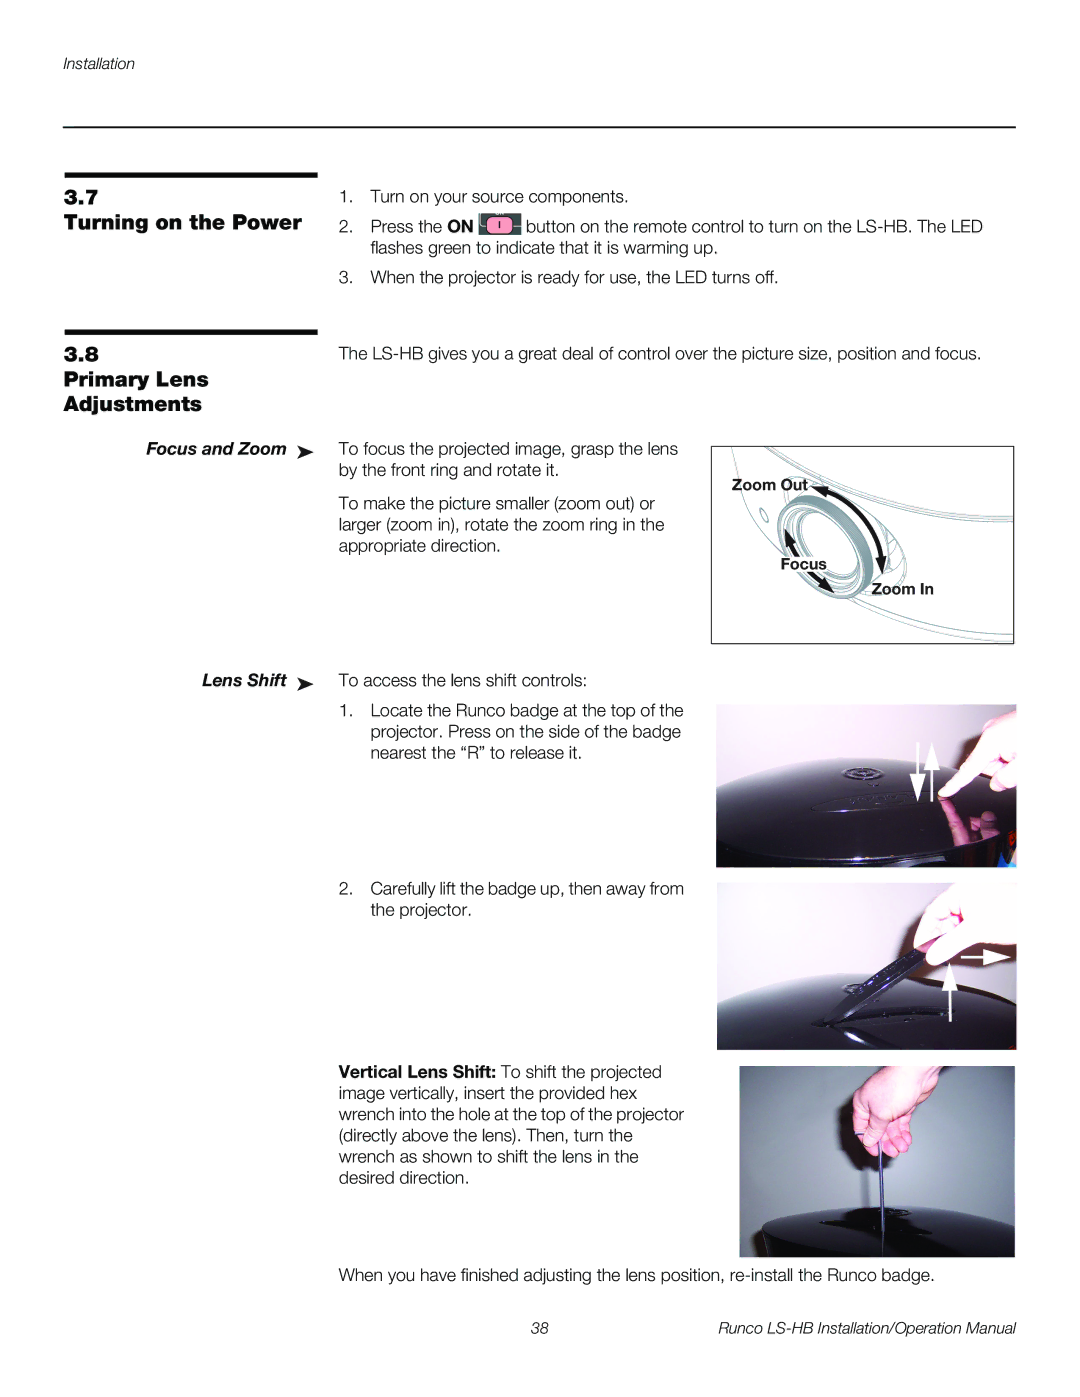
Focus and Zoom ➤ To focus the projected image, grasp the lens by the front ring and rotate it.
To make the picture smaller (zoom out) or larger (zoom in), rotate the zoom ring in the appropriate direction.
Lens Shift ➤ To access the lens shift controls:
1.Locate the Runco badge at the top of the projector. Press on the side of the badge nearest the “R” to release it.
2.Carefully lift the badge up, then away from the projector.
Vertical Lens Shift: To shift the projected image vertically, insert the provided hex wrench into the hole at the top of the projector (directly above the lens). Then, turn the wrench as shown to shift the lens in the desired direction.
Zoom Out
Focus 


 Zoom In
When you have finished adjusting the lens position,
38 | Runco |