Loading paper in the multi-purpose tray
The
Tips on using the multi-purpose tray
•Load only one size of print media at a time in the
•To prevent paper jams, do not add paper when there is still paper in the
•Print media should be loaded face down with the top edge going into the
•Always load only the specified print media to avoid paper jams and print quality problems. (See "Selecting print media" on page 33.)
•Flatten any curl on postcards, envelopes, and labels before loading them into the
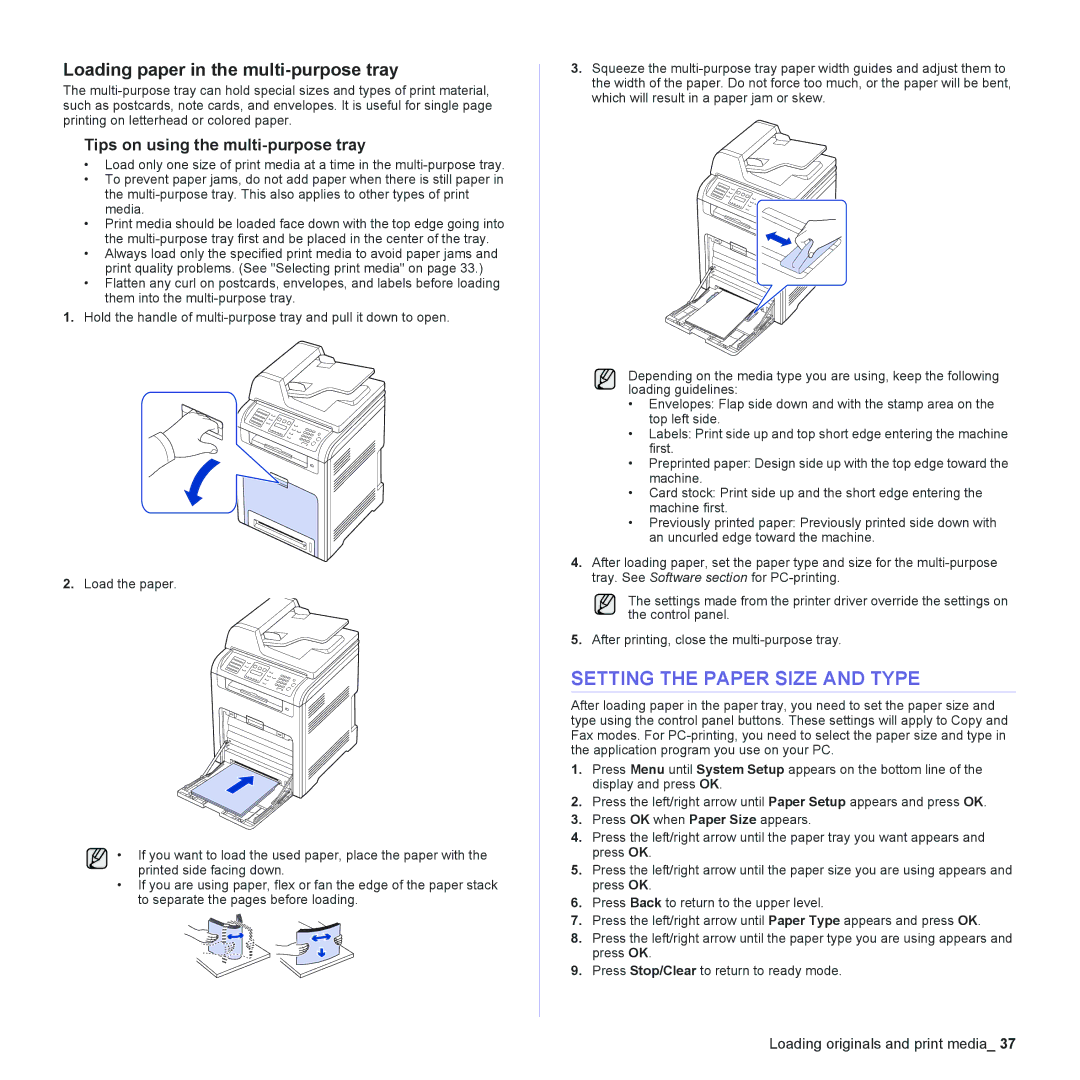
1.Hold the handle of
2.Load the paper.
• If you want to load the used paper, place the paper with the printed side facing down.
•If you are using paper, flex or fan the edge of the paper stack to separate the pages before loading.
3.Squeeze the
Depending on the media type you are using, keep the following loading guidelines:
•Envelopes: Flap side down and with the stamp area on the top left side.
•Labels: Print side up and top short edge entering the machine first.
•Preprinted paper: Design side up with the top edge toward the machine.
•Card stock: Print side up and the short edge entering the machine first.
•Previously printed paper: Previously printed side down with an uncurled edge toward the machine.
4.After loading paper, set the paper type and size for the
The settings made from the printer driver override the settings on the control panel.
5.After printing, close the
SETTING THE PAPER SIZE AND TYPE
After loading paper in the paper tray, you need to set the paper size and type using the control panel buttons. These settings will apply to Copy and Fax modes. For
1.Press Menu until System Setup appears on the bottom line of the display and press OK.
2.Press the left/right arrow until Paper Setup appears and press OK.
3.Press OK when Paper Size appears.
4.Press the left/right arrow until the paper tray you want appears and press OK.
5.Press the left/right arrow until the paper size you are using appears and press OK.
6.Press Back to return to the upper level.
7.Press the left/right arrow until Paper Type appears and press OK.
8.Press the left/right arrow until the paper type you are using appears and press OK.
9.Press Stop/Clear to return to ready mode.
