3.Grasp the handles on the toner cartridge and pull to remove the cartridge from the machine.
When you open the front cover, be careful not to touch the underneath of the control panel (the lower part of the fuser unit). The temperature of the fuser unit might be high and could damage your skin.
When you open the front cover and work inside the machine, it is highly recommend that you remove the paper transfer belt first. Because the work you do could contaminate the paper transfer belt.
4.Press the green release handle to release the paper transfer belt. Holding the handle on the paper transfer belt, lift it out of the machine.
5.With a dry
If toner gets on your clothing, wipe it off with a dry cloth and wash it in cold water. Hot water sets toner into fabric.
6.Locate the long strip of glass (LSU) inside the cartridge compartment, and gently swab the glass to see if dirt turns the white cotten black.
7.Reinstall all the compartments into the machine, and close the front cover.
If the front cover is not completely closed, the machine will not operate.
8.Plug in the power cord and turn the machine on
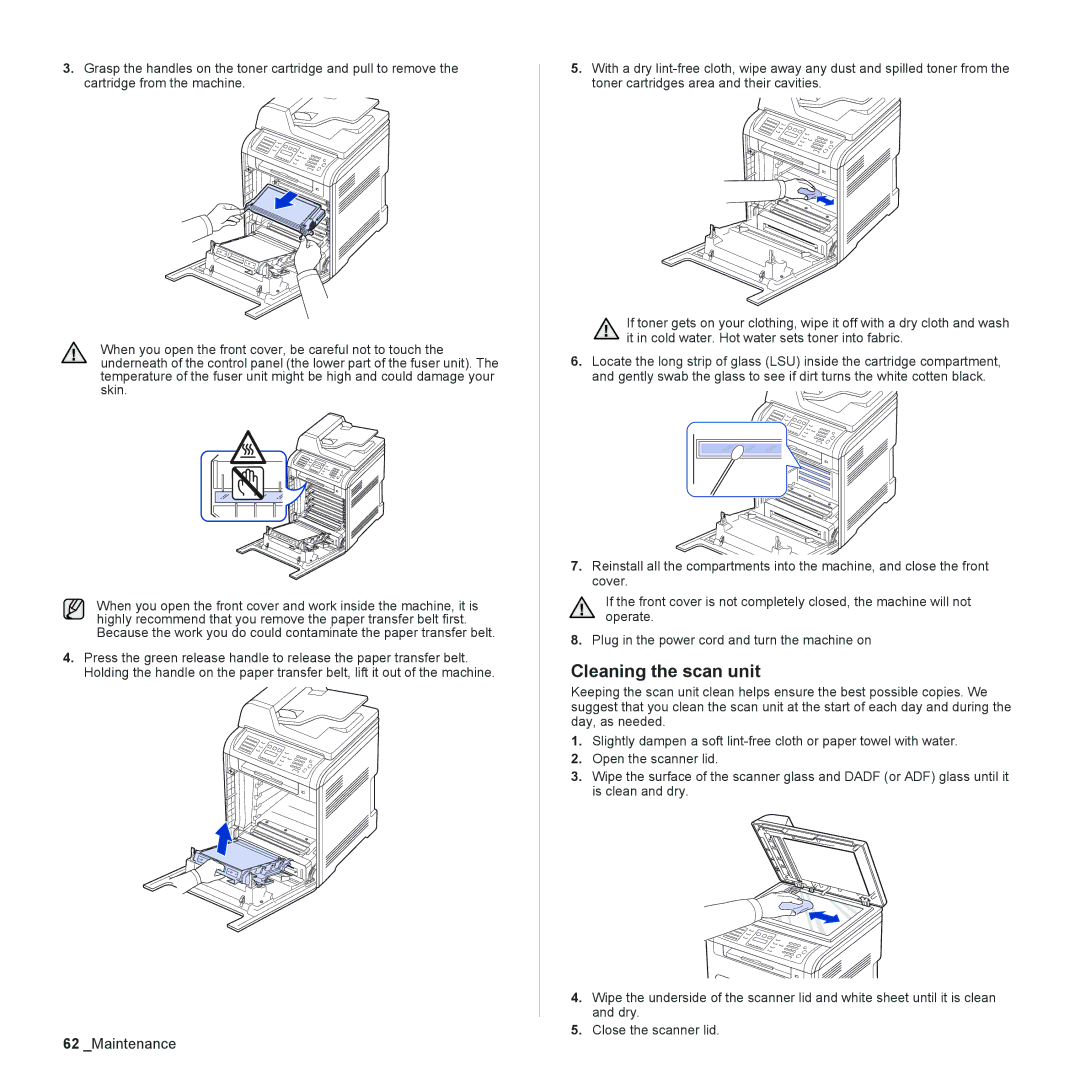
Cleaning the scan unit
Keeping the scan unit clean helps ensure the best possible copies. We suggest that you clean the scan unit at the start of each day and during the day, as needed.
1.Slightly dampen a soft
2.Open the scanner lid.
3.Wipe the surface of the scanner glass and DADF (or ADF) glass until it is clean and dry.
4.Wipe the underside of the scanner lid and white sheet until it is clean and dry.
5.Close the scanner lid.
62_Maintenance