CLEARING PAPER JAMS
When a paper jam occurs, the warning message appears on the display screen. Refer to the table below to locate and clear the paper jam.
MESSAGE | LOCATION OF JAM | GO TO |
|
|
|
MP Tray | In the multi purpose tray | Page 72 |
Paper Jam 0 |
|
|
Tray 2 | In the optional tray | Page 75 |
Paper jam 0 |
|
|
Paper Jam 0 | In the paper feed area or | Page 71, Page 73 |
Open/Close Door | inside the machine |
|
Paper Jam 1 | Inside the machine | Page 71, Page 73 |
Open/Close Door |
|
|
Paper Jam 2 | Inside the machine or in | Page 71, Page 73 |
Check Inside | the fuser area |
|
Reverse Jam 0 | In the fuser area or in the | Page 71, Page 73 |
Check Inside | cover of reverse unit area |
|
Reverse Jam 1 | In the rear cover or in the | Page 71, Page 74 |
Check Inside | cover of reverse unit area |
|
Remove Paper | Inside rear cover | Page 74 |
in Rear Cover |
|
|
Duplex Jam 0 | Inside the machine | Page 71 |
Check Inside |
|
|
Duplex Jam 1 | In the paper feed area or | Page 71, Page 73 |
Open/Close Door | inside the machine |
|
|
|
|
Some messages may not appear in the display depending on options or models.
To avoid tearing the paper, pull the jammed paper out gently and slowly. Follow the instructions in the following sections to clear the jam.
In the paper feed area
If paper is jammed in the paper feed area, follow the next steps to release the jammed paper.
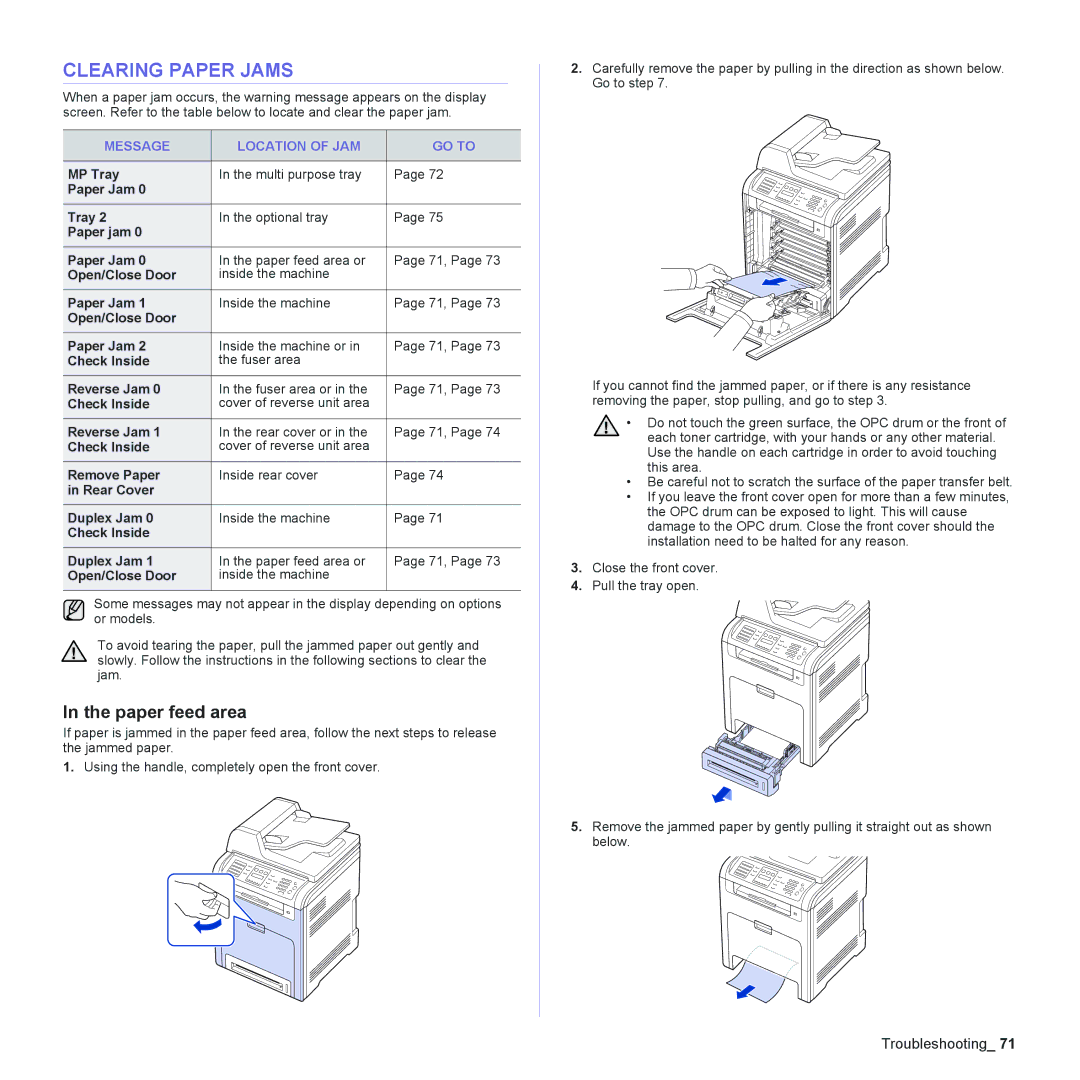
1.Using the handle, completely open the front cover.
2.Carefully remove the paper by pulling in the direction as shown below. Go to step 7.
If you cannot find the jammed paper, or if there is any resistance removing the paper, stop pulling, and go to step 3.
•Do not touch the green surface, the OPC drum or the front of each toner cartridge, with your hands or any other material. Use the handle on each cartridge in order to avoid touching this area.
•Be careful not to scratch the surface of the paper transfer belt.
•If you leave the front cover open for more than a few minutes, the OPC drum can be exposed to light. This will cause damage to the OPC drum. Close the front cover should the installation need to be halted for any reason.
3.Close the front cover.
4. Pull the tray open.
5.Remove the jammed paper by gently pulling it straight out as shown below.
Troubleshooting_ 71