The numbers you can enter as follows:
| HEXADECIMAL | ALPHANUMERIC |
|
|
|
10 digits | 5 characters | |
|
|
|
26 digits | 13 characters | |
|
|
|
7.When you have finished, press Stop/Clear to return to ready mode.
USING THE HARD DISK
Installing the hard disk allows the data from your computer to be sent to the print queue of the printer hard disk. This decreases the workload of the computer. You can also use various print features, such as storing a job in the hard disk, proofing a job, and printing private documents.
Installing the hard disk
For order information, see "Accessories" on page 89. Review the precautions on page 91.
1.Turn the machine off and unplug all cables from the machine.
2.Release the screws and remove the rear cover.
3.Open the control board cover. Release the screws, then lift up the cover slightly and pull the cover to the right.
1 control board cover
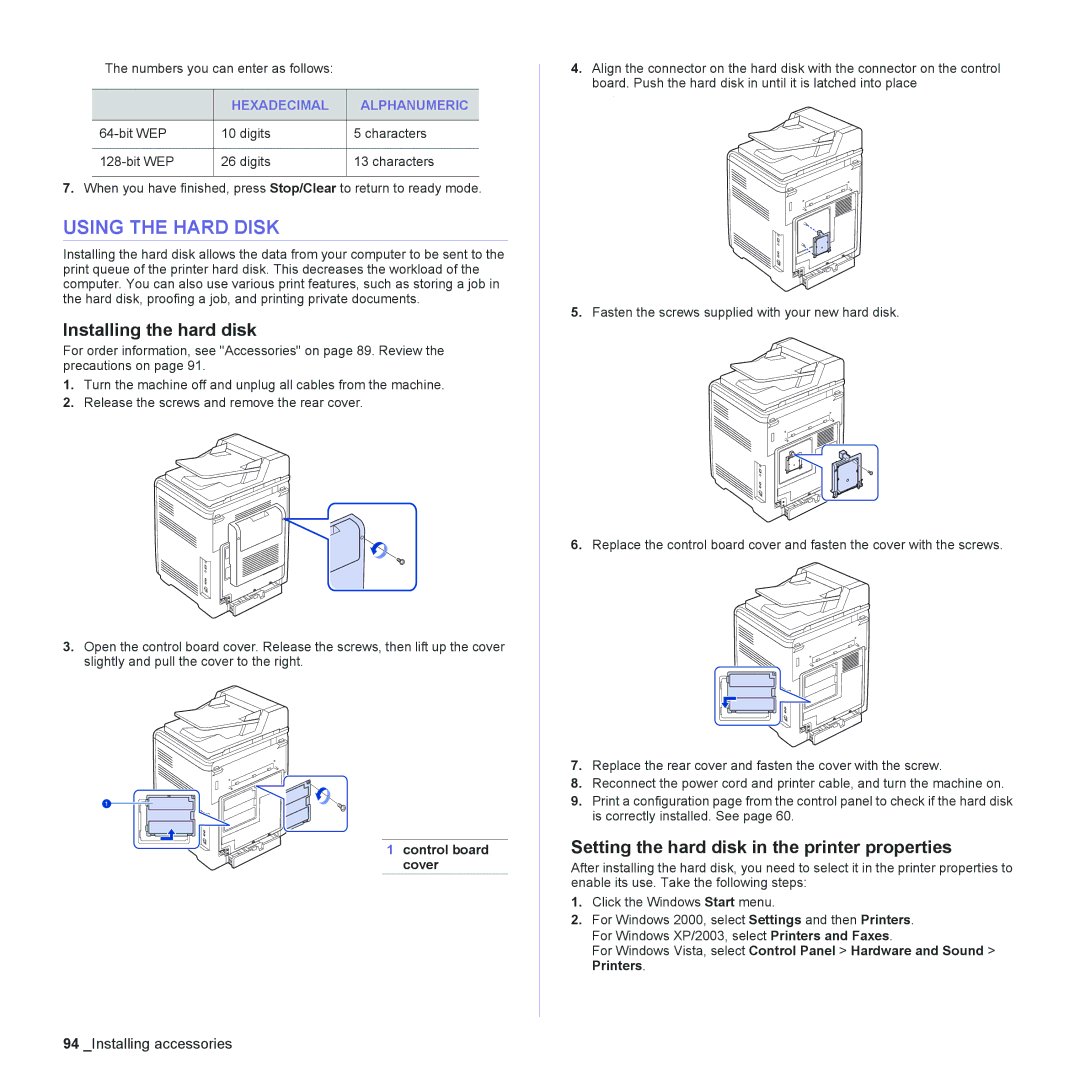
4.Align the connector on the hard disk with the connector on the control
board. Push the hard disk in until it is latched into place
.
5.Fasten the screws supplied with your new hard disk.
6.Replace the control board cover and fasten the cover with the screws.
7.Replace the rear cover and fasten the cover with the screw.
8.Reconnect the power cord and printer cable, and turn the machine on.
9.Print a configuration page from the control panel to check if the hard disk is correctly installed. See page 60.
Setting the hard disk in the printer properties
After installing the hard disk, you need to select it in the printer properties to enable its use. Take the following steps:
1.Click the Windows Start menu.
2.For Windows 2000, select Settings and then Printers. For Windows XP/2003, select Printers and Faxes.
For Windows Vista, select Control Panel > Hardware and Sound > Printers.