I ENGLISH I
Preparation
Lithium Batterv installation for the internal Clock
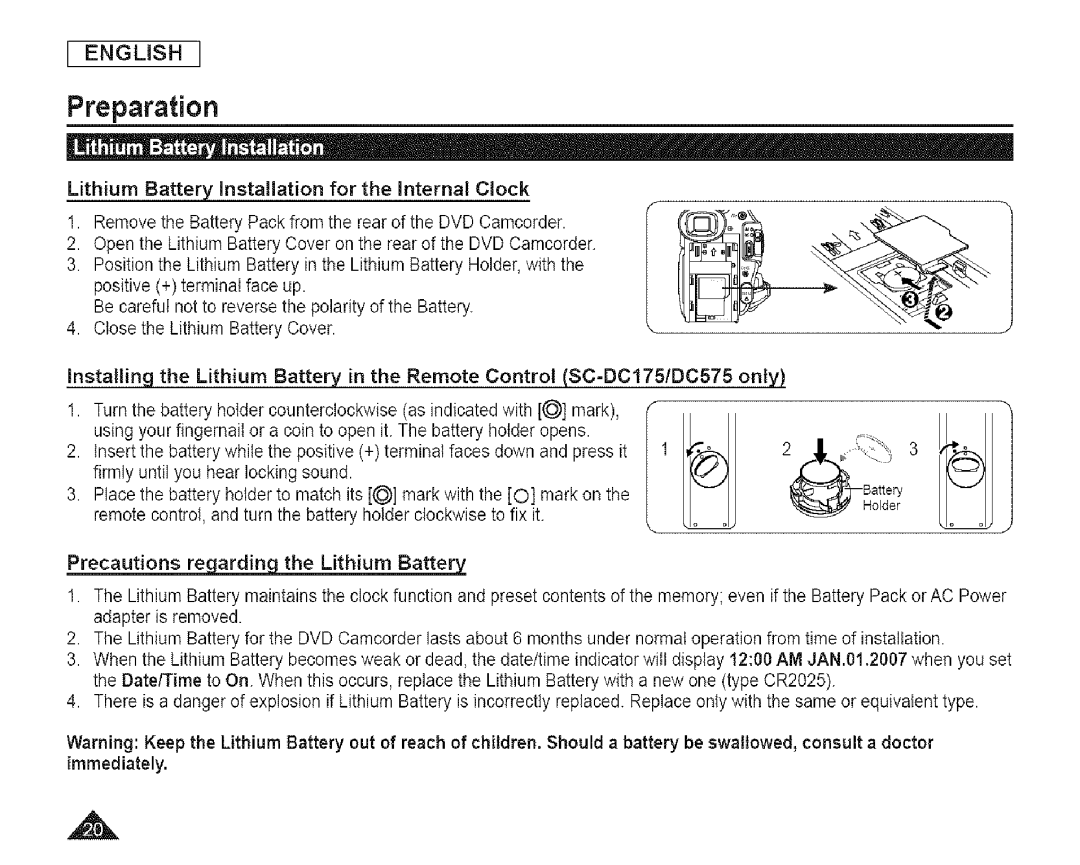
1.Remove the Battery Pack from the rear of the DVD Camcorder.
2.Open the Lithium Battery Cover on the rear of the DVD Camcorder.
3.Position the Lithium Battery in the Lithium Battery Holder, with the positive (+) terminal face up.
Be careful not to reverse the polarity of the Battery.
4.Close the Lithium Battery Cover.
Installing the Lithium Battery in the Remote Control
| using your fingernail or a coin to open it. The battery holder opens. |
|
| |
2. | insert the | battery while the positive (+) terminai faces down and press it | 1 | 2 _ _ : : 3 |
| firmly until you hear locking sound. |
|
| |
3. | Place the | battery holder to match its [(_] mark with the [O] mark on the |
| Battery |
| remote control, and turn the battery holder clockwise to fix it. |
| Holder | |
Precautions re ardin the Lithium Battery
1.The Lithium Battery maintains the clock function and preset contents of the memory; even if the Battery Pack or AC Power adapter is removed.
2.The Lithium Battery for the DVD Camcorder lasts about 6 months under normal operation from time of installation.
3.When the Lithium Battery becomes weak or dead, the date/time indicator will display 12:00 AM JAN.01.2007 when you set the Date/Time to On. When this occurs, replace the Lithium Battery with a new one (type CR2025).
4.There is a danger of explosion if Lithium Battery is incorrectly replaced. Replace only with the same or equivalent type.
Warning: Keep the Lithium Battery out of reach of children. Should a battery be swallowed, consult a doctor immediately.
