Caméscope vidéo numérique
Ključne Funkcije Vašega Novega MINIDV-KAMKORDERJA
Ključne funkcije vašega miniDV-kamkorderja
Consignes Previdnostni ukrepi
Avertissements de sécurité varnostna opozorila
Kaj pomenijo sličice in znaki v tem
Dans ce manuel dutilisation Uporabniškem priročniku
Opombe in varnostna navodila
Remarques et instructions de sécurité
Remarques SUR LE Caméscope
Réparation ET Pièces DE Rechange
Servisiranje in Nadomestni Deli
Opombe Glede Kamkorderja
Sommaire Vsebina
Enregistrement
Réglage Initial Réglage DU Menu Affichage
DE Base
Avancé
Lecture
Sommaire
Predvajanje
Povezava
Depannage
Entretien
Vzdrževanje
Transfert DE Données Ieee
Spoznajte svoj miniDV-kamkorder
Accessoires Livrés Avec Votre Caméscope MINI-DV
Familiarisez-vous avec votre caméscope mini-DV
KAJ JE Priloženo MINIDV-KAMKORDERJU
VUE Avant Gauche Pogled OD Spredaj in Z Leve
Interrupteur de sélection CARD-TAPE VP-D395i uniquement
VUE Latérale Gauche
Pogled Z Leve Strani
VUE Supérieure Droite Pogled Z Desne Strani in OD Zgoraj
Združljive pomnilniške kartice največ 2 GB Priključki
VUE Inférieure Arrière
Pogled OD Zadaj in OD Spodaj
Uporaba Daljinskega Upravljalnika Samo ZA VP-D392i/D395i
Utilisation DE LA Télécommande VP-D392i/D395i Uniquement
Gumb za predvajanje Play
+ Gumb smeri
Pašček ZA Roko in Pokrovček Objektiva
Préparation Priprava
Insertion DE LA Pile DE Type Bouton
Fixation DU Filtre À Noyau DE Ferrite
Pritrjevanje Glavnega Filtra
Namestitev Baterije V Obliki Gumba
Uporaba Baterije
Préparation
Insertion DU Bloc DE Batteries
IA-BP80WA
Témoin de charge
Indikator napolnjenosti
Gestion de la batterie
Affichage du niveau de charge de la batterie
Koliko časa boste lahko neprekinjeno snemali, je odvisno od
Prikaz napolnjenosti baterije
Branchement SUR UNE Source Dalimentation
Priključitev NA VIR Napajanja
Nastavljanje načinov delovanja
Priprava
Caméscope Mini-DV
Réglage des modes de fonctionnement
OSD in Player Mode
OSD in Camera Mode
No Tape
Art
OSD in M.Cam Mode
De fichier du film Réglage du volume*
OSD in M.Player Mode
No Memory Card
Uporaba Gumba ZA Prikaz
Utilisation DU Bouton Affichage
Preklop načina prikaza informacij
Restant
Gestion DES Menus Rapides À Laide DU Pavé
Utilisation DU Pavé
Uporaba Krmilne Paličice
Fich
Gestion DES Menus Rapides À Laide DU Pavé
Pavé
Réglage DE Lhorloge PARAM. Horloge Nastavitev URE Clock SET
Réglage initial Začetna nastavitev Réglage du menu Système
Nastavitev Brezžičnega Daljinskega Upravljanja
Réglage initial réglage du menu Système
Réglage DU Signal Sonore Signal Sonore
Nastavitev Piska Beep Sound
Appuyez sur le bouton Menu La liste des menus apparaît
Réglage DU SON DE Lobturateur SON Obturateur
Nastavitev Zvoka Zaklopa Shutter Sound
Modes CameraCam/Player/M.Cam/M.Player Cam/M.Player. stran
Sélectionner DemonstrationDémonstration
Nastavitev Pomožnih ČRT Guideline
Réglage initial Začetna nastavitev Réglage du menu Affichage
Réglage DES Repére Repére
Réglage DE Lécran LCD Luminosité LCD/COULEUR LCD
Prilagajanje Zaslona LCD LCD BRIGHT/LCD Colour
Affichage DE LA Date ET DE Lheure DATE/HEURE
Prikaz DATUMA/URE DATE/TIME
Strani
Osnovno snemanje
Enregistrement de base
Sur le bouton Début/fin denregistrement
Prvi Posnetek
Konec snemanja
Mode CameraCam
Pour annuler le mode Easy Q Preklic načina Easy Q
Enregistrement de base
Za začetek/konec snemanja
Pour effectuer un zoom avant
Zoom Avant ET Arrière Primik in Odmik
Primik
Pour effectuer un zoom arrière
Vrednost
CameraCam et Player.
Boste po predvajanju želeli vrniti
Ne gênez pas le capteur de votre
La télécommande et le caméscope
Pritisnite gumb Mode in nastavite način Camera
Ogled in Iskanje Posnetka
Recherche dun enregistrement pavé
Iskanje posnetkov krmilna paličica
Visualisation ET Recherche DUN Enregistrement
Postopno Pojavljanje in Izginjanje
Activation ET Désactivation DU Fondu
SAMODEJNO/ROČNO Ostrenje
Mise AU Point AUTOMATIQUE/MANUELLE
Auto Focus
Manual Focus
Nastavitev osvetlitve
Hitrost Zaklopa in Osvetlitev
Nastavitev hitrosti zaklopa
Napredno snemanje
Enregistrement avancé
Funkcija snemanja deluje v načinih Camera in Player. stran
Pritisnite gumb Menu Prikazan bo seznam
Preprečevanje Zvoka Šuma Vetra Windcut Plus
Suppression DU Bruit DU Vent Coupe Vent
Premaknite krmilno paličico / gor ali
Ali Auto
Napredno snemanje
Camera Mode CameraCam
Pour sélectionner RecordEnregistrement
Sur OffArrêt
Sur le pavé
La droite
Pritisnite gumb Menu Prikazan bo seznam
Pokažejo se razpoložjive možnosti
Nastavitve Vsebina
Réglage DE LA Fonction PROG. AE
Sommaire
Réglage DE LA Balance DES Blancs BAL. Blancs
Nastavitev Beline White Balance
Ročna nastavitev beline
Enregistrement avancé Napredno snemanje
Réglage de la balance des blancs
Manuellement
Uporaba Vizualnih Učinkov Visual Effect
Application Deffets Visuels
Ustvarjalen videz
Pokažejo se razpoložjive možnosti
BLK&WHT
OffArrêt
Réglage DU Mode Širokozaslonski Način 16
No Tape
Wide169 sur OffArrêt Wide na Off
Funkcija Makrofotografije Macro
Utilisation DE LA Télé Macro Macro
Meni DIS na Off
Meni BLC na Off
Pomoč PRI Protisvetlobi BLC
CameraCam et M.Cam.
Premaknite krmilno paličico
Camera , nato pa pritisnite krmilno paličico ali
1200x , nato pa pritisnite krmilno paličico
Način DIS , se Digital Zoom izklopi
Uporaba Nočnih Barv C.NITE
Utilisation DU Mode Color Nite C.NITE
VP-D392i/D395i Uniquement Samo ZA VP-D392i/D395i
Uporaba Svetlobe Light
Pavé
LightÉclair. sur OffArrêt
Visual EffectEffets visuels, DIS
Appuyez sur le bouton Photo
Vous pouvez enregistrer une photo sur une cassette. Cette
Funkcija je priročna, če želite na kaseto posneti sliko
Mode Player
Lecture Predvajanje
Različne Funkcije V Načinu Predvajanja
Fonctions Disponibles EN Mode Player
Predvajanje nazaj samo za VP-D392i/D395i
Lecture
Lecture arrière VP-D392i/D395i uniquement
Premaknite krmilno paličico dol
Nasnemavanje Zvoka Samo ZA VP-D392i/D395i
Predvajanje Nasnetega Zvoka Audio Select
Stikalo za izbiranje nastavite na Tape Samo za VP-D395i
Effets Sonores Avdio Učinek
Sélectionner OutSortie ou InEntrée , puis
Branchements
Povezava
Lecture Dune Cassette SUR UN Écran DE Télévision
Predvajanje Kasete NA Televizorju
Povezava s televizorjem, ki ima avdio-video vtičnice
Predvajanje kasete Lecture de la cassette
Branchements
TV Display na Off. stran
Ko je kopiranje zaključeno Une fois la copie terminée
Sélection sur Tape
Utilisation DE LA Fonction VOICE+ Uporaba Funkcije VOICE+
Kaseto kamkorderja
Enregistrement copie sur
Une cassette de caméscope
Pour enregistrer à partir dun magnétoscope
Funkcije pomnilniške kartice
Fonctions de la carte mémoire
Insertion dune carte mémoire
Vstavljanje pomnilniške kartice
Video datoteka
Datoteka nastavitve slike
Datoteka fotografije
Zgradba MAP in Datotek NA Pomnilniški Kartici
Format slike
Format dimage
Krmilno palièico
Pour sélectionner File No.Numéro Fichier Palièico
Samo za VP-D395i
Pour visualiser une seule image
Visualisation DE Photos Jpeg Ogled Fotografij Jpeg
Ogled diaprojekcije
Pour visualiser un diaporama
No image
Protect
Message No image !Pas dimage ! saffiche
Ukaz Delete All
Utilisation du pavé
Uporaba krmilne palièice
Brisanje vseh slik naenkrat Une seule fois
VP-D395i uniquement Samo za VP-D395i
Suppression de toutes les images en
Le message All files will be deleted! Do you
Formatage Dune Carte Mémoire Format
Want to format?Ts Fichiers Sont Suppr
Do you want to format? Voulez vous formater? saffiche
Snemanje Videa Format Mpeg NA Pomnilniško Kartico
Enregistrement DE Films Mpeg SUR UNE Carte Mémoire
Enregistrement de films sur une carte mémoire
Shranjevanje videa na pomnilniško kartico
Le son est enregistré au format mono
Pritisnite krmilno palièico
Movie, nato pa pritisnite krmilno palièico
Pred uporabo
Avant de commencer
Pomnilniško Kartico Photo Copy
Samo za VP-D395i
Pred uporabo Avant de commencer
Krmilno palièico dol
Suppression du voyant dimpression
Oznaèevanje Slik ZA Tiskanje Print Mark
Brisanje oznake za tisk
002
PictbridgeTM VP-D395i uniquement
PictbridgeTM Samo za VP-D395i
Connexion à une imprimante
Povezava s tiskalnikom
Možnost tiskanja datuma/ure
Sélection dimages Izbira slik
Tiskanje slik
Impression dimages
Raccordement à un ordinateur
Prenos podatkov Z Ieee
Configuration système
Priklop na osebni raèunalnik
Modeli s pripono i imajo vhod DV IEEE1394/AV analogni
Snemanje s kablom za povezavo DV
Zakljuèek snemanja
DV cable
Uporaba Vmesnika USB
Utilisation DE Linterface USB
French
Sélection DU Périphérique USB Connexion USB
Izbira Naprave USB USB Connect
Pour sélectionner USB ConnectConnexion
ComputerOrdinateur reliez à un
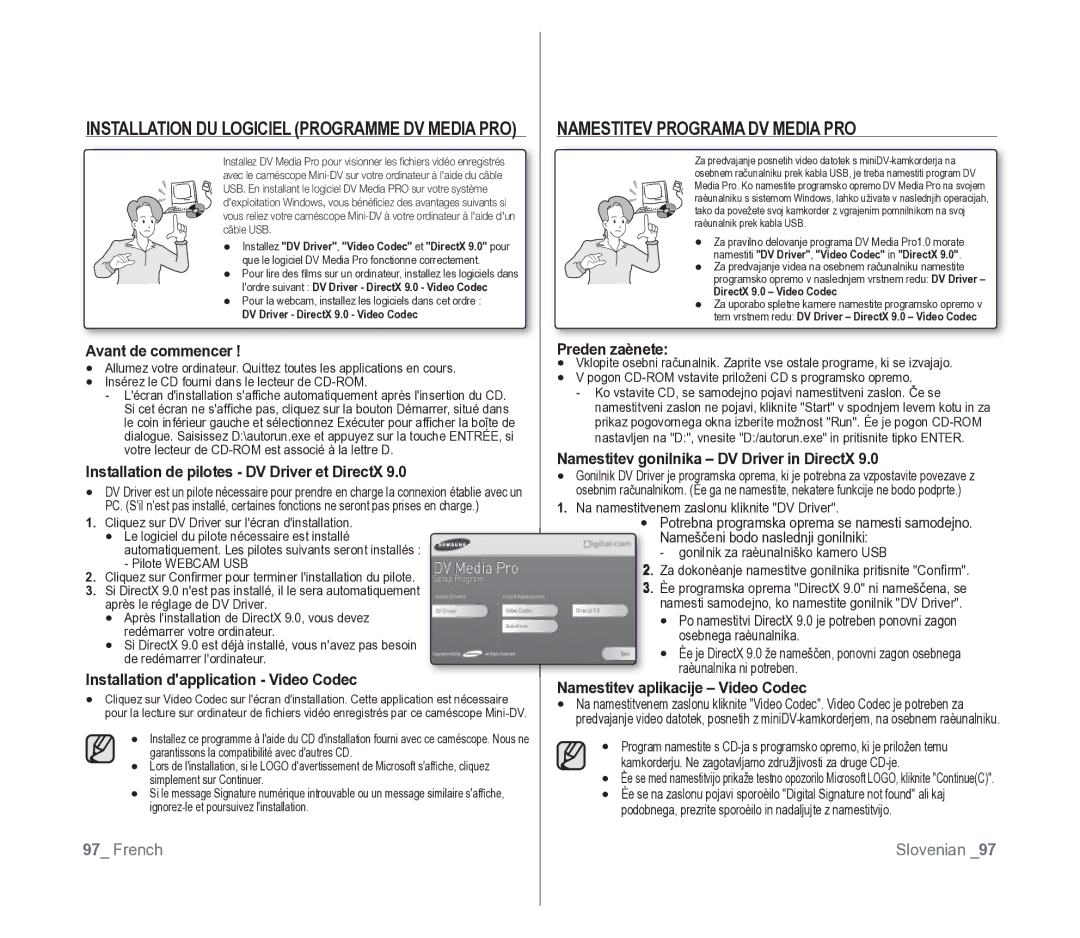
Namestitev Programa DV Media PRO
Installation DU Logiciel Programme DV Media PRO
Priklop NA Osebni Računalnik
Raccordement À UN Ordinateur
Débranchement du câble USB
Utilisation de la fonction de disque amovible
Funkcija deluje samo v načinu Camera. stran
Utilisation de la fonction Webcam
Funkcija spletne kamere
Vzdrževanje
Entretien
Èiščenje in Vzdrževanje Kamkorderja
Nettoyage ET Entretien DU Caméscope
Nettoyage des têtes vidéo
Èiščenje video glav
Codes de couleurs sur un téléviseur
Sources dalimentation
Uporaba MINIDV-KAMKORDERJA V Tujini
Viri napajanja
Odpravljanje težav
Dépannage
Dépannage
Odpravljanje Težavv
Simptom Pojasnilo/rešitev
Condensation due à lhumidité
Kondenzacija
Elementi Menija
Réglage DES Éléments DE Menu
Samo za VP-D391i/D392i/D395i Samo za VP-D392i/D395i
VP-D391i/D392i/D395i uniquement VP-D392i/D395i uniquement
NOM DU Modèle VP-D391i/VP-D3910/VP-D392i
Tehnične podrobnosti
VP-D395i
08 25 08 65 65 € 0,15/Min Fax 01 48 63 06
Soit à vous adresser au revendeur à qui vous lavez acheté
Evropski Garancijski List
„GARANCIJSKI Pogoji
Contactez Samsung world wide
Skladnost s predpisom RoHS
Conforme à la directive RoHS