Unit 5: Troubleshooting
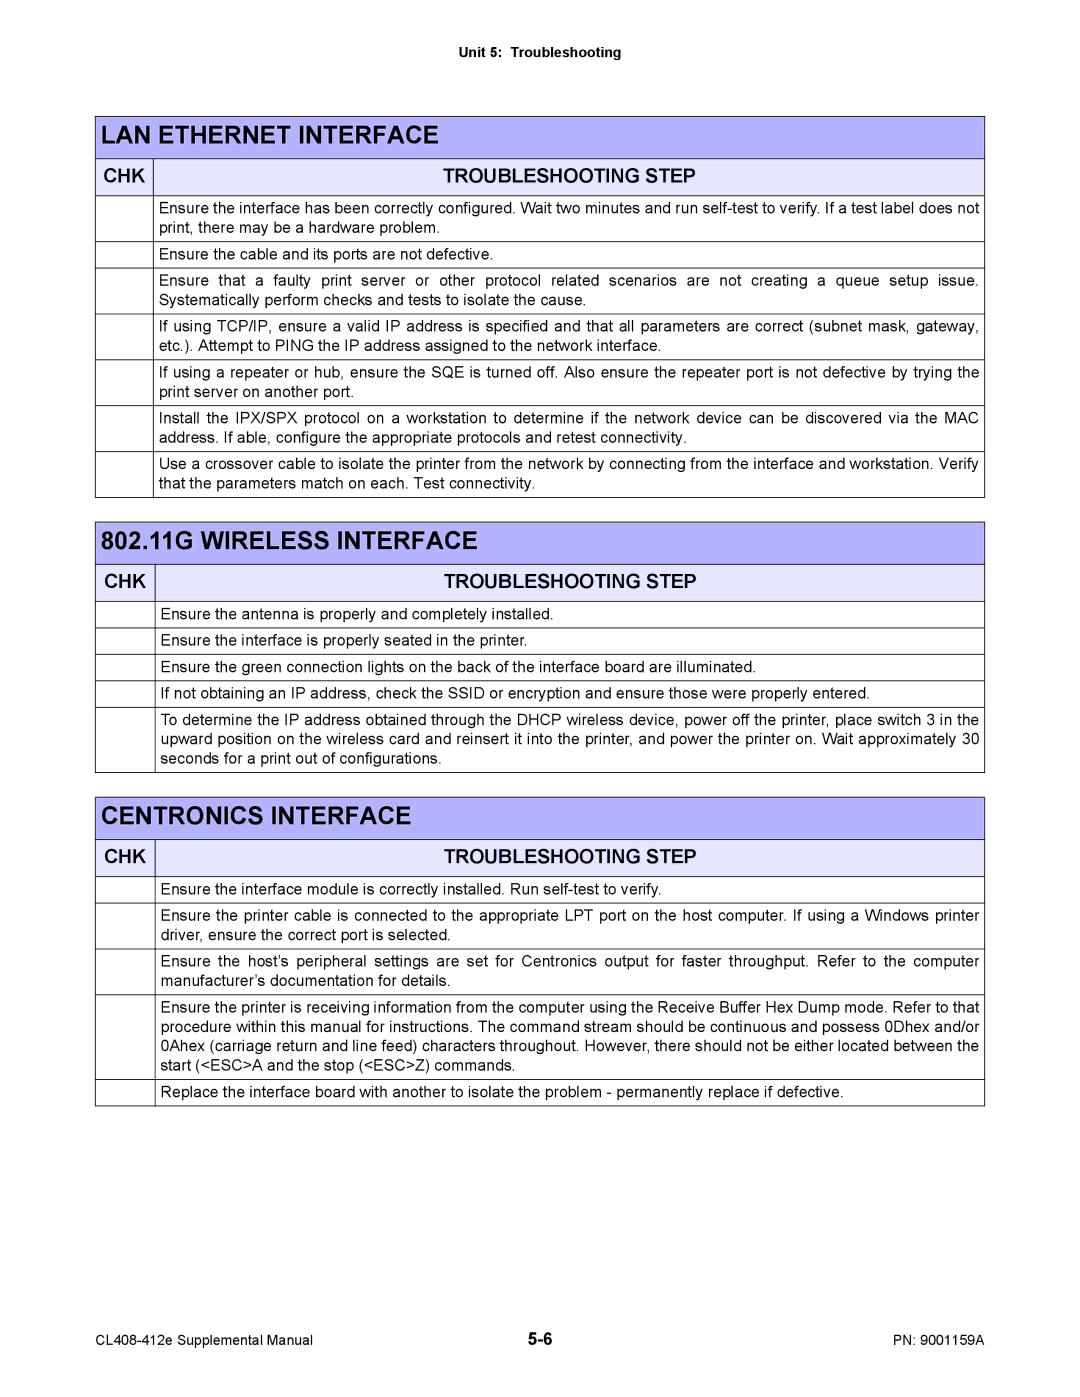
LAN ETHERNET INTERFACE
CHK | TROUBLESHOOTING STEP |
|
|
Ensure the interface has been correctly configured. Wait two minutes and run
Ensure the cable and its ports are not defective.
Ensure that a faulty print server or other protocol related scenarios are not creating a queue setup issue. Systematically perform checks and tests to isolate the cause.
If using TCP/IP, ensure a valid IP address is specified and that all parameters are correct (subnet mask, gateway, etc.). Attempt to PING the IP address assigned to the network interface.
If using a repeater or hub, ensure the SQE is turned off. Also ensure the repeater port is not defective by trying the print server on another port.
Install the IPX/SPX protocol on a workstation to determine if the network device can be discovered via the MAC address. If able, configure the appropriate protocols and retest connectivity.
Use a crossover cable to isolate the printer from the network by connecting from the interface and workstation. Verify that the parameters match on each. Test connectivity.
802.11G WIRELESS INTERFACE
CHK | TROUBLESHOOTING STEP |
|
|
Ensure the antenna is properly and completely installed.
Ensure the interface is properly seated in the printer.
Ensure the green connection lights on the back of the interface board are illuminated.
If not obtaining an IP address, check the SSID or encryption and ensure those were properly entered.
To determine the IP address obtained through the DHCP wireless device, power off the printer, place switch 3 in the upward position on the wireless card and reinsert it into the printer, and power the printer on. Wait approximately 30 seconds for a print out of configurations.
CENTRONICS INTERFACE
CHK | TROUBLESHOOTING STEP |
|
|
Ensure the interface module is correctly installed. Run
Ensure the printer cable is connected to the appropriate LPT port on the host computer. If using a Windows printer driver, ensure the correct port is selected.
Ensure the host’s peripheral settings are set for Centronics output for faster throughput. Refer to the computer manufacturer’s documentation for details.
Ensure the printer is receiving information from the computer using the Receive Buffer Hex Dump mode. Refer to that procedure within this manual for instructions. The command stream should be continuous and possess 0Dhex and/or 0Ahex (carriage return and line feed) characters throughout. However, there should not be either located between the start (<ESC>A and the stop (<ESC>Z) commands.
Replace the interface board with another to isolate the problem - permanently replace if defective.
PN: 9001159A |