GETTING STARTED Part names and functions
PART NAMES AND FUNCTIONS
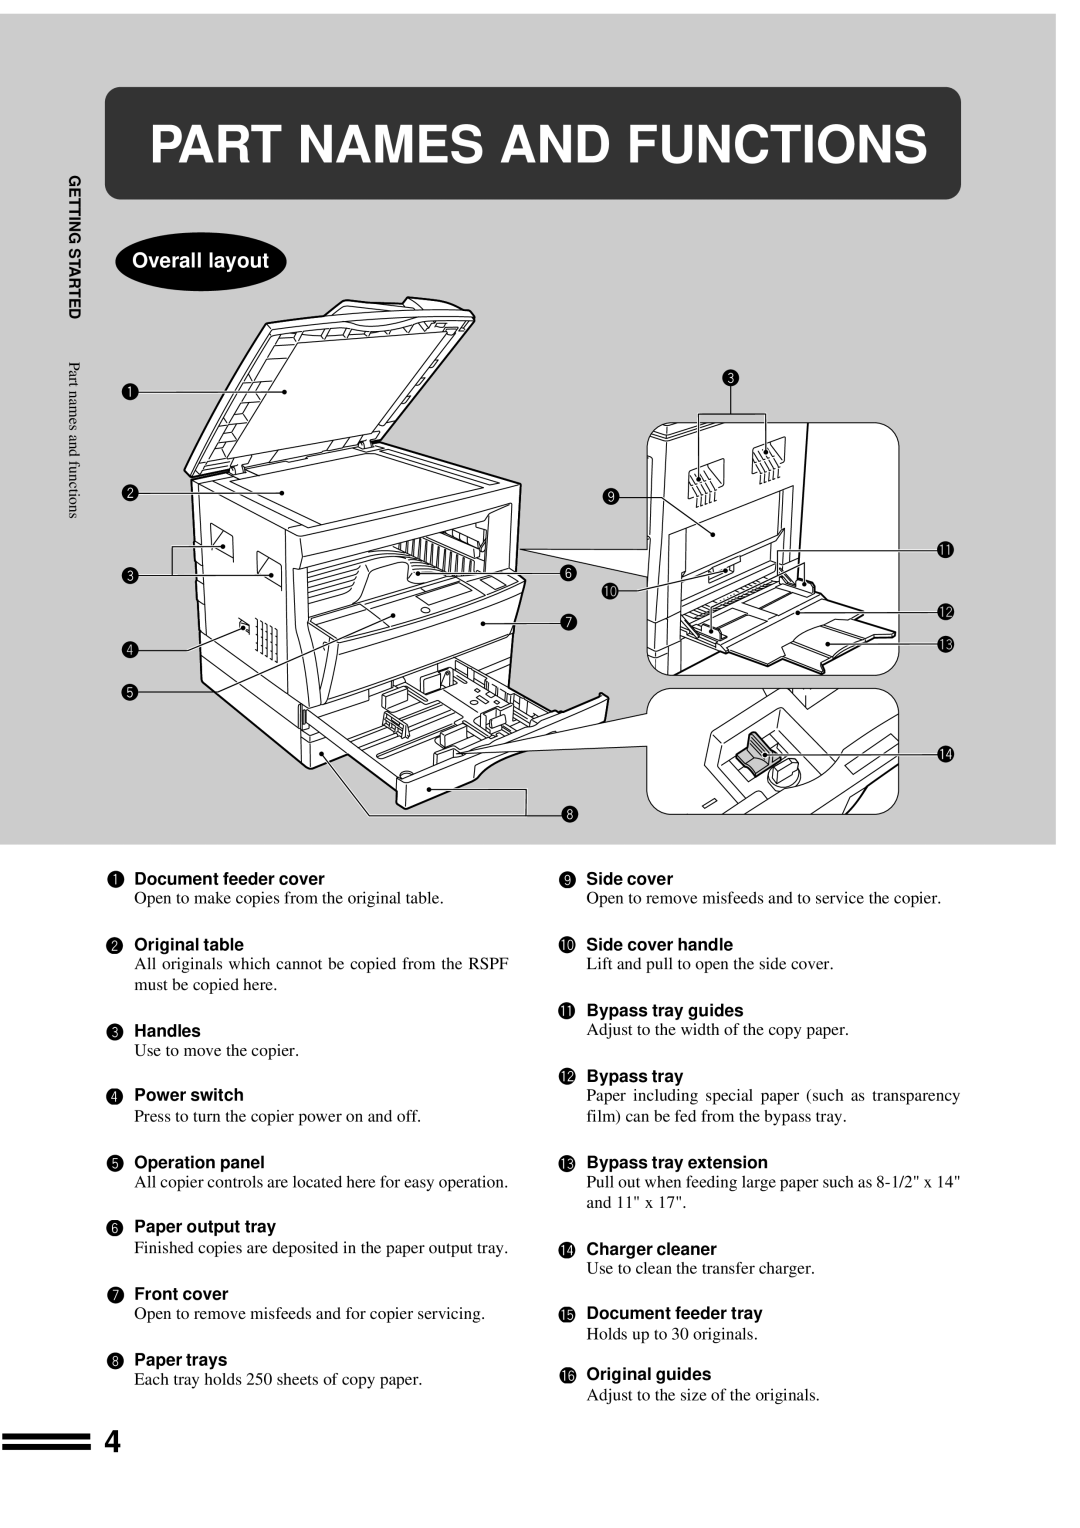
Overall layout
Document feeder cover
Open to make copies from the original table.
Original table
All originals which cannot be copied from the RSPF must be copied here.
Handles
Use to move the copier.
Power switch
Press to turn the copier power on and off.
Operation panel
All copier controls are located here for easy operation.
Paper output tray
Finished copies are deposited in the paper output tray.
Front cover
Open to remove misfeeds and for copier servicing.
Paper trays
Each tray holds 250 sheets of copy paper.
Side cover
Open to remove misfeeds and to service the copier.
Side cover handle
Lift and pull to open the side cover.
Bypass tray guides
Adjust to the width of the copy paper.
Bypass tray
Paper including special paper (such as transparency film) can be fed from the bypass tray.
Bypass tray extension
Pull out when feeding large paper such as
Charger cleaner
Use to clean the transfer charger.
Document feeder tray
Holds up to 30 originals.
Original guides
Adjust to the size of the originals.
4