| Indication | Cause and remedy | Page |
| While pressing the start | Check the toner cartridge and make sure that the | – |
| ( ) key, "64" is displayed. | seal is not still affixed. | |
|
| ||
|
|
|
|
|
|
|
|
|
|
|
|
MISFEED REMOVAL
When the misfeed ( ![]() ) indicator blinks or
) indicator blinks or ![]() blinks in the display, the unit will stop because of a misfeed. When the SPF misfeeds an original sheet, the unit will stop and the SPF misfeed (
blinks in the display, the unit will stop because of a misfeed. When the SPF misfeeds an original sheet, the unit will stop and the SPF misfeed ( ![]() ) indicator will blink, while the misfeed (
) indicator will blink, while the misfeed ( ![]() ) indicator will remain off. For a misfeed of originals in the SPF, see "E: Misfeed in the SPF (Peripheral device)" (p.84).
) indicator will remain off. For a misfeed of originals in the SPF, see "E: Misfeed in the SPF (Peripheral device)" (p.84).
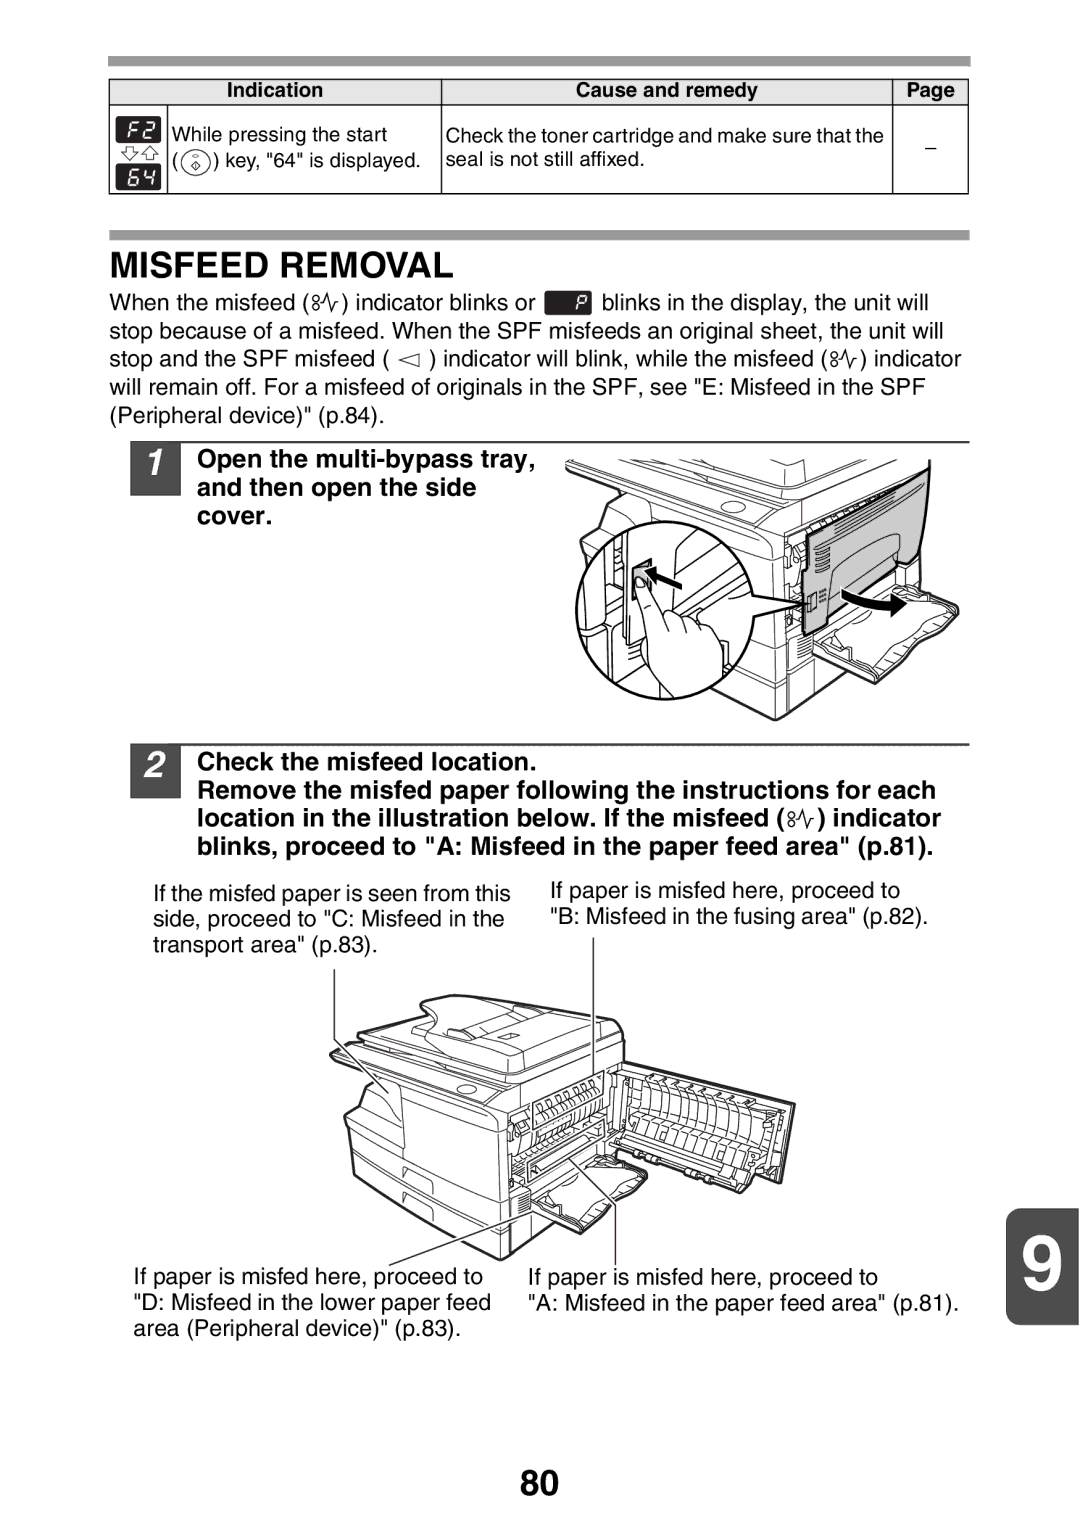
1 Open the
2 Check the misfeed location.
Remove the misfed paper following the instructions for each location in the illustration below. If the misfeed (![]() ) indicator blinks, proceed to "A: Misfeed in the paper feed area" (p.81).
) indicator blinks, proceed to "A: Misfeed in the paper feed area" (p.81).
If the misfed paper is seen from this side, proceed to "C: Misfeed in the transport area" (p.83).
If paper is misfed here, proceed to "B: Misfeed in the fusing area" (p.82).
|
|
| 9 | |
|
|
| ||
If paper is misfed here, proceed to | If paper is misfed here, proceed to | |||
| ||||
"D: Misfeed in the lower paper feed | "A: Misfeed in the paper feed area" (p.81). |
| ||
area (Peripheral device)" (p.83). |
|
| ||
80