
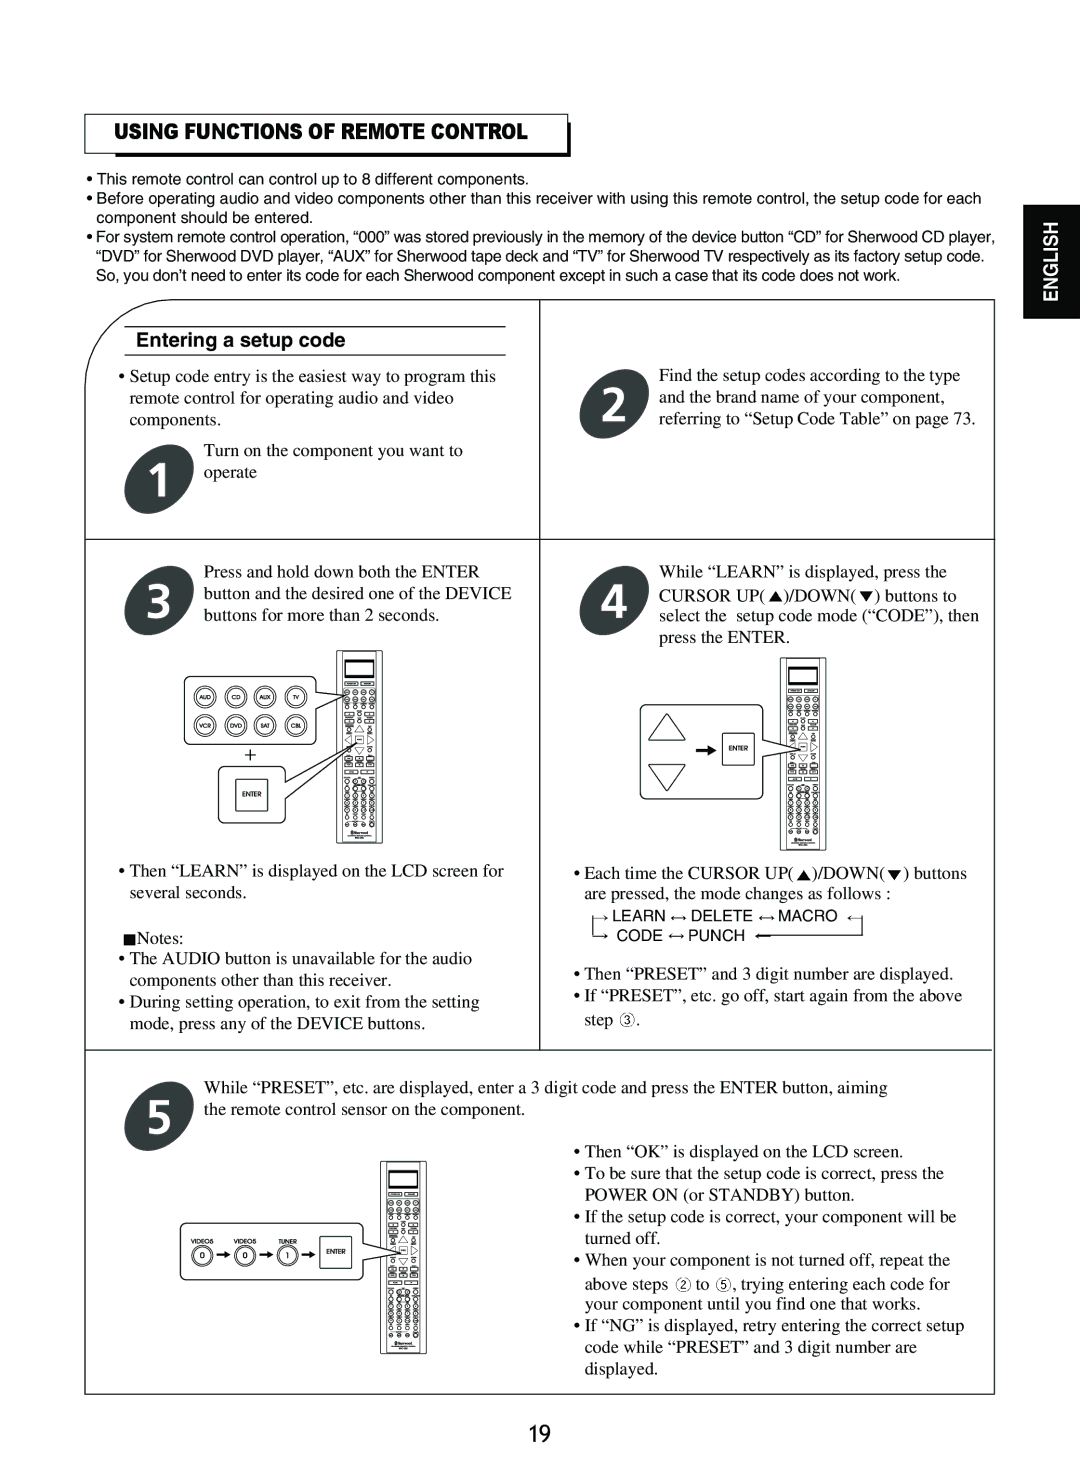
R-865 specifications
The Sherwood R-865 is a remarkable audio receiver that encapsulates the essence of home audio entertainment. Belonging to the renowned Sherwood brand, this model is a perfect blend of vintage aesthetics and modern engineering, making it a prized addition for audiophiles and casual listeners alike.At the heart of the Sherwood R-865 lies its powerful amplification section, designed to deliver exceptional sound quality and maintaining audio fidelity across various frequencies. The receiver supports 5.1 channel surround sound, making it an ideal choice for those who enjoy immersive audio experiences in their home theater setups. With a power output of up to 100 watts per channel, the R-865 can easily drive a variety of speaker systems, resulting in detailed sound reproduction that brings movies, music, and games to life.
One of the standout features of the R-865 is its advanced digital signal processing capabilities. This technology not only enhances audio clarity but also ensures that users can enjoy an optimized sound experience tailored to their room's acoustics. The inclusion of multiple sound modes further allows listeners to choose settings that suit different genres of music or types of content, whether it be movies, music, or sports.
Connectivity is another strong point for the Sherwood R-865. It offers a variety of inputs, including HDMI, optical, and coaxial ports, ensuring compatibility with a wide range of sources such as Blu-ray players, gaming consoles, and streaming devices. Additionally, it features built-in Bluetooth technology, allowing users to stream their favorite songs directly from smartphones or tablets without the hassle of wires.
The receiver's user interface is designed with convenience in mind. The LCD display makes it easy to navigate through settings and inputs, while the remote control provides users with extensive control options from the comfort of their couch. For those who appreciate the aesthetics of home audio equipment, the Sherwood R-865 also sports a timeless design with clean lines and a classic finish that complements any home décor.
Moreover, the R-865 offers a robust equalizer feature, enabling users to fine-tune audio outputs to match their unique listening preferences. The receiver also includes various safety features such as short-circuit protection and thermal overload safeguards, ensuring reliable operation over long periods.
In summary, the Sherwood R-865 audio receiver packs a punch with its state-of-the-art audio technologies, versatile connectivity options, and user-friendly design. Whether you’re throwing a movie night or hosting a listening party, this receiver stands ready to deliver an unparalleled audio experience that everyone can enjoy.