ENGLISH
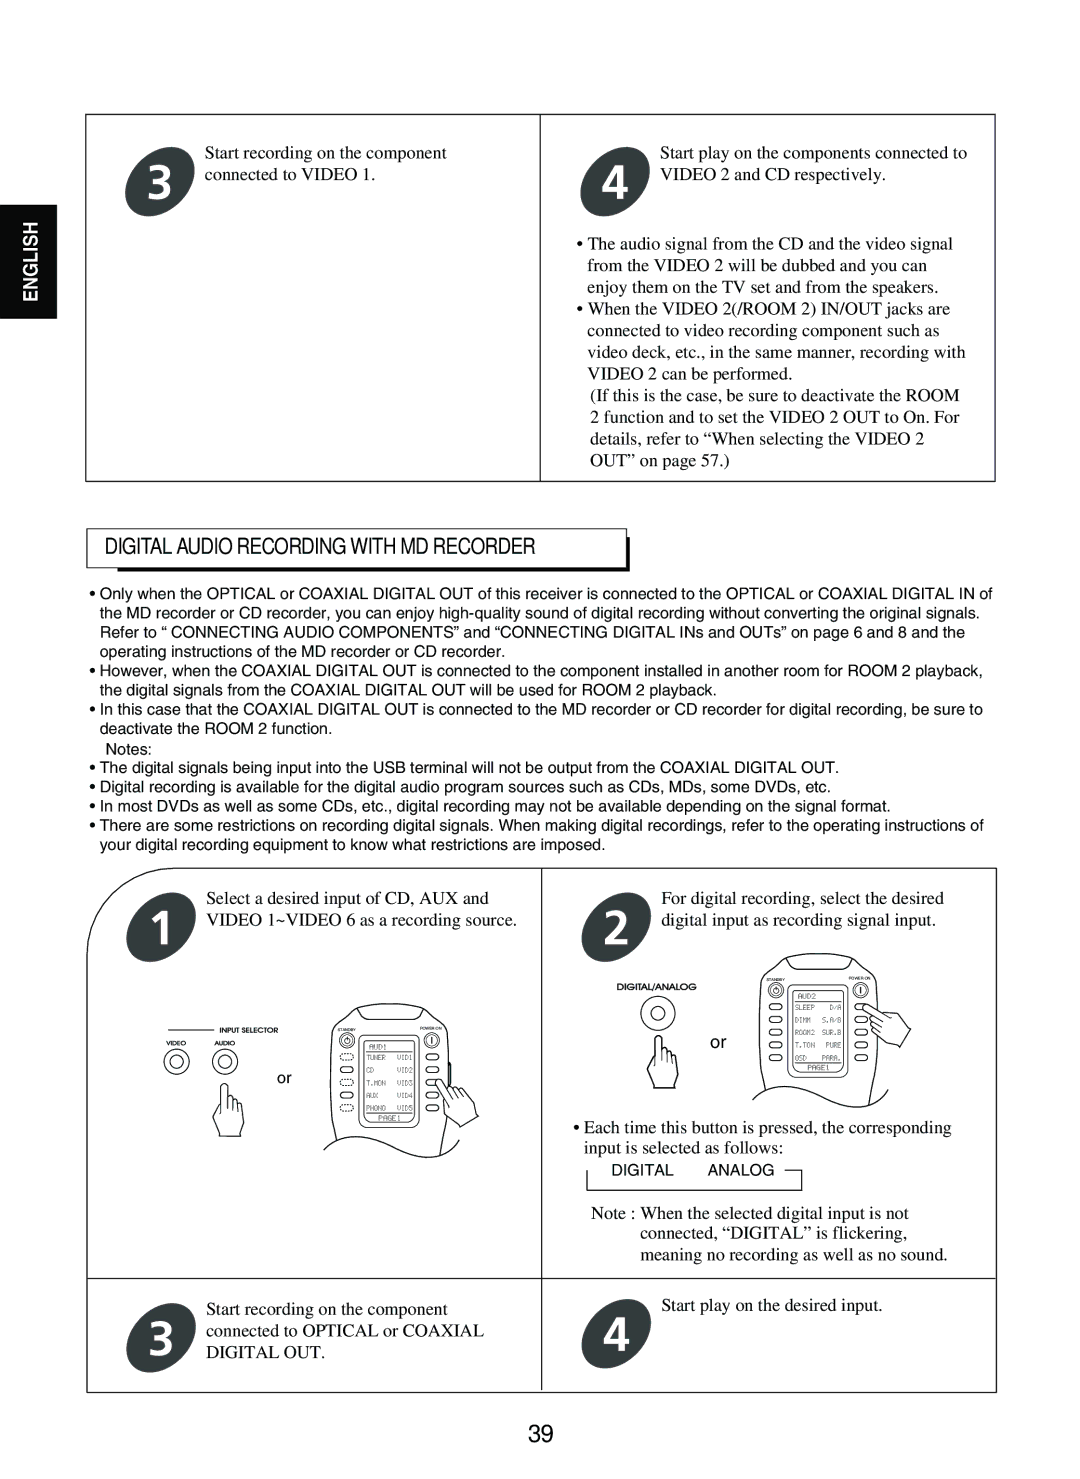
Start recording on the component
3 connected to VIDEO 1.
Start play on the components connected to
4 VIDEO 2 and CD respectively.
•The audio signal from the CD and the video signal from the VIDEO 2 will be dubbed and you can enjoy them on the TV set and from the speakers.
•When the VIDEO 2(/ROOM 2) IN/OUT jacks are connected to video recording component such as video deck, etc., in the same manner, recording with VIDEO 2 can be performed.
(If this is the case, be sure to deactivate the ROOM 2 function and to set the VIDEO 2 OUT to On. For details, refer to “When selecting the VIDEO 2 OUT” on page 57.)
DIGITAL AUDIO RECORDING WITH MD RECORDER
•Only when the OPTICAL or COAXIAL DIGITAL OUT of this receiver is connected to the OPTICAL or COAXIAL DIGITAL IN of the MD recorder or CD recorder, you can enjoy
•However, when the COAXIAL DIGITAL OUT is connected to the component installed in another room for ROOM 2 playback, the digital signals from the COAXIAL DIGITAL OUT will be used for ROOM 2 playback.
•In this case that the COAXIAL DIGITAL OUT is connected to the MD recorder or CD recorder for digital recording, be sure to deactivate the ROOM 2 function.
![]() Notes:
Notes:
•The digital signals being input into the USB terminal will not be output from the COAXIAL DIGITAL OUT.
•Digital recording is available for the digital audio program sources such as CDs, MDs, some DVDs, etc.
•In most DVDs as well as some CDs, etc., digital recording may not be available depending on the signal format.
•There are some restrictions on recording digital signals. When making digital recordings, refer to the operating instructions of your digital recording equipment to know what restrictions are imposed.
1 | Select a desired input of CD, AUX and | 2 | For digital recording, select the desired | |||||
VIDEO 1~VIDEO 6 as a recording source. | digital input as recording signal input. | |||||||
|
|
|
|
|
| STANDBY |
| POWER ON |
|
|
|
|
|
|
| AUD2 |
|
|
|
|
|
|
|
| SLEEP | D/A |
|
|
|
|
|
|
| DIMM | S.A/B |
|
| STANDBY | POWER ON |
|
| or | ROOM2 | SUR.B |
|
|
|
|
|
| |||
|
| AUD1 |
|
|
| T.TON | PURE | |
|
| TUNER | VID1 |
|
|
| OSD | PARA. |
| or | CD | VID2 |
|
|
| PAGE1 | |
|
|
|
|
|
| |||
| T.MON | VID3 |
|
|
|
|
| |
|
| AUX | VID4 |
|
|
|
|
|
|
| PHONO | VID5 |
|
|
|
|
|
|
| PAGE1 | • Each time this button is pressed, the corresponding | |||||
|
|
|
| |||||
|
|
|
| input is selected as follows: |
|
| ||
|
|
|
| DIGITAL | ANALOG |
|
| |
|
|
|
| Note : When the selected digital input is not | ||||
|
|
|
|
| connected, “DIGITAL” is flickering, | |||
|
|
|
|
| meaning no recording as well as no sound. | |||
3 | Start recording on the component | 4 | Start play on the desired input. | |||||
connected to OPTICAL or COAXIAL |
|
|
|
| ||||
DIGITAL OUT. |
|
|
|
|
|
| ||
39
