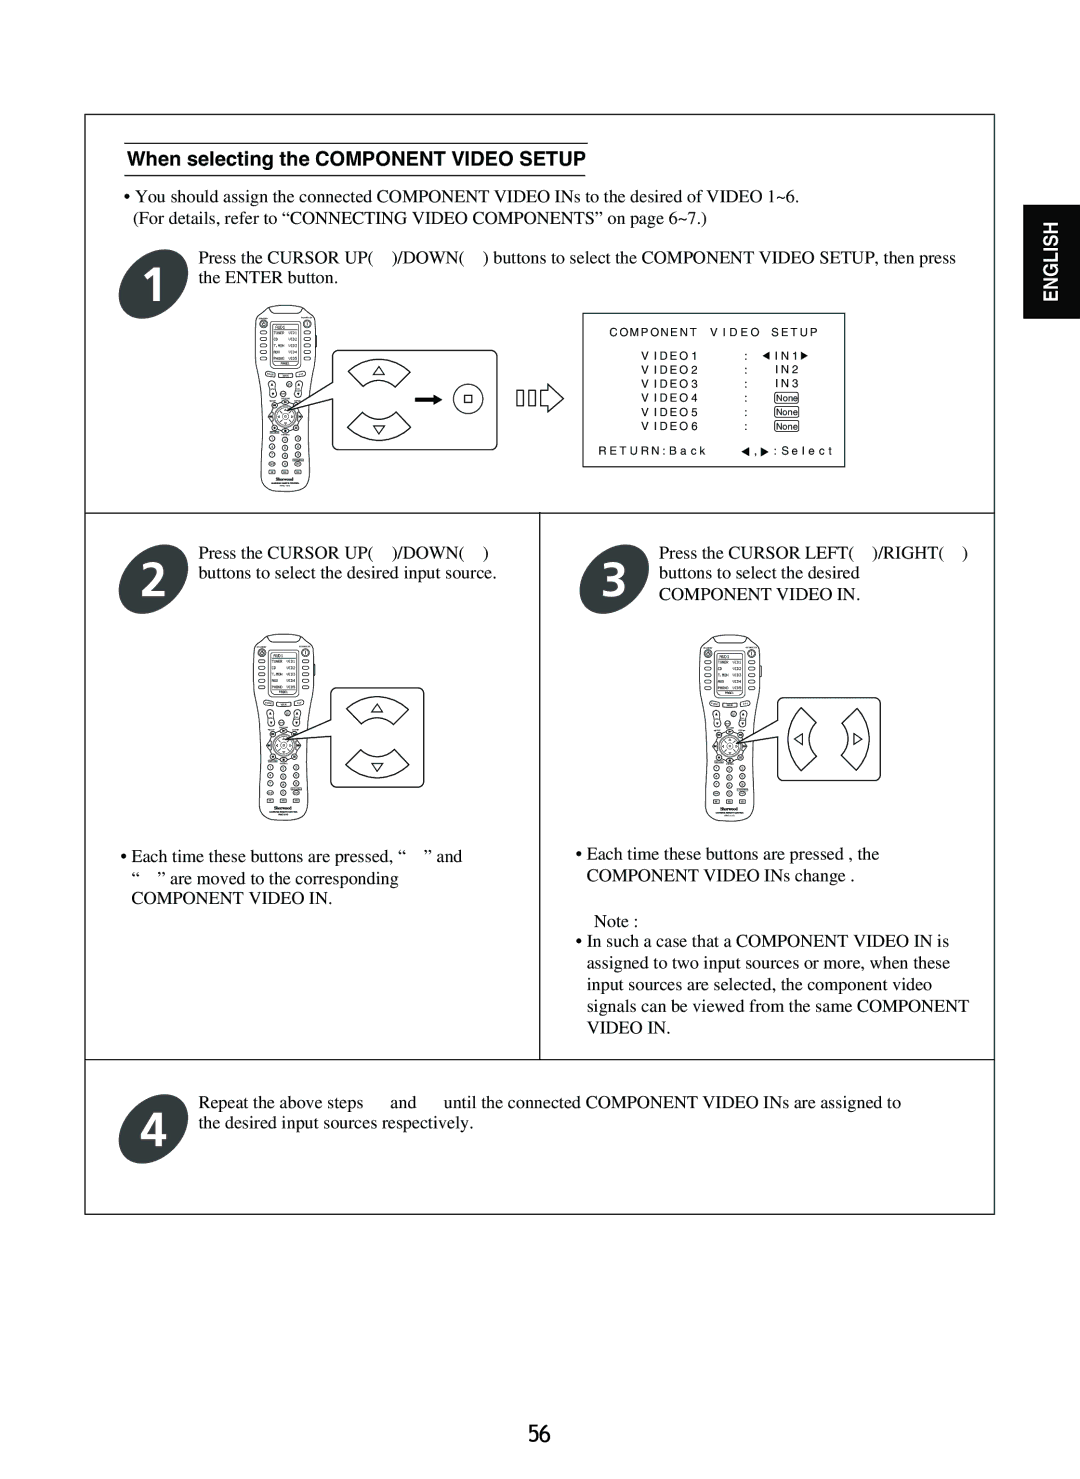
When selecting the COMPONENT VIDEO SETUP
•You should assign the connected COMPONENT VIDEO INs to the desired of VIDEO 1~6. (For details, refer to “CONNECTING VIDEO COMPONENTS” on page 6~7.)
Press the CURSOR UP( ![]() )/DOWN(
)/DOWN(![]() ) buttons to select the COMPONENT VIDEO SETUP, then press
) buttons to select the COMPONENT VIDEO SETUP, then press
1 the ENTER button.
ENGLISH
PAGE
VOL
1
4
7
MAIN
2
5
8
FAV
3
6
9
C OM P ON E N T V I D E O S E T U P
V I D E O 1 | : | I N 1 |
V I D E O 2 | : | I N 2 |
V I D E O 3 | : | I N 3 |
V I D E O 4 | : | None |
V I D E O 5 | : | None |
V I D E O 6 | : | None |
R E T U R N : B a c k |
| , : S e l e c t |
0
MI M2 M3
Press the CURSOR UP( ![]() )/DOWN(
)/DOWN(![]() )
)
2 buttons to select the desired input source.
PAGE | MAIN | FAV |
VOL |
|
|
1 2 3
4 5 6
7 8 9
0
MI M2 M3
• Each time these buttons are pressed, “![]() ” and “
” and “![]() ” are moved to the corresponding
” are moved to the corresponding
COMPONENT VIDEO IN.
Press the CURSOR LEFT(![]() )/RIGHT(
)/RIGHT(![]() )
)
3 buttons to select the desired
COMPONENT VIDEO IN.
PAGE | MAIN | FAV |
VOL |
|
|
1 2 3
4 5 6
7 8 9
0
MI M2 M3
•Each time these buttons are pressed , the COMPONENT VIDEO INs change .
Note :
•In such a case that a COMPONENT VIDEO IN is assigned to two input sources or more, when these input sources are selected, the component video signals can be viewed from the same COMPONENT
VIDEO IN.
Repeat the above steps ![]() and
and ![]() until the connected COMPONENT VIDEO INs are assigned to
until the connected COMPONENT VIDEO INs are assigned to
4 the desired input sources respectively.
56
