ENGLISH
When selecting the AUTO SPEAKER SETUP
•Auto Speaker Setup lets you avoid troublesome
•If you want to personalize your speaker setup and channel level setup by making the settings manually, perform the “When selecting the SPEAKER CONFIGURATION” procedure on page 45, “When selecting the SPEAKER DISTANCE” procedure on page 47, “Adjusting each channel level with test tone” and “Adjusting the current channel levels” procedures on page 33.
 Preparations
1.Connect the supplied microphone to the SETUP MIC jack on the rear panel.(For details, refer to “CONNECTING MICROPHONE” on page 13.)
![]() Note:
Note:
•After you have completed the auto speaker setup procedure, be sure to disconnect the microphone.
2.Place the microphone on a flat level surface at your normal listening position.
•If possible, use a tripod, etc. to attach the microphone at the same height as your ears would be when you are seated in your listening position.
•Ensure there are no obstacles between the speakers and the microphone.
3.For the speakers to be set to “Small”, select the desired crossover frequency performing the “CROSSOVER FREQ.” procedure.(For details, refer to “When selecting the CROSSOVER FREQUENCY” on page 50.)
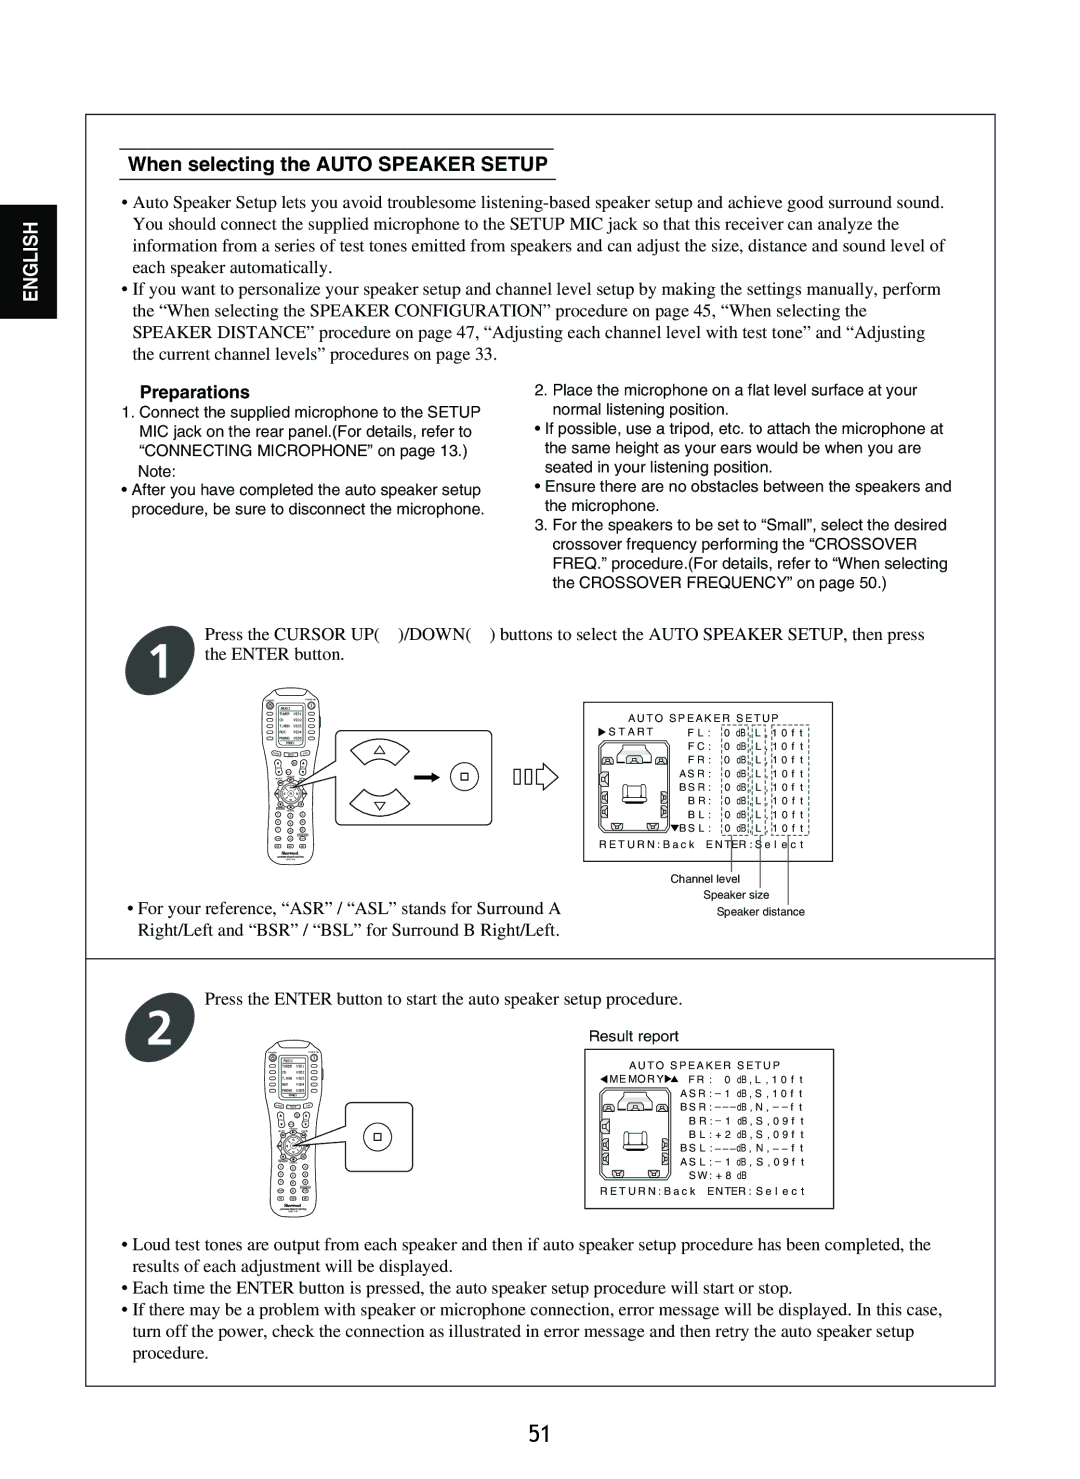
Press the CURSOR UP(![]() )/DOWN(
)/DOWN(![]() ) buttons to select the AUTO SPEAKER SETUP, then press
) buttons to select the AUTO SPEAKER SETUP, then press
1 the ENTER button.
PAGE | MAIN | FAV |
VOL |
|
|
1 2 3
4 5 6
7 8 9
0
MI M2 M3
•For your reference, “ASR” / “ASL” stands for Surround A Right/Left and “BSR” / “BSL” for Surround B Right/Left.
A U T O S P E A K E R S E T U P
S T A R T | F L : 0 dB , L , 1 0 f t | ||||||
|
|
|
|
|
| F C : 0 | dB , L , 1 0 f t |
|
|
|
|
|
| F R : 0 | dB , L , 1 0 f t |
|
|
|
|
|
| A S R : 0 | dB , L , 1 0 f t |
|
|
|
|
|
| B S R : 0 | dB , L , 1 0 f t |
|
|
|
|
|
| ||
|
|
|
|
|
| B R : 0 | dB , L , 1 0 f t |
|
|
|
|
|
| B L : 0 | dB , L , 1 0 f t |
|
|
|
|
|
| B S L : 0 | dB , L , 1 0 f t |
R E T U R N : B a c k E N TER : S e l e c t
Channel level
Speaker size
Speaker distance
Press the ENTER button to start the auto speaker setup procedure.
2 |
| Result report |
|
|
|
|
|
|
|
| |
|
| A U T O S P E A K E R S E T U P |
| ||
|
| ME MOR Y | F R : 0 | dB , L , 1 0 f t | |
|
|
| A S R : 1 dB , S , 1 0 f t | ||
PAGE | MAIN | FAV | B S R : | dB , N , | f t |
|
|
| |||
VOL |
|
| B R : 1 dB , S , 0 9 f t | ||
|
|
| |||
|
|
| B L : + 2 dB , S , 0 9 f t | ||
|
|
| B S L : | dB , N , | f t |
1 | 2 | 3 | A S L : 1 dB , S , 0 9 f t | ||
S W : + 8 | dB |
| |||
4 | 5 | 6 |
| ||
7 |
| 9 |
| ||
8 |
|
|
| ||
| 0 | R E T U R N : B a c k EN TER : S e l e c t | |||
|
| ||||
MI | M2 | M3 |
|
|
|
•Loud test tones are output from each speaker and then if auto speaker setup procedure has been completed, the results of each adjustment will be displayed.
•Each time the ENTER button is pressed, the auto speaker setup procedure will start or stop.
•If there may be a problem with speaker or microphone connection, error message will be displayed. In this case, turn off the power, check the connection as illustrated in error message and then retry the auto speaker setup
procedure.
51