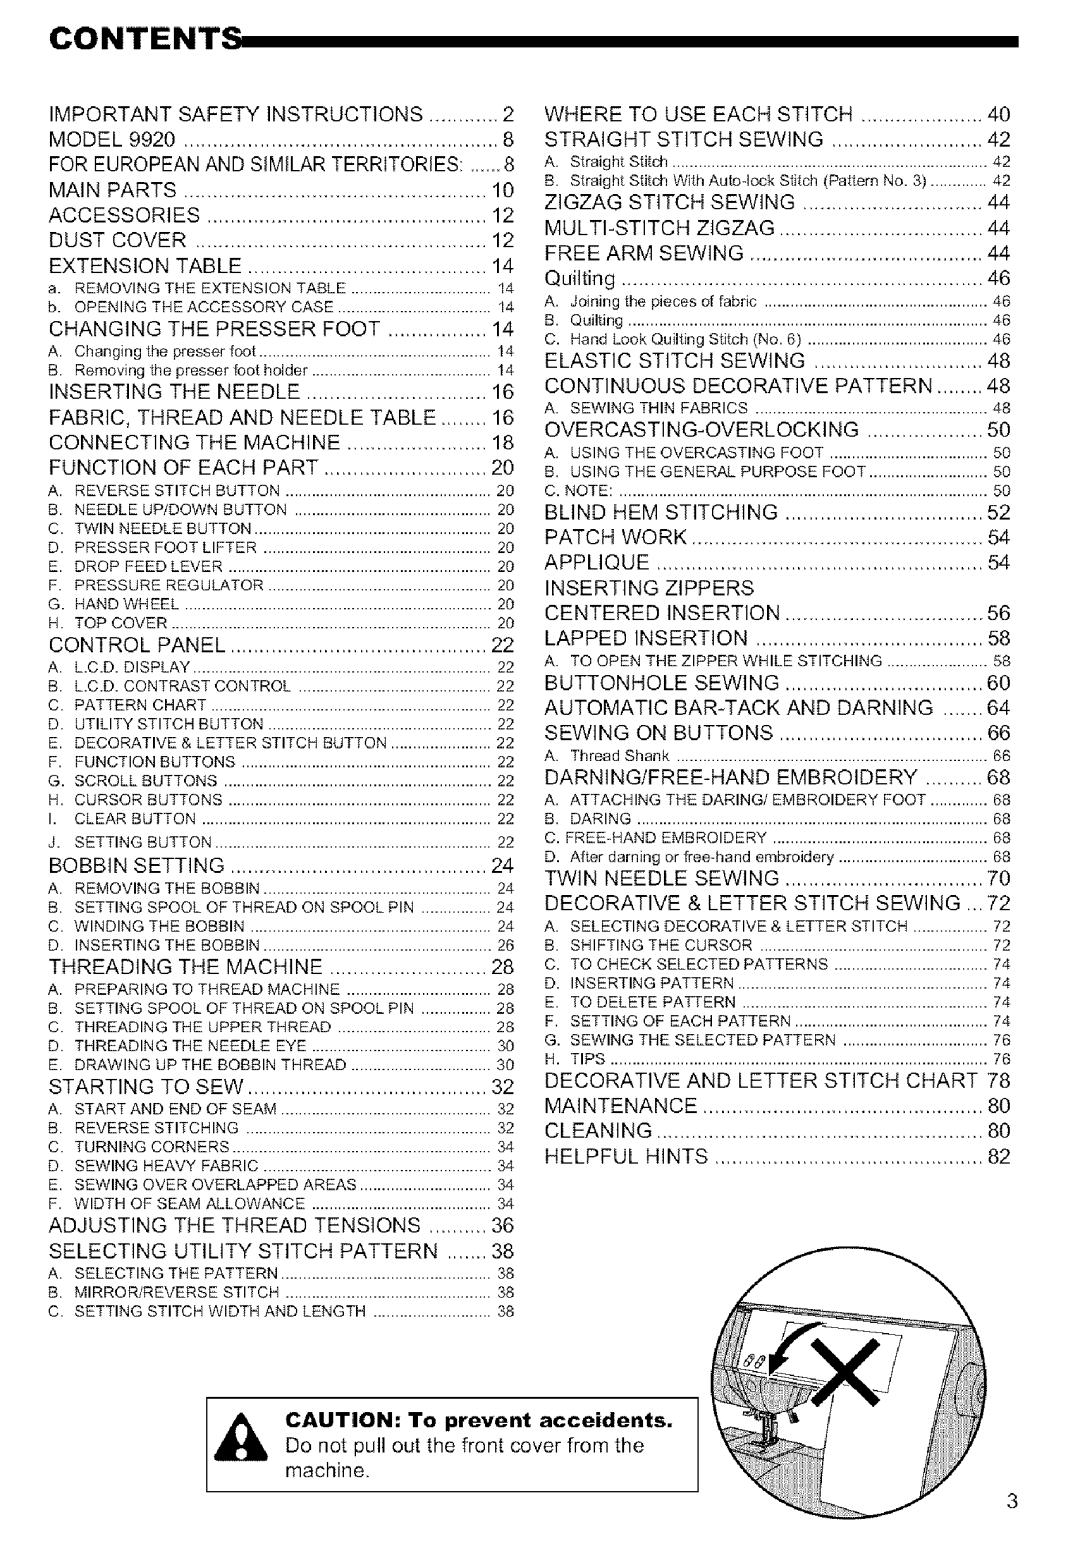
Singer MODEL 9920 instruction manual Content, DARNING/FREE-HAND Embroidery

Models: MODEL 9920

1 85
Download 85 pages 52.37 Kb
Page 3
Image 3

CONTENT_

IMPORTANT

SAFETY

INSTRUCTIONS

2

WHERE

TO USE EACH STITCH

40

MODEL


9920

......................................................


8

STRAIGHT


STITCH SEWING

..........................

42

FOR EUROPEAN AND SIMILAR TERRITORIES:

8

A.

Straight

Stitch


42

MAIN PARTS

....................................................


10

B.

Straight

Stitch With

Autoqock

Stitch

(Paffern

No. 3)

42

ACCESSORIES


12

ZIGZAG

STITCH

SEWING


44


................................................


MULTI-STITCH

ZIGZAG


44

DUST COVER


12

...................................


..................................................


FREE ARM SEWING


44

EXTENSION

TABLE


14


Quilting


46

a.

REMOVING


THE

EXTENSION

TABLE


14


A.

Joining

the

pieces of fabric


46

b.

OPENING

THE

ACCESSORY

CASE


14

...................................................


CHANGING

THE PRESSER FOOT

.................

14

B.

Quilting

..................................................................................


46

A.

Changing the presser foot


14

C.

Hand

Look

Quilting

Stitch (No. 6)


46


ELASTIC

STITCH

SEWING


48

B.

Removing

_le presser foot holder


14


.........................................

CONTINUOUS

DECORATIVE

PATTERN

48

INSERTING

THE NEEDLE


16

...............................

A.

SEWING

THIN FABRICS


48

FABRIC, THREAD AND NEEDLE TABLE

16


OVERCASTING-OVERLOCKING


50

CONNECTING

THE MACHINE


18

....................

A.

USING

THE

OVERCASTING

FOOT


50

FUNCTION


OF EACH

PART


20

....................................


B.

USING

THE

GENERAL PURPOSE

FOOT

50

A.

REVERSE

STITCH

BUTTON

...............................................


20

C. NOTE:

....................................................................................


50

B.

NEEDLE

UP/DOWN BUTTON

.............................................


20

BLIND

HEM STITCHING

..................................


52

C.

TWIN

NEEDLE

BUTTON


20

PATCH WORK


54

D.

PRESSER

FOOT

LIFTER


20

..................................................


....................................................


APPLIQUE


54

E.

DROP

FEED

LEVER


20


........................................................


F.

PRESSURE


REGULATOR

...................................................


20

INSERTING

ZIPPERS


G. HAND

WHEEL

......................................................................


20

CENTERED

INSERTION


56

H.

TOP COVER


20


.........................................................................


LAPPED

INSERTION


58

CONTROL

PANEL


22


A.

TO OPEN

THE ZIPPER WHILE STITCHING


58

A.

L.C.D.

DISPLAY


22

.......................

....................................................................


BUTTONHOLE

SEWING


60

B.

L.C.D.

CONTRAST

CONTROL


22


C.

PATTERN

CHART

................................................................


22

AUTOMATIC

BAR-TACK AND DARNING

64

D.

UTILITY

STITCH

BUTTON

...................................................


22

SEWING

ON BUTTONS


66

E.

DECORATIVE

& LETTER

STITCH BUTTON


22

...................................


.......................

A.

Thread

Shank


66

F.

FUNCTION


BUTTONS


22


DARNING/FREE-HAND

EMBROIDERY

68

G.

SCROLL

BUTTONS


22

H.

CURSOR

BUTTONS


22

A.

ATTACHING


THE DARING/EMBROIDERY

FOOT

68

I.

CLEAR


BUTTON

..................................................................


22

B. DARING

................................................................................


68

J.

SETTING

BUTTON


22

C. FREE-HAND


EMBROIDERY

.................................................


68


BOBBIN SETTING


24

D.

After

darning

or free-hand embroidery

..................................

68


TWIN

NEEDLE

SEWING


70

A.

REMOVING


THE

BOBBIN


24


....................................................


DECORATIVE & LETTER STITCH SEWING ... 72

B.

SETTING

SPOOL

OF THREAD

ON SPOOL

PIN

24


C.

WINDING

THE

BOBBIN


24

A.

SELECTING


DECORATIVE

& LETTER STITCH

72

D.

INSERTING


THE

BOBBIN

....................................................


26

B.

SHIFTING

THE

CURSOR


72

THREADING

THE MACHINE

28

C.

TO CHECK


SELECTED PATTERNS

...................................

74

A.

PREPARING

TO THREAD

MACHINE


28

D.

INSERTING


PATTERN


74

E. TO DELETE

PATTERN


74

B.

SETTING

SPOOL

OF THREAD

ON SPOOL

PIN

28


F. SETTING OF EACH

PATTERN


74

C.

THREADING

THE

UPPER

THREAD


28


G. SEWING

THE SELECTED

PATTERN


76

D.

THREADING

THE

NEEDLE


EYE


30


H. TIPS


76

E.

DRAWING

UP THE BOBBIN

THREAD


30

......................................................................................


DECORATIVE AND LETTER STITCH CHART 78

STARTING


TO SEW


32


MAINTENANCE


80

A.

START AND END OF SEAM

................................................


32

................................................


B.

REVERSE

STITCHING


32

CLEANING


........................................................


80

C.

TURNING

CORNERS


34

HELPFUL

HINTS


82

D.

SEWING

HEAVY

FABRIC


34

..............................................


....................................................


E.

SEWING

OVER

OVERLAPPED

AREAS

34


F.

WIDTH


OF SEAM

ALLOWANCE

.........................................

34


ADJUSTING

THE THREAD

TENSIONS

36


SELECTING

UTILITY STITCH PATTERN

38


A.

SELECTING

THE PATTERN

................................................


38


B.

MIRROR/REVERSE

STITCH

...............................................


38


C.

SETTING

STITCH

WIDTH

AND

LENGTH

38


,_ CAUTION:Do not pull outTothepreventfront coveracceidentsfrom the. machine.

Page 3
Image 3
Singer MODEL 9920 instruction manual Content, DARNING/FREE-HAND Embroidery

MODEL 9920 specifications

The Singer MODEL 9920 is a versatile and advanced sewing machine that caters to both beginner and experienced sewists. Renowned for its reliability and user-friendly features, the 9920 stands out in the market for its ability to handle a wide range of sewing tasks, making it a popular choice among hobbyists and professionals alike.

One of the key features of the Singer MODEL 9920 is its extensive selection of built-in stitches. With 600 stitch options, including utility, decorative, and stretch stitches, users have the flexibility to choose the perfect stitch for any project. Additionally, the machine offers unique stitch combinations, allowing for creative expression and customization in sewing projects.

The Singer MODEL 9920 is equipped with an automatic needle threader, a feature that simplifies the sewing process by allowing users to thread the needle with minimal effort. This is particularly useful for those who may struggle with manual threading, making the machine more accessible to all skill levels. Furthermore, the adjustable presser foot pressure allows sewists to work with a variety of fabric types, from lightweight materials to thick, heavy fabrics, providing versatility in sewing applications.

One of the standout technologies in the Singer MODEL 9920 is the computerized interface. The intuitive LCD screen displays stitch options, settings, and helpful information, making it easy for users to select and adjust their preferred stitches. With the touch of a button, users can quickly navigate through the different functions and settings, enhancing the overall sewing experience.

The sewing machine also features a drop-in bobbin system, which ensures easy bobbin installation and smooth, consistent stitching. This system minimizes bobbin jams and allows for quick bobbin changes, making the sewing process more efficient. Additionally, the Singer MODEL 9920 has a variety of included accessories, such as multiple presser feet, a seam ripper, and a quick start guide, ensuring that users have everything they need to get started right out of the box.

The Singer MODEL 9920 is designed with user comfort in mind. Its lightweight design makes it portable, ideal for classes or sewing groups. The built-in carrying handle contributes to its ease of transport, while the machine's quiet operation allows for a pleasant sewing experience.

Overall, the Singer MODEL 9920 encapsulates the perfect blend of advanced technology and user-friendly design, making it a remarkable choice for anyone looking to enhance their sewing skills and explore their creativity. With its extensive features, dependable performance, and thoughtful design, the Singer MODEL 9920 is a valuable addition to any sewing enthusiast’s toolkit.