7.ROUTES
The GPS chartplotter has the capability to store: for CP 155C: 20 Routes with a maximum
of 30 Waypoints each, for CP 175C: 20 Routes with a maximum of 50 Waypoints each, for
CP 1000C: 50 Routes with a maximum of 50 Waypoints each.
A Route can consist of Waypoints or Marks. The difference is when a Route is made using Waypoints and the Route is deleted the Waypoints are also deleted. However if a Route is made of Marks and the Route is deleted the Marks stay in memory.
7.0CREATING A ROUTE USING WAYPOINTS
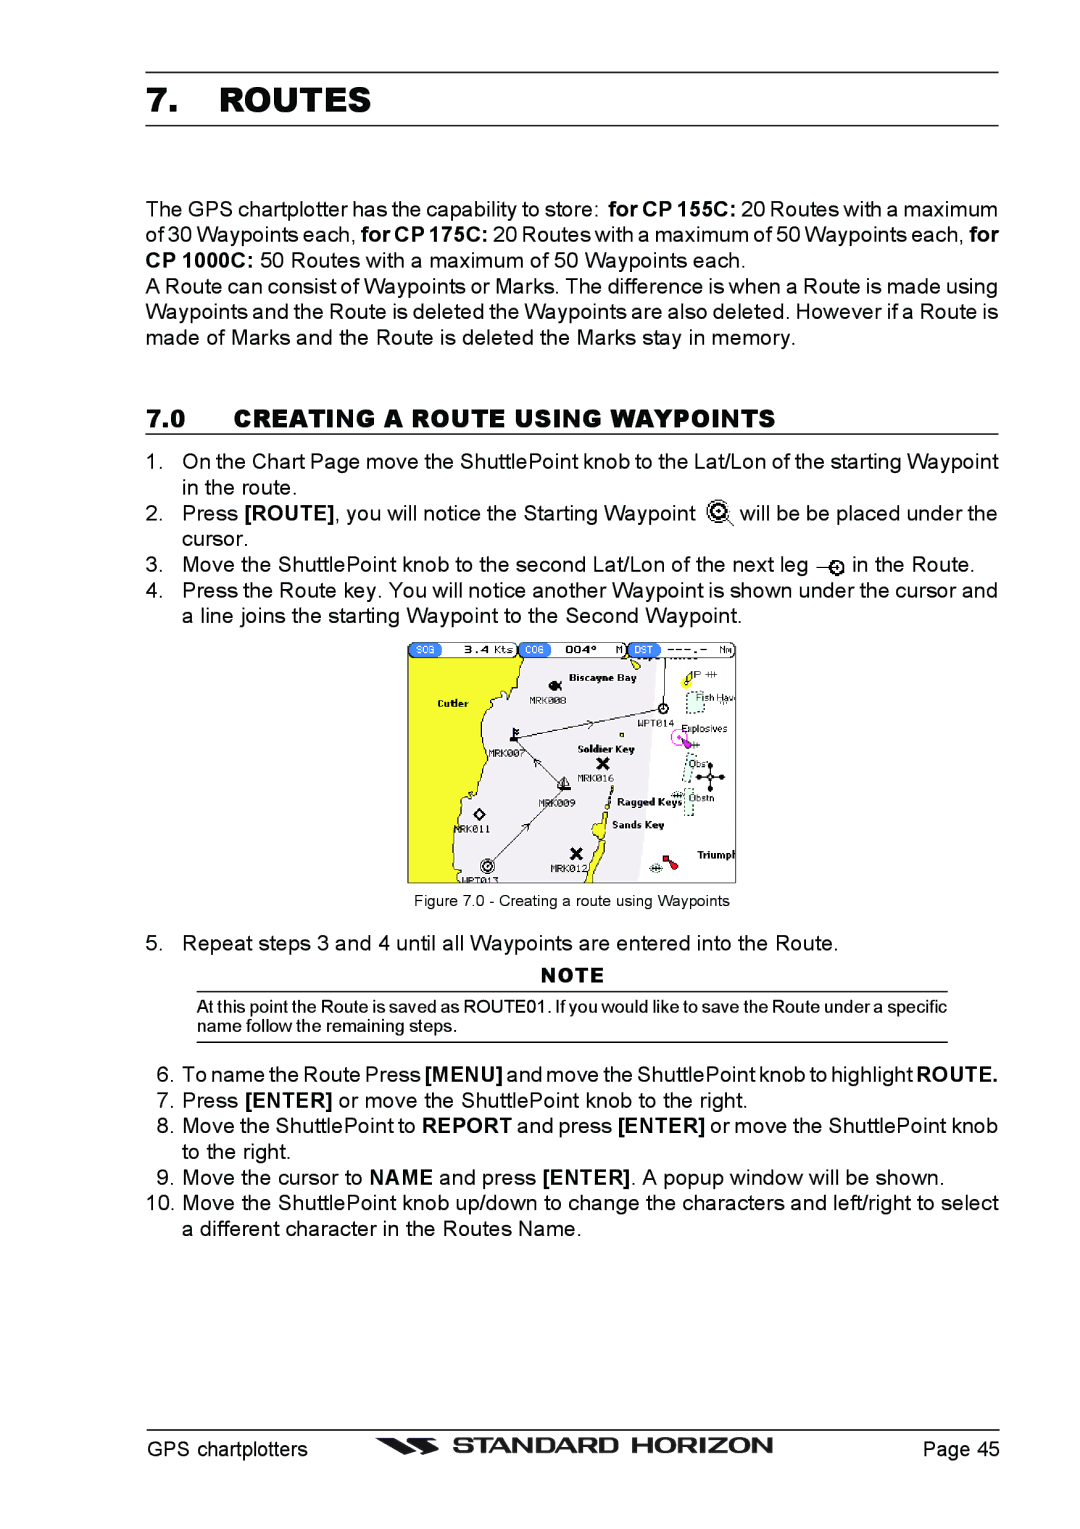
1.On the Chart Page move the ShuttlePoint knob to the Lat/Lon of the starting Waypoint in the route.
2. Press [ROUTE], you will notice the Starting Waypoint | will be be placed under the |
cursor. |
|
3.Move the ShuttlePoint knob to the second Lat/Lon of the next leg ![]() in the Route.
in the Route.
4.Press the Route key. You will notice another Waypoint is shown under the cursor and a line joins the starting Waypoint to the Second Waypoint.
Figure 7.0 - Creating a route using Waypoints
5. Repeat steps 3 and 4 until all Waypoints are entered into the Route.
NOTE
At this point the Route is saved as ROUTE01. If you would like to save the Route under a specific name follow the remaining steps.
6.To name the Route Press [MENU] and move the ShuttlePoint knob to highlight ROUTE.
7.Press [ENTER] or move the ShuttlePoint knob to the right.
8.Move the ShuttlePoint to REPORT and press [ENTER] or move the ShuttlePoint knob to the right.
9.Move the cursor to NAME and press [ENTER]. A popup window will be shown.
10.Move the ShuttlePoint knob up/down to change the characters and left/right to select a different character in the Routes Name.
GPS chartplotters |
| Page 45 |
|