12 | Delta User’s Manual | .~ |
-
-
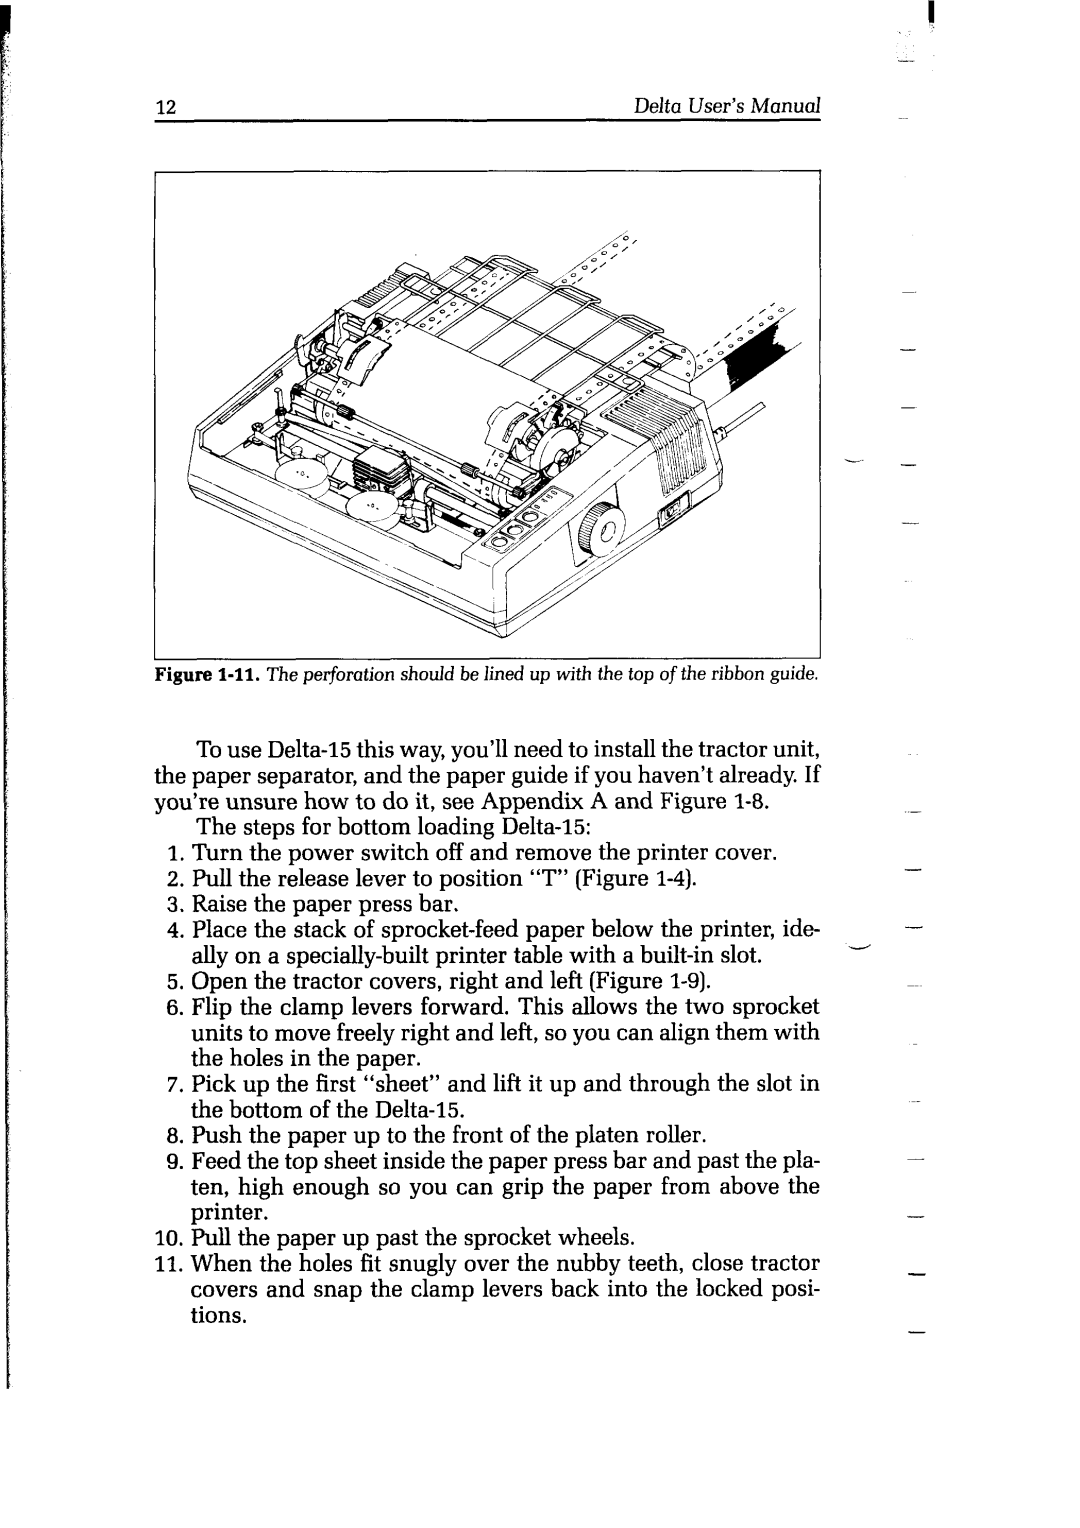
Figure l-11. The perforation should be lined up with the top of the ribbon guide.
| To use |
| |||
the paper separator, and the paper guide if you haven’t already. If |
| ||||
you’re unsure how to do it, see Appendix | A and Figure | - | |||
| The steps for bottom loading |
|
| ||
1. Turn the power switch off and remove the printer cover. | - | ||||
2. | Pull the release lever to position “T” (Figure | ||||
| |||||
3. | Raise the paper press bar. |
|
|
| |
4. | Place the stack of | paper | below the printer, ide- | - | |
| ally on a | table with a | - | ||
5.Open the tractor covers, right and left (Figure
6.Flip the clamp levers forward. This allows the two sprocket units to move freely right and left, so you can align them with the holes in the paper.
7.Pick up the first “sheet” and lift it up and through the slot in the bottom of the
8.Push the paper up to the front of the platen roller.
9.Feed the top sheet inside the paper press bar and past the pla-
| ten, high enough so you can grip the paper from above the | - | ||
| printer. |
|
| |
10. | Pull the paper up past the | sprocket | wheels. |
|
11. | When the holes fit snugly | over the | nubby teeth, close tractor | _ |
| covers and snap the clamp levers back into the locked posi- |
| ||
tions. | - |
|