75
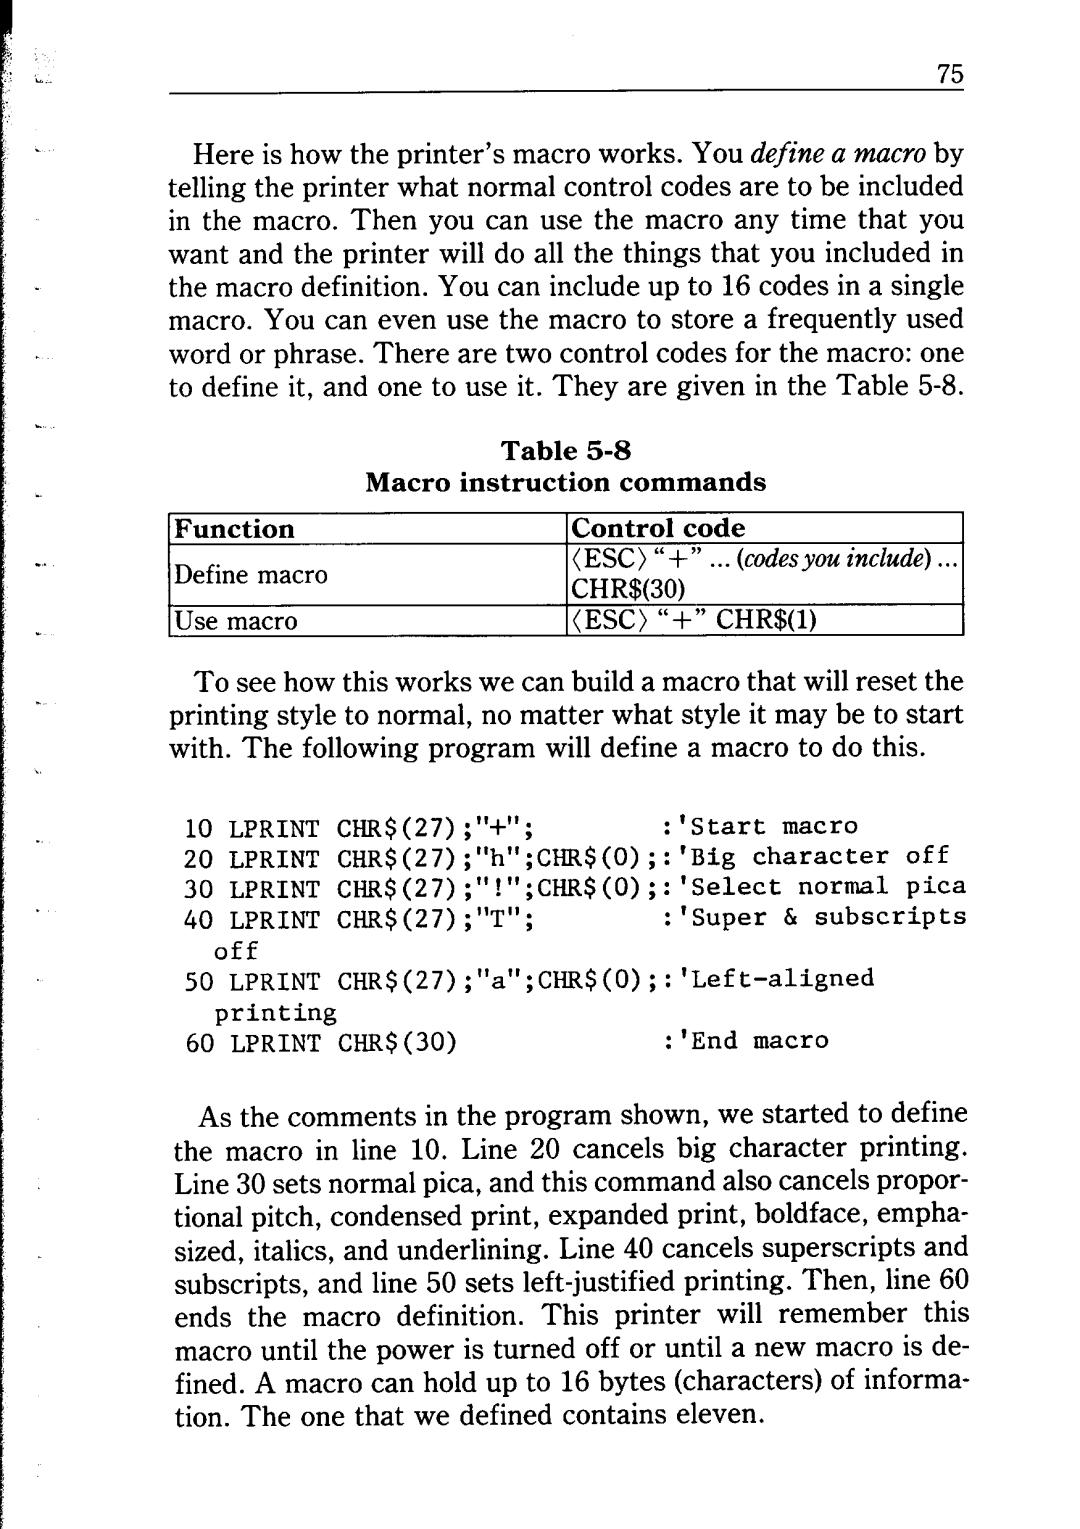
Here is how the printer’s macro works. You define a macro by telling the printer what normal control codes are to be included in the macro. Then you can use the macro any time that you want and the printer will do all the things that you included in the macro definition. You can include up to 16 codes in a single macro. You can even use the macro to store a frequently used word or phrase. There are two control codes for the macro: one to define it, and one to use it. They are given in the Table
Function
Define macro
Use macro
Table
Macro instruction commands
Control code
(ESC) “+” ... (codesyou include) ...
CHR$(SO)
(ESC) “+” CHR$(l)
To see how this works we can build a macro that will reset the printing style to normal, no matter what style it may be to start with. The following program will define a macro to do this.
10 | LPRINT | CHR$(27);"+"; | :'Start macro |
| |
20 |
| LPRINT | CHR$(27);"h";CHR$(O);:'Big character | off | |
30 |
| LPRINT | CHR$(27);"!";CHR$(O);:'Select normal | pica | |
40 |
| LPRINT | CHR$(27);"T"; | :'Super & subscripts | |
| off |
|
|
| |
50 | LPRINT |
| |||
| printing |
|
|
| |
60 | LPRINT | CHR$(30) | :'End macro |
| |
As the comments in the program shown, we started to define the macro in line 10. Line 20 cancels big character printing. Line 30 sets normal pica, and this command also cancels propor- tional pitch, condensed print, expanded print, boldface, empha- sized, italics, and underlining. Line 40 cancels superscripts and subscripts, and line 50 sets