

 Connecting to a Macintosh


ReadyGetting
PhotographsTaking
Back/DeletingPlaying ImagesPhotographed
The Macintosh must have Mac OS 9.0 or later installed. Because this camera supports the USB Mass Storage Class, a Macintosh with Mac OS 9.0 or later does not require the installation of the USB driver.
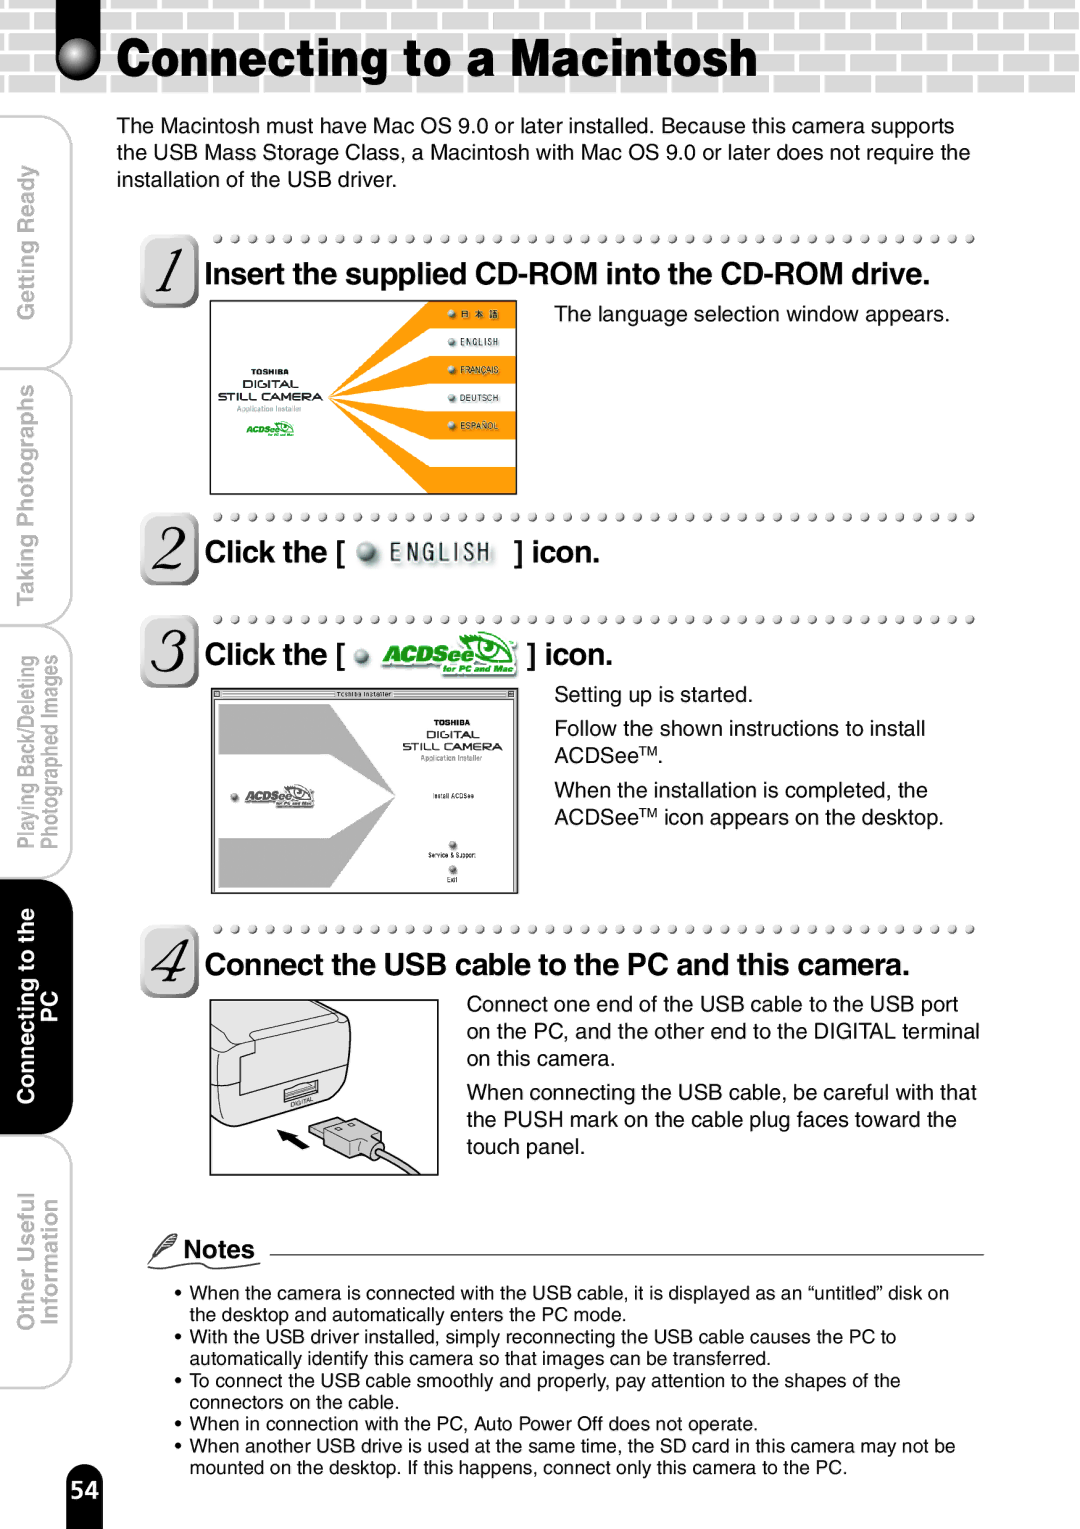
Insert the supplied CD-ROM into the CD-ROM drive.
The language selection window appears.
 Click the [
  ] icon.
![]() Click the [
Click the [ ![]() ] icon.
] icon.
Setting up is started.
Follow the shown instructions to install
ACDSeeTM.
When the installation is completed, the
ACDSeeTM icon appears on the desktop.
Connectingtothe | PC |
OtherUseful | Information |
 Connect the USB cable to the PC and this camera.
Connect one end of the USB cable to the USB port on the PC, and the other end to the DIGITAL terminal on this camera.
When connecting the USB cable, be careful with that the PUSH mark on the cable plug faces toward the touch panel.
![]() Notes
Notes
•When the camera is connected with the USB cable, it is displayed as an “untitled” disk on the desktop and automatically enters the PC mode.
•With the USB driver installed, simply reconnecting the USB cable causes the PC to automatically identify this camera so that images can be transferred.
•To connect the USB cable smoothly and properly, pay attention to the shapes of the connectors on the cable.
•When in connection with the PC, Auto Power Off does not operate.
•When another USB drive is used at the same time, the SD card in this camera may not be mounted on the desktop. If this happens, connect only this camera to the PC.
54
