Set-up (continued)
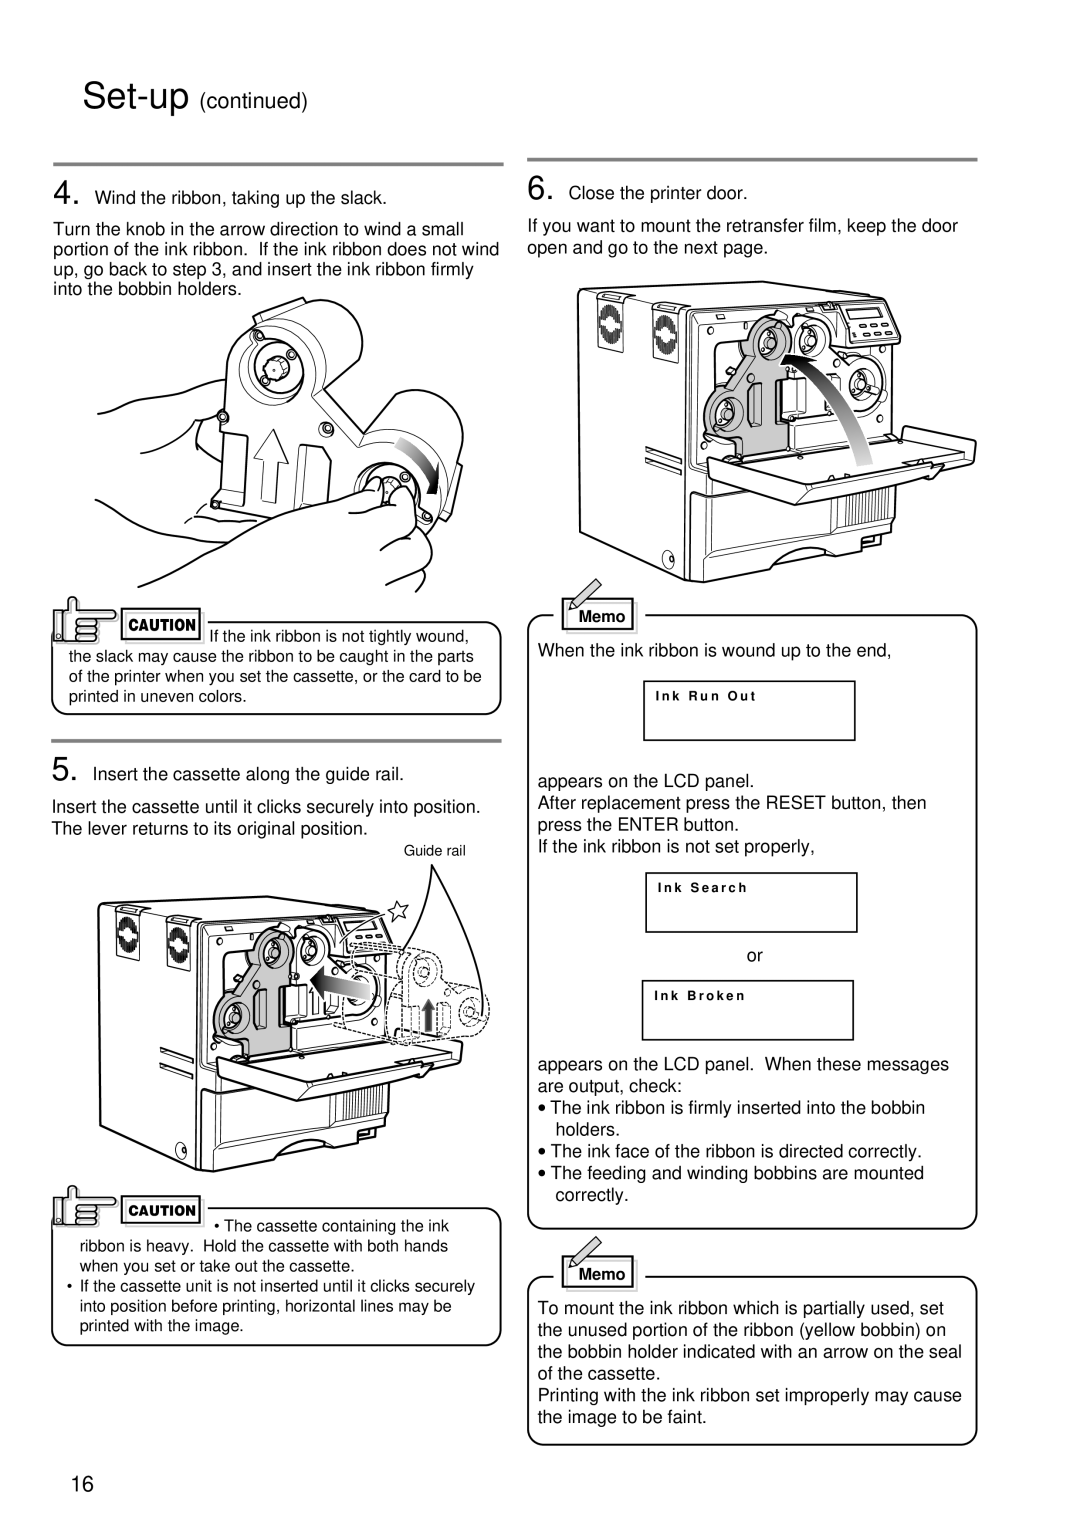
4. Wind the ribbon, taking up the slack.
Turn the knob in the arrow direction to wind a small
portion of the ink ribbon. If the ink ribbon does not wind up, go back to step 3, and insert the ink ribbon firmly into the bobbin holders.
6. Close the printer door.
If you want to mount the retransfer film, keep the door open and go to the next page.
![]() CAUTION If the ink ribbon is not tightly wound, the slack may cause the ribbon to be caught in the parts
CAUTION If the ink ribbon is not tightly wound, the slack may cause the ribbon to be caught in the parts
of the printer when you set the cassette, or the card to be printed in uneven colors.
5. Insert the cassette along the guide rail.
Insert the cassette until it clicks securely into position. The lever returns to its original position.
Guide rail
CAUTION
• The cassette containing the ink
ribbon is heavy. Hold the cassette with both hands when you set or take out the cassette.
•If the cassette unit is not inserted until it clicks securely into position before printing, horizontal lines may be printed with the image.
Memo
When the ink ribbon is wound up to the end,
I n k R u n O u t
appears on the LCD panel.
After replacement press the RESET button, then press the ENTER button.
If the ink ribbon is not set properly,
I n k S e a r c h
or
I n k B r o k e n
appears on the LCD panel. When these messages are output, check:
•The ink ribbon is firmly inserted into the bobbin holders.
•The ink face of the ribbon is directed correctly.
•The feeding and winding bobbins are mounted correctly.
Memo
To mount the ink ribbon which is partially used, set the unused portion of the ribbon (yellow bobbin) on the bobbin holder indicated with an arrow on the seal of the cassette.
Printing with the ink ribbon set improperly may cause the image to be faint.
16