Set-up (continued)
Installing the card stacker
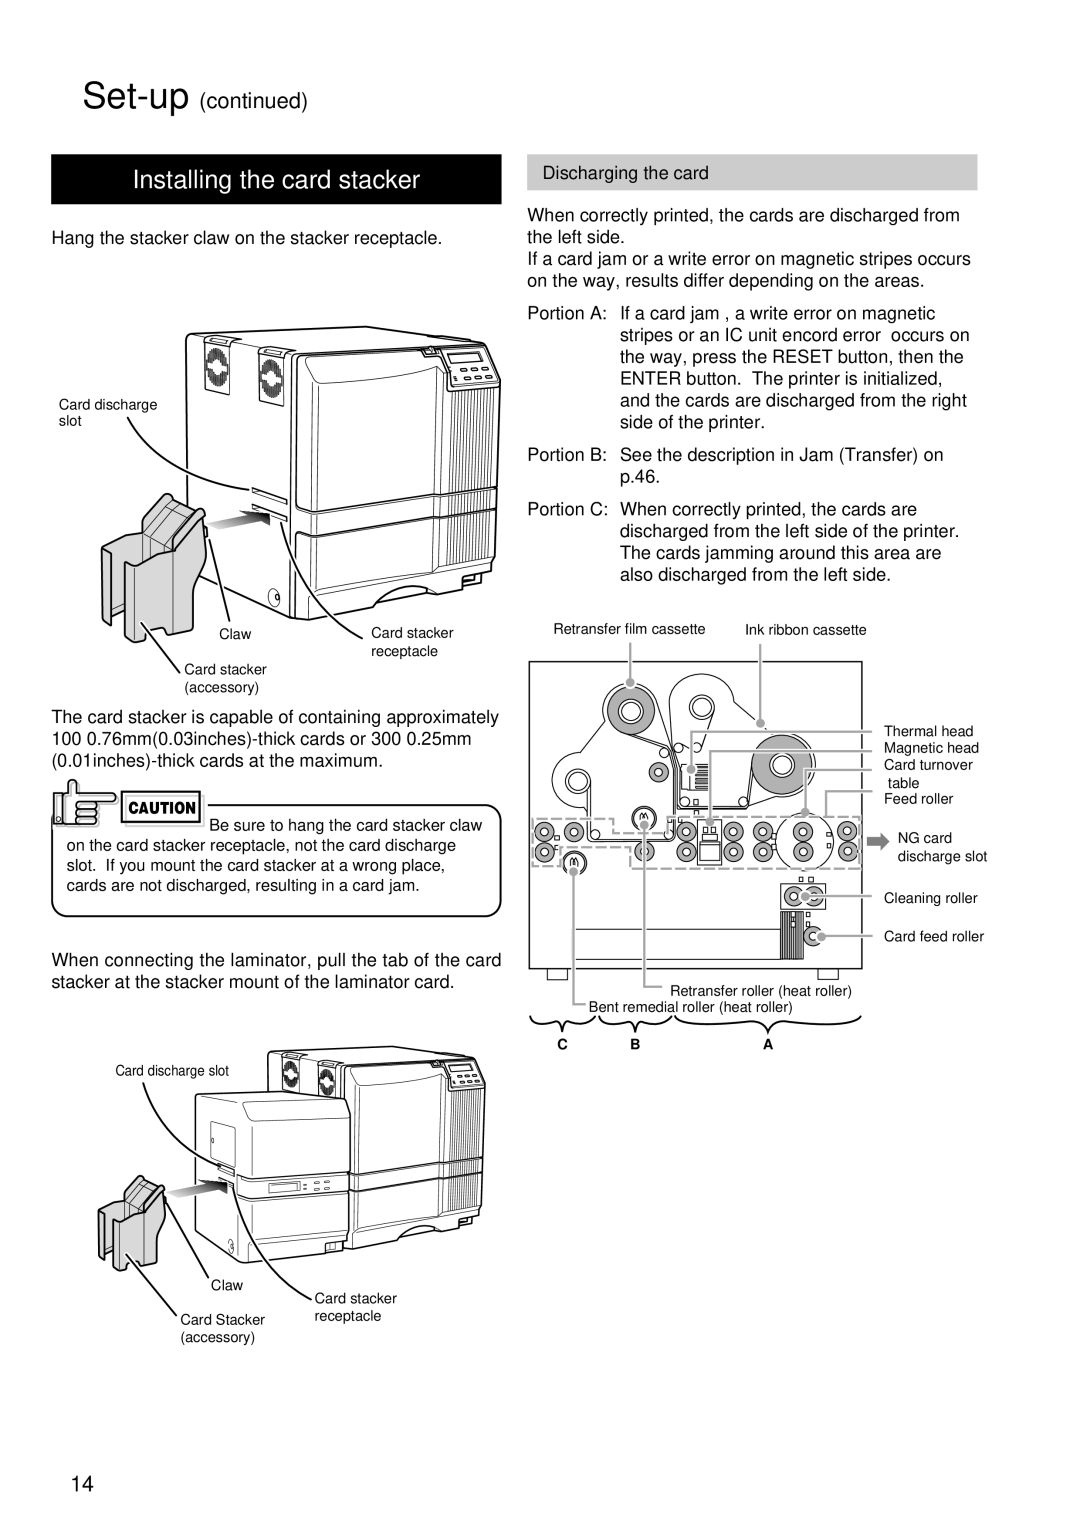
Hang the stacker claw on the stacker receptacle.
Card discharge slot
Claw | Card stacker |
| receptacle |
Card stacker |
|
(accessory) |
|
The card stacker is capable of containing approximately
100
CAUTION
Be sure to hang the card stacker claw
on the card stacker receptacle, not the card discharge slot. If you mount the card stacker at a wrong place, cards are not discharged, resulting in a card jam.
When connecting the laminator, pull the tab of the card stacker at the stacker mount of the laminator card.
Card discharge slot
Claw
Card stacker
Card Stackerreceptacle (accessory)
Discharging the card
When correctly printed, the cards are discharged from the left side.
If a card jam or a write error on magnetic stripes occurs on the way, results differ depending on the areas.
Portion A: If a card jam , a write error on magnetic stripes or an IC unit encord error occurs on the way, press the RESET button, then the ENTER button. The printer is initialized, and the cards are discharged from the right side of the printer.
Portion B: See the description in Jam (Transfer) on p.46.
Portion C: When correctly printed, the cards are
discharged from the left side | of the printer. | |
The cards jamming around this area are | ||
also discharged from the left | side. | |
Retransfer film cassette | Ink ribbon cassette | |
Thermal head
Magnetic head
Card turnover
table Feed roller
NG card discharge slot
Cleaning roller
Card feed roller
Retransfer roller (heat roller)
Bent remedial roller (heat roller)
C BA
14