Set-up (continued)
Setting the ink ribbon
CAUTION
 Do not touch the surface of the ink ribbon with your hands.
1. Activate the slide knob and open the printer door.
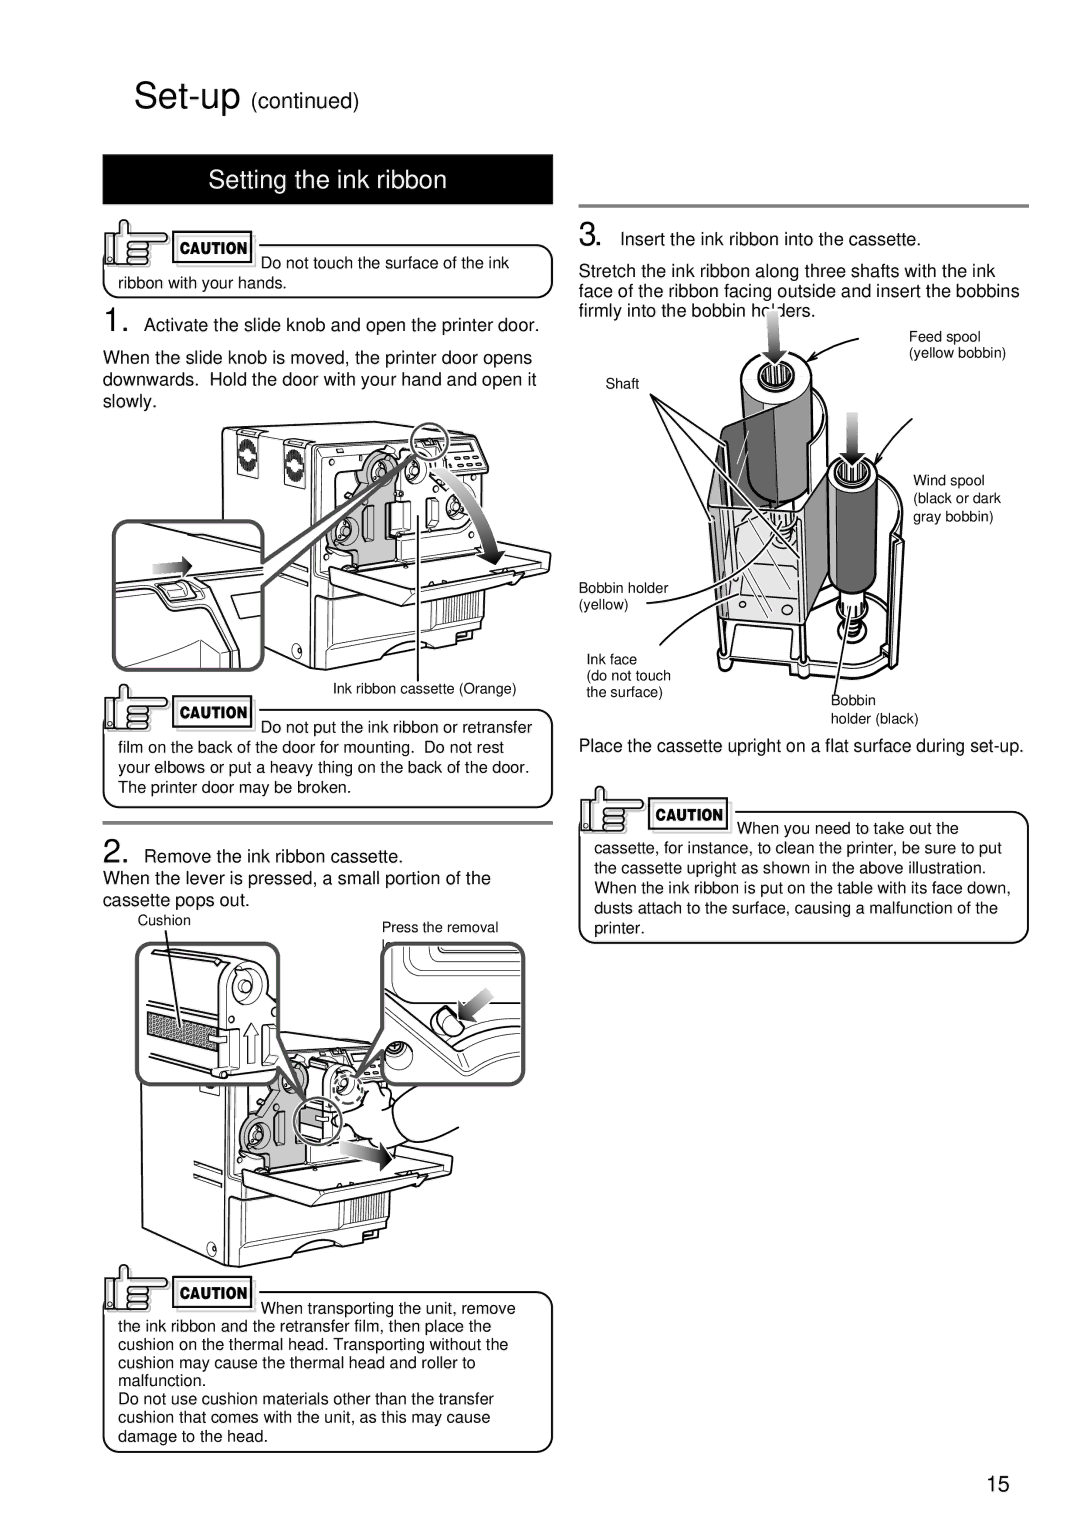
3. Insert the ink ribbon into the cassette.
Stretch the ink ribbon along three shafts with the ink face of the ribbon facing outside and insert the bobbins firmly into the bobbin holders.
When the slide knob is moved, the printer door opens downwards. Hold the door with your hand and open it slowly.
Ink ribbon cassette (Orange)
CAUTION
Do not put the ink ribbon or retransfer
Shaft
Bobbin holder (yellow)
Ink face (do not touch the surface)
Feed spool
(yellow bobbin)
Wind spool (black or dark
gray bobbin)
Bobbin
holder (black)
film on the back of the door for mounting. Do not rest your elbows or put a heavy thing on the back of the door. The printer door may be broken.
2. Remove the ink ribbon cassette.
When the lever is pressed, a small portion of the cassette pops out.
Cushion | Press the removal |
| |
| lever. |
CAUTION
![]() When transporting the unit, remove the ink ribbon and the retransfer film, then place the cushion on the thermal head. Transporting without the
When transporting the unit, remove the ink ribbon and the retransfer film, then place the cushion on the thermal head. Transporting without the
cushion may cause the thermal head and roller to malfunction.
Do not use cushion materials other than the transfer cushion that comes with the unit, as this may cause damage to the head.
Place the cassette upright on a flat surface during set-up.
CAUTION
![]() When you need to take out the cassette, for instance, to clean the printer, be sure to put the cassette upright as shown in the above illustration.
When you need to take out the cassette, for instance, to clean the printer, be sure to put the cassette upright as shown in the above illustration.
When the ink ribbon is put on the table with its face down, dusts attach to the surface, causing a malfunction of the printer.
15