VSD220 Smart Display Features
No. | Components | Descriptions |
6 | Earphone Jack | Connect to earphone or headset. |
|
|
|
7 | Micro USB Port | Connect to windows computer for data transferring. |
|
| (Need MTP driver) |
8 | Touch Screen | Touch the screen to control the |
|
| including menu items, applications, buttons, keyboard |
|
| and so on. |
9 | - Used for taking a front picture just the same as a self- | |
| Camera | portrait. |
|
| - Used for making video calls with supportive web |
|
| applications, such as Google talk. |
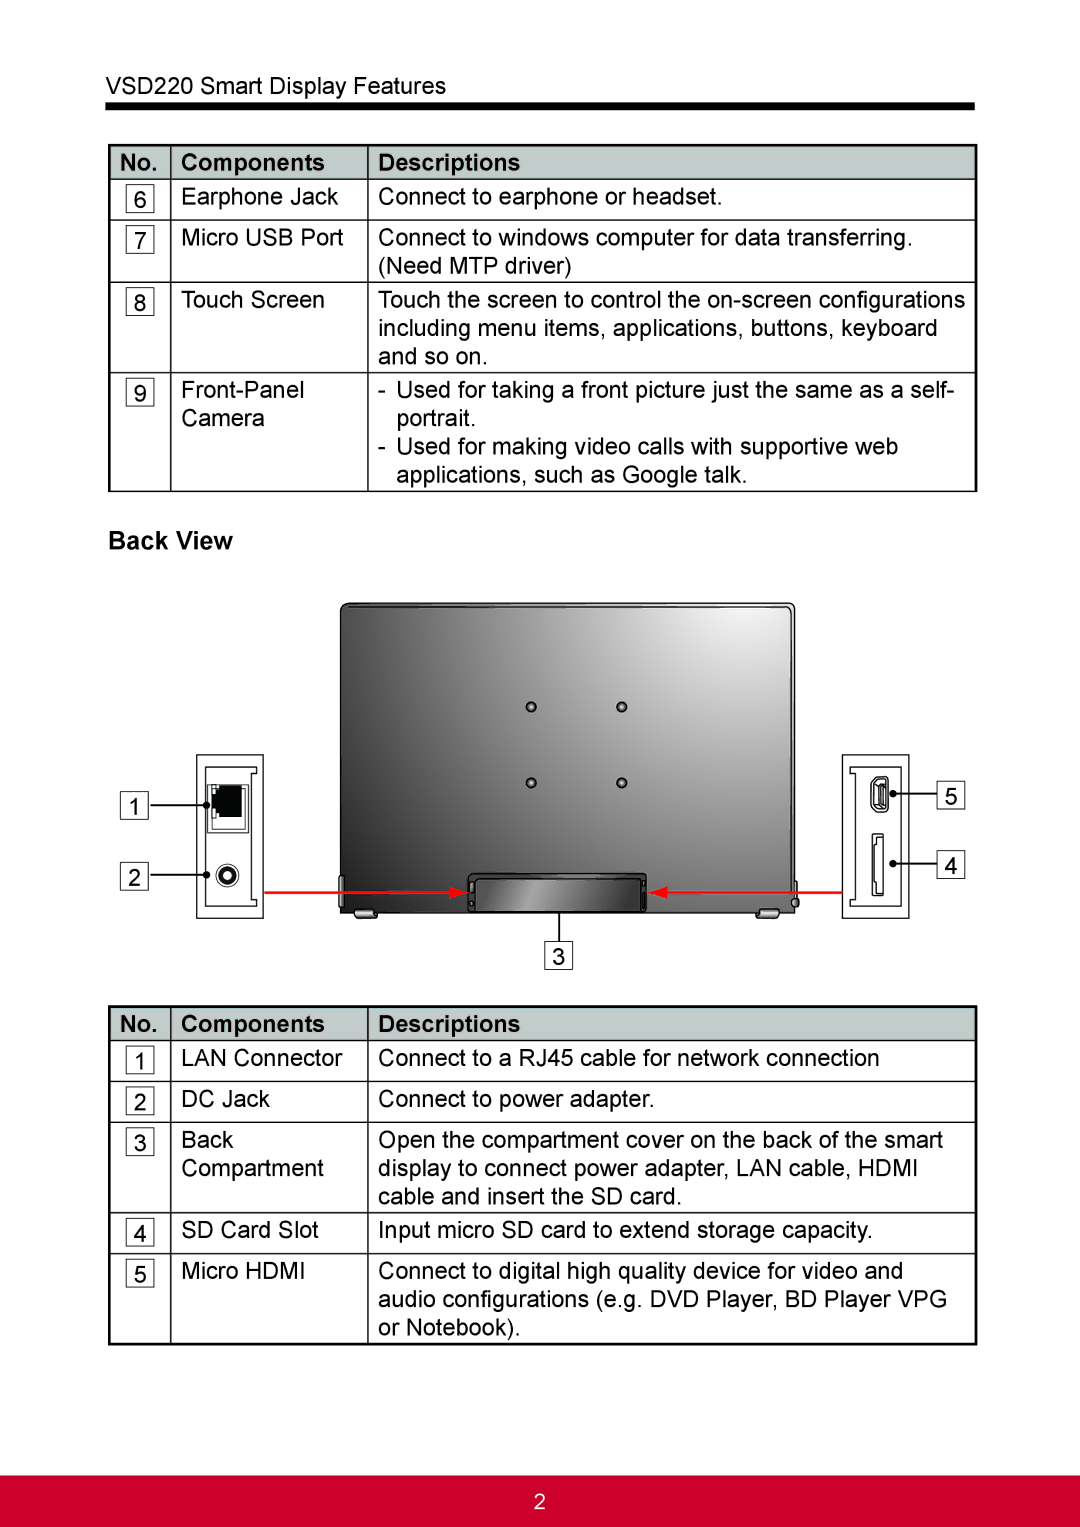
Back View
1
2
5
4
3
No. | Components | Descriptions |
1 | LAN Connector | Connect to a RJ45 cable for network connection |
|
|
|
2 | DC Jack | Connect to power adapter. |
|
|
|
3 | Back | Open the compartment cover on the back of the smart |
| Compartment | display to connect power adapter, LAN cable, HDMI |
|
| cable and insert the SD card. |
4 | SD Card Slot | Input micro SD card to extend storage capacity. |
|
|
|
5 | Micro HDMI | Connect to digital high quality device for video and |
|
| audio configurations (e.g. DVD Player, BD Player VPG |
|
| or Notebook). |
2
