Using Color Corrections
To select the color correction in a supported driver:
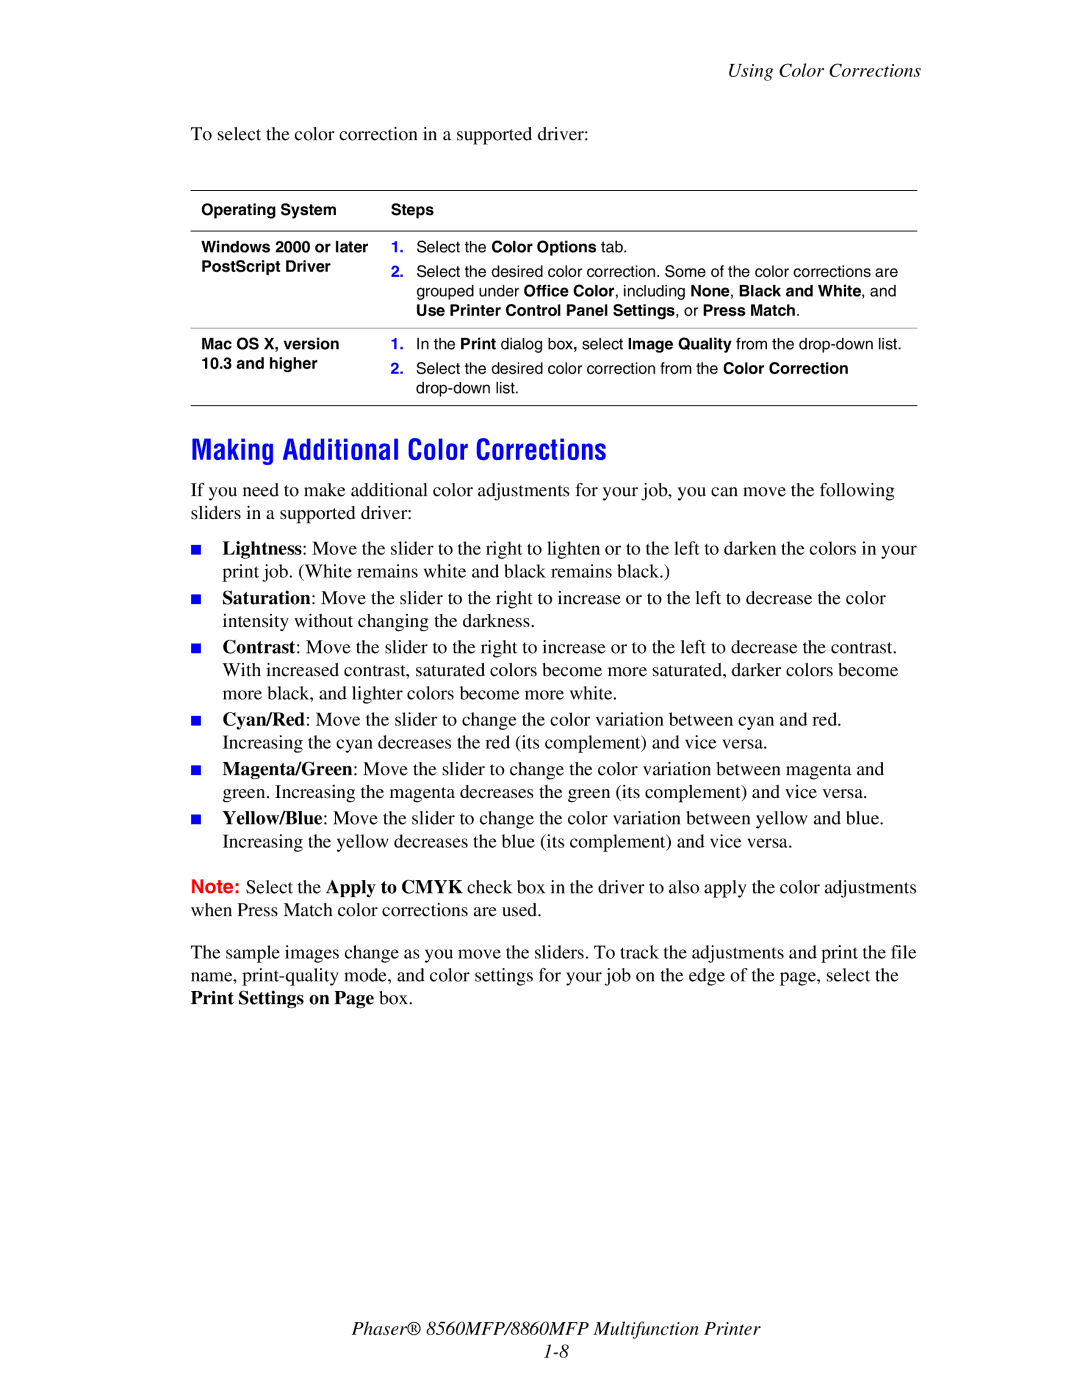
Operating System | Steps |
Windows 2000 or later PostScript Driver
1.Select the Color Options tab.
2.Select the desired color correction. Some of the color corrections are grouped under Office Color, including None, Black and White, and Use Printer Control Panel Settings, or Press Match.
Mac OS X, version | 1. | In the Print dialog box, select Image Quality from the |
10.3 and higher | 2. | Select the desired color correction from the Color Correction |
|
Making Additional Color Corrections
If you need to make additional color adjustments for your job, you can move the following sliders in a supported driver:
■Lightness: Move the slider to the right to lighten or to the left to darken the colors in your print job. (White remains white and black remains black.)
■Saturation: Move the slider to the right to increase or to the left to decrease the color intensity without changing the darkness.
■Contrast: Move the slider to the right to increase or to the left to decrease the contrast. With increased contrast, saturated colors become more saturated, darker colors become more black, and lighter colors become more white.
■Cyan/Red: Move the slider to change the color variation between cyan and red. Increasing the cyan decreases the red (its complement) and vice versa.
■Magenta/Green: Move the slider to change the color variation between magenta and green. Increasing the magenta decreases the green (its complement) and vice versa.
■Yellow/Blue: Move the slider to change the color variation between yellow and blue. Increasing the yellow decreases the blue (its complement) and vice versa.
Note: Select the Apply to CMYK check box in the driver to also apply the color adjustments when Press Match color corrections are used.
The sample images change as you move the sliders. To track the adjustments and print the file name,
Phaser® 8560MFP/8860MFP Multifunction Printer