■Installation procedures (continued)
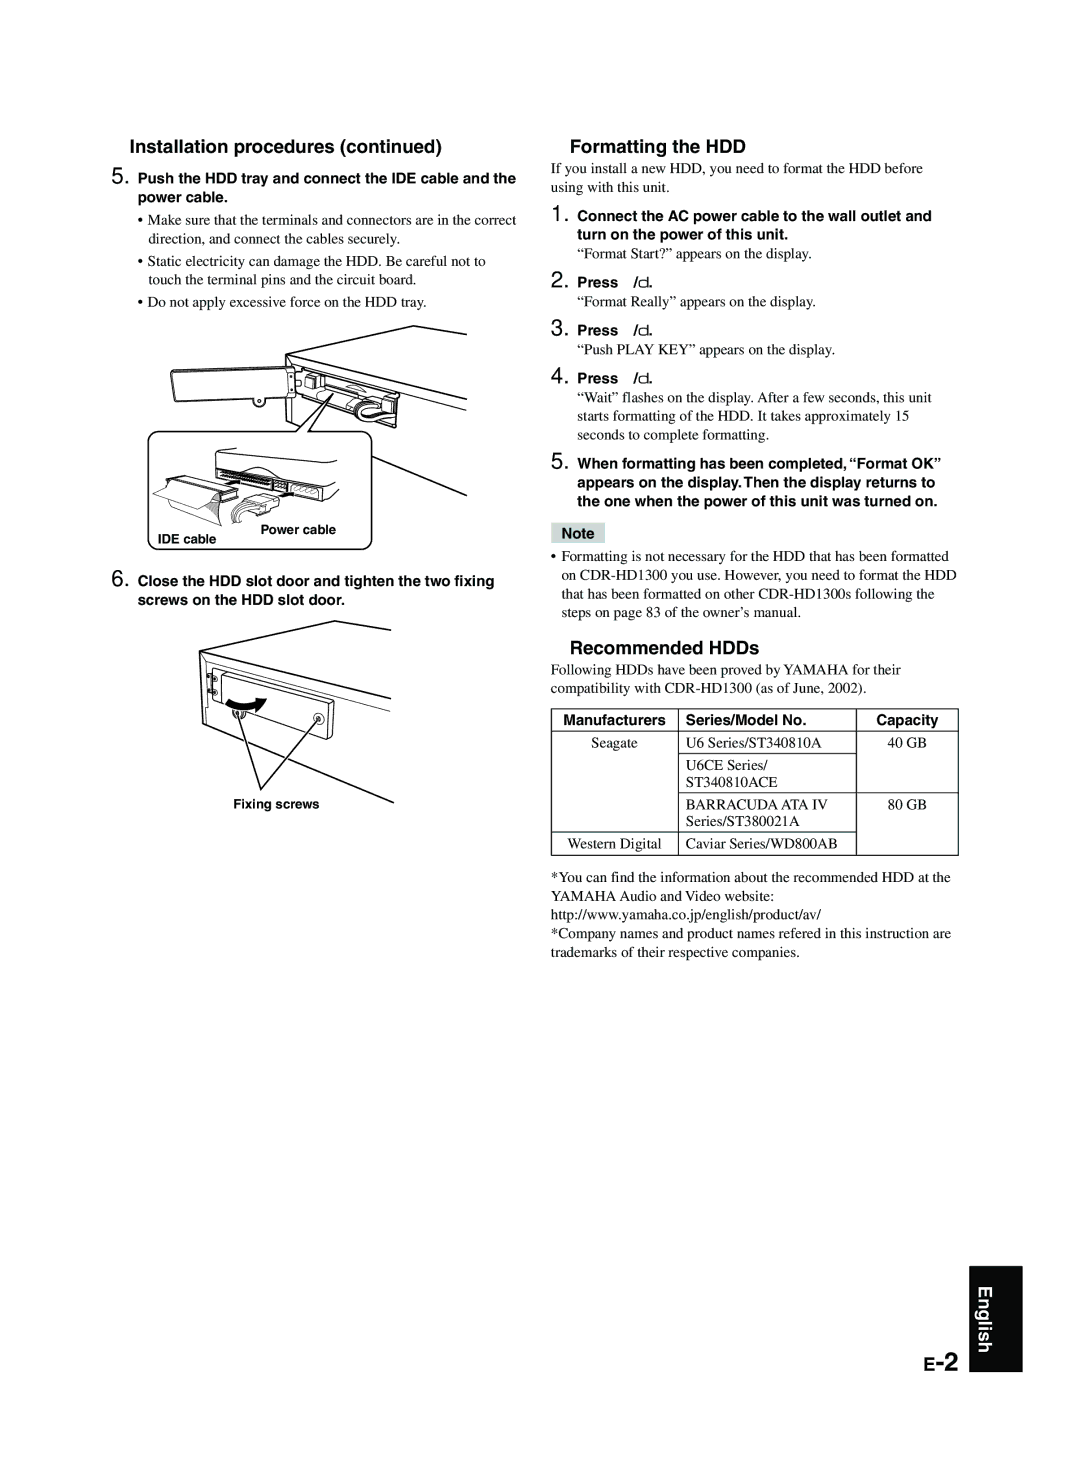
5. Push the HDD tray and connect the IDE cable and the power cable.
•Make sure that the terminals and connectors are in the correct direction, and connect the cables securely.
•Static electricity can damage the HDD. Be careful not to touch the terminal pins and the circuit board.
•Do not apply excessive force on the HDD tray.
Power cable
IDE cable
6. Close the HDD slot door and tighten the two fixing screws on the HDD slot door.
Fixing screws
■Formatting the HDD
If you install a new HDD, you need to format the HDD before using with this unit.
1. Connect the AC power cable to the wall outlet and turn on the power of this unit.
“Format Start?” appears on the display.
2. Press w/d.
“Format Really” appears on the display.
3. Press w/d.
“Push PLAY KEY” appears on the display.
4. Press w/d.
“Wait” flashes on the display. After a few seconds, this unit starts formatting of the HDD. It takes approximately 15 seconds to complete formatting.
5. When formatting has been completed, “Format OK” appears on the display. Then the display returns to the one when the power of this unit was turned on.
Note
•Formatting is not necessary for the HDD that has been formatted on
■Recommended HDDs
Following HDDs have been proved by YAMAHA for their compatibility with
Manufacturers | Series/Model No. | Capacity |
Seagate | U6 Series/ST340810A | 40 GB |
| U6CE Series/ |
|
| ST340810ACE |
|
| BARRACUDA ATA IV | 80 GB |
| Series/ST380021A |
|
Western Digital | Caviar Series/WD800AB |
|
|
|
|
*You can find the information about the recommended HDD at the YAMAHA Audio and Video website: http://www.yamaha.co.jp/english/product/av/
*Company names and product names refered in this instruction are trademarks of their respective companies.
English