RECORDING FROM AN EXTERNAL COMPONENT ONTO A
You can record from an external component directly to a
Note
•Before starting to record, check the remaining time available for recording on the
4 JKL 5 MNO 6 PQR
|
|
|
|
|
|
|
|
|
|
| 1 |
|
|
| 1 | 1 |
|
|
| 4 |
| 4 |
|
NATURAL SOUND HDD/CD RECORDER |
|
|
|
|
| MULTI JOG |
| 9 | |||
|
|
|
|
|
| PUSH ENTER |
| ||||
|
|
|
|
| TEXT/TIME |
| MODE |
| MENU | ||
POWER |
|
|
|
|
|
|
|
|
|
|
|
|
|
|
|
| TRACK NO. | COMPLETE |
| CLEAR |
| ||
|
|
|
|
| BOOKMARK |
|
|
|
|
| |
|
|
|
|
|
|
|
| DIGITAL REC LEVEL |
|
| |
| HDD | CDR | COPY |
|
|
|
|
|
|
|
|
PHONES | LEVEL |
|
|
|
|
|
| INPUT | ANALOG REC LEVEL |
| |
|
|
|
| REC | FINALIZE | ERASE | OPTICAL |
|
|
| |
|
|
| A.M.Q.R. |
|
|
|
| COAXIAL |
|
|
|
|
|
|
|
|
|
|
| ANALOG |
|
|
|
MIN | MAX |
|
|
|
|
|
|
| MIN | MAX |
|
|
|
|
| 2 9 |
|
| 6 3 | 8 |
| ||
| OPEN/CLOSE |
|
|
| 7 STU | 8 VWX | 9 YZ | ||
|
|
|
|
|
|
| |||
|
|
|
|
|
|
| 0 | +10 |
|
|
|
|
|
|
| 2 | SPACE | SYMBOL | BOOKMARK |
COPY | TIMER REC |
| REC |
|
|
| |||
A.M.Q.R. | FINALIZE | ERASE | REPEAT | RANDOM | INTRO | ||||
|
|
|
| ||||||
TEXT/TIME | INPUT | TRACK NO. |
|
|
|
| |||
WRITE |
|
| GROUP SKIP |
| |||||
|
|
|
|
|
| 3 |
|
| |
MODE |
|
| MENU |
|
|
| |||
COMPLETE |
|
|
|
| 4 |
|
|
| |
|
|
|
|
|
| 4 | HDD |
| CDR |
CLEAR |
|
| ENTER |
|
|
| |||
1 | ABC | 2 | DEF | 3 | GHI | 4 |
|
|
|
4 | JKL | 5 | MNO | 6 | PQR |
|
|
|
|
7 | STU | 8 | VWX | 9 | YZ |
|
|
|
|
| 0 |
| +10 |
|
|
|
|
|
|
SPACE | SYMBOL | BOOKMARK |
|
|
|
| |||
REPEAT | RANDOM | NTRO |
|
|
|
| |||
6
6
8
COPYING AND
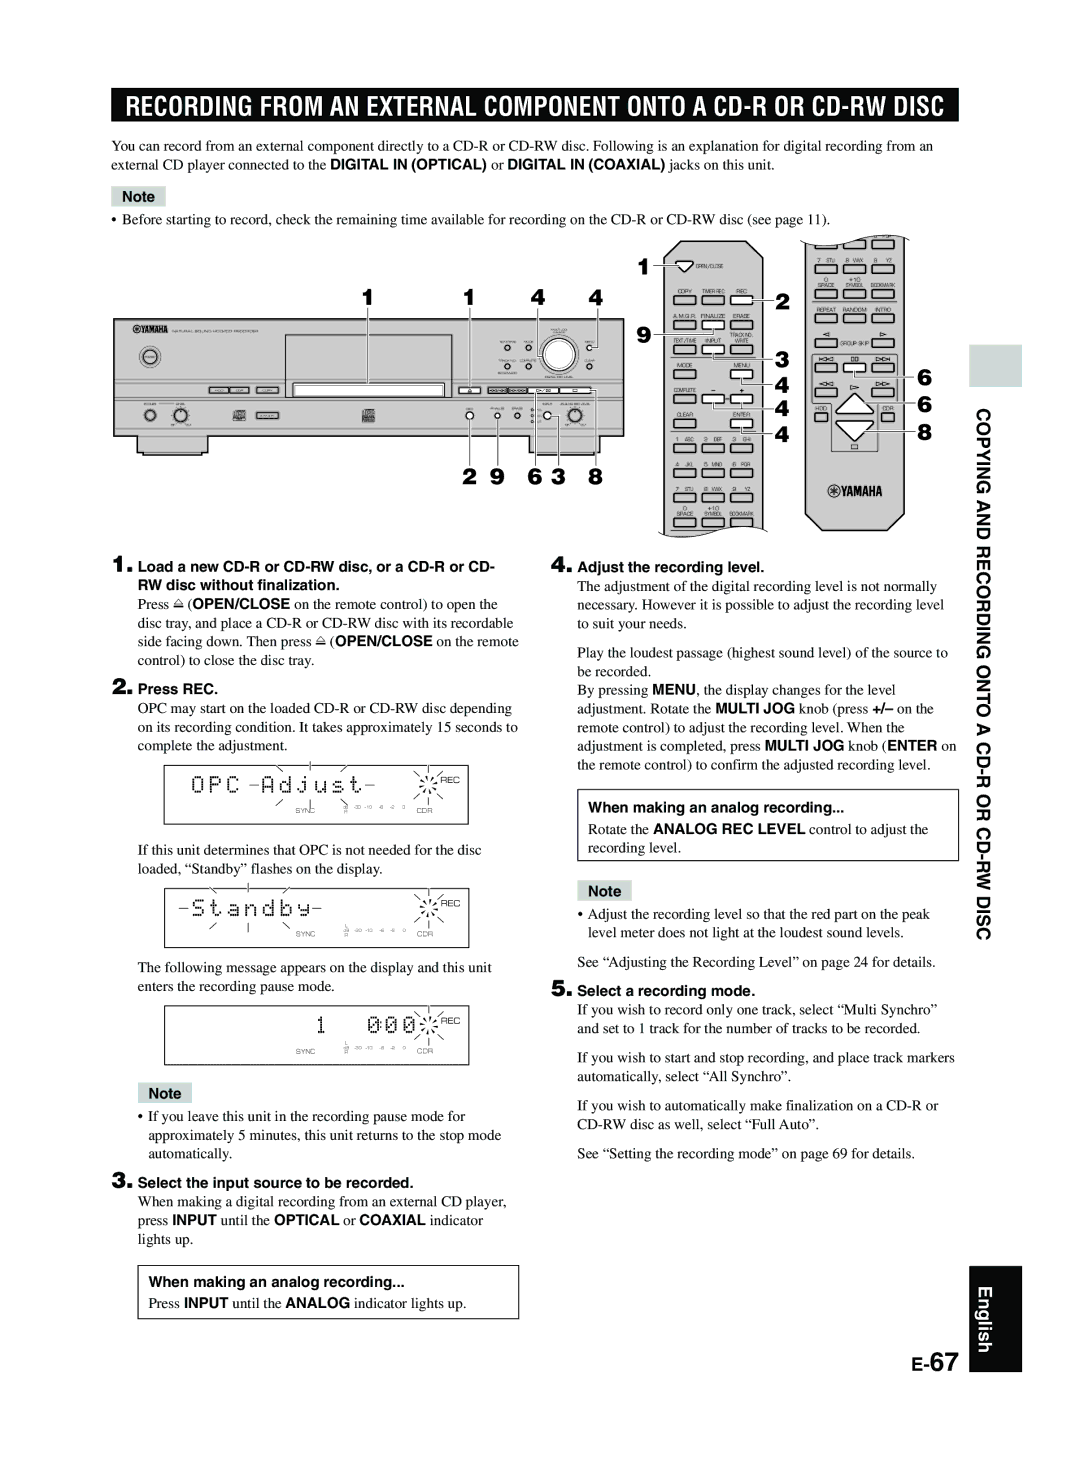
1. Load a new
Press v (OPEN/CLOSE on the remote control) to open the disc tray, and place a
2. Press REC.
OPC may start on the loaded
O P C A d j u s t |
| REC | |
| L |
|
|
SYNC | dB | 0 | CDR |
R |
| ||
|
|
|
|
If this unit determines that OPC is not needed for the disc loaded, “Standby” flashes on the display.
S t a n d b y |
|
| REC |
| L |
|
|
SYNC | dB | 0 | CDR |
R |
| ||
|
|
|
|
The following message appears on the display and this unit enters the recording pause mode.
1 0 0 0 

 REC
REC
L
SYNC | dB | 0 | CDR |
R |
|
Note
•If you leave this unit in the recording pause mode for approximately 5 minutes, this unit returns to the stop mode automatically.
3.Select the input source to be recorded.
When making a digital recording from an external CD player, press INPUT until the OPTICAL or COAXIAL indicator lights up.
When making an analog recording...
Press INPUT until the ANALOG indicator lights up.
4. Adjust the recording level.
The adjustment of the digital recording level is not normally necessary. However it is possible to adjust the recording level to suit your needs.
Play the loudest passage (highest sound level) of the source to be recorded.
By pressing MENU, the display changes for the level adjustment. Rotate the MULTI JOG knob (press +/– on the remote control) to adjust the recording level. When the adjustment is completed, press MULTI JOG knob (ENTER on the remote control) to confirm the adjusted recording level.
When making an analog recording...
Rotate the ANALOG REC LEVEL control to adjust the recording level.
Note
•Adjust the recording level so that the red part on the peak level meter does not light at the loudest sound levels.
See “Adjusting the Recording Level” on page 24 for details.
5. Select a recording mode.
If you wish to record only one track, select “Multi Synchro” and set to 1 track for the number of tracks to be recorded.
If you wish to start and stop recording, and place track markers automatically, select “All Synchro”.
If you wish to automatically make finalization on a
See “Setting the recording mode” on page 69 for details.
RECORDING ONT O A CD-R
OR CD -R
W DISC
English