| RECORDING FROM AN EXTERNAL COMPONENT ONTO THE HDD | |
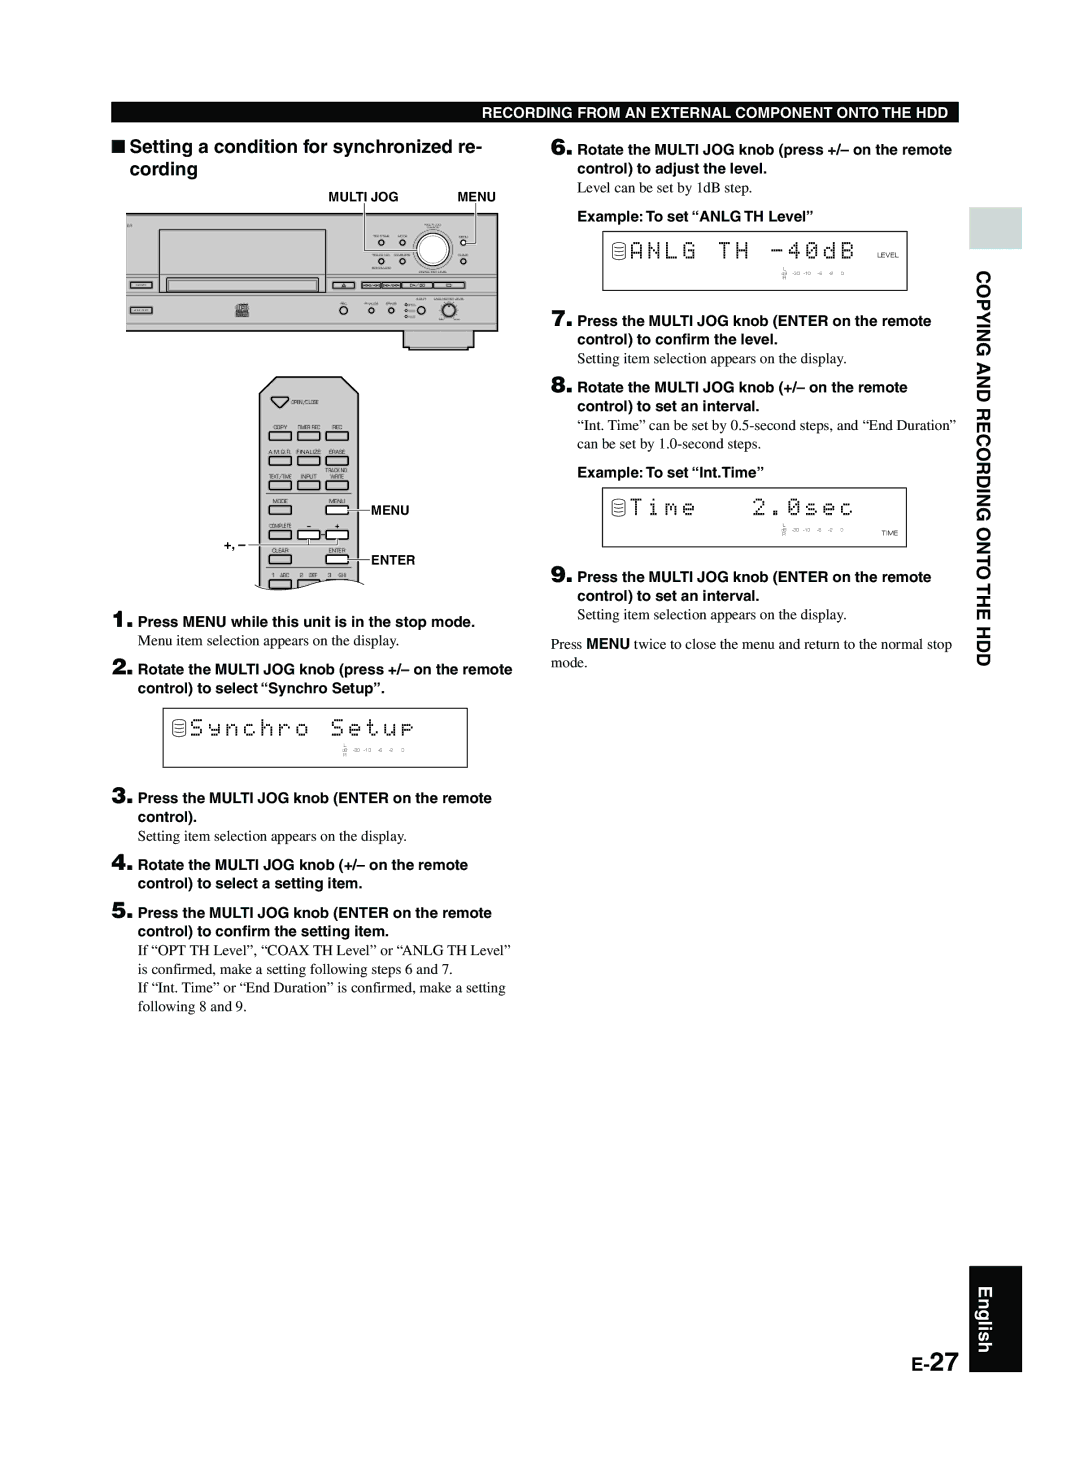
■ Setting a condition for synchronized re- | 6. Rotate the MULTI JOG knob (press +/– on the remote | |
cording |
| control) to adjust the level. |
MULTI JOG | MENU | Level can be set by 1dB step. |
| ||
ER | MULTI JOG |
PUSH ENTER |
TEXT/TIME | MODE | MENU |
TRACK NO. | COMPLETE | CLEAR |
BOOKMARK |
|
|
|
| DIGITAL REC LEVEL |
COPY |
|
|
|
|
| INPUT | ANALOG REC LEVEL | |
REC | FINALIZE | ERASE | OPTICAL |
|
|
A.M.Q.R. |
|
| COAXIAL |
|
|
|
|
| ANALOG |
|
|
|
|
|
| MIN | MAX |
OPEN/CLOSE |
| |
COPY | TIMER REC | REC |
A.M.Q.R. | FINALIZE | ERASE |
TEXT/TIME | INPUT | TRACK NO. |
WRITE | ||
MODEMENU
![]() MENU
MENU
COMPLETE
+, –
CLEARENTER
![]() ENTER
ENTER
1 ABC 2 DEF 3 GHI
1. Press MENU while this unit is in the stop mode. Menu item selection appears on the display.
2. Rotate the MULTI JOG knob (press +/– on the remote control) to select “Synchro Setup”.
Example: To set “ANLG TH Level”
 A N L G T H - 4 0 d B LEVEL
L
dB
R
7. Press the MULTI JOG knob (ENTER on the remote control) to confirm the level.
Setting item selection appears on the display.
8. Rotate the MULTI JOG knob (+/– on the remote control) to set an interval.
“Int. Time” can be set by
Example: To set “Int.Time”
T i m e | 2 . 0 s e c |
| |
| L |
|
|
| dB | 0 | TIME |
| R |
| |
|
|
|
|
9. Press the MULTI JOG knob (ENTER on the remote control) to set an interval.
Setting item selection appears on the display.
Press MENU twice to close the menu and return to the normal stop mode.
COPYING AND RECORDING ONT
O THE HDD
 S y n c h r o S e t u p
L
dB
R
3. Press the MULTI JOG knob (ENTER on the remote control).
Setting item selection appears on the display.
4. Rotate the MULTI JOG knob (+/– on the remote control) to select a setting item.
5. Press the MULTI JOG knob (ENTER on the remote control) to confirm the setting item.
If “OPT TH Level”, “COAX TH Level” or “ANLG TH Level” is confirmed, make a setting following steps 6 and 7.
If “Int. Time” or “End Duration” is confirmed, make a setting following 8 and 9.
English
